Refinishing an oak table can breathe new life into a beloved piece of furniture, restoring its beauty and extending its longevity. Oak tables, known for their durability and classic charm, are often passed down through generations or found in antique shops, making them worthy candidates for a revitalization project.
Whether you wish to refresh your dining table, rescue a thrift store find, or simply enjoy the satisfaction of do-it-yourself home improvement, learning how to refinish an oak table is a valuable skill.

This article will serve as your comprehensive guide, taking you through the step-by-step process of refinishing oak tables. From stripping the old finish and sanding the surface to applying a new stain and protective finish, you’ll gain the knowledge and confidence to transform your oak table into a stunning centerpiece that enhances your decor.
So, let’s embark on this DIY journey and unlock the potential of your oak table, bringing out its natural beauty and radiance once more.
The Value of Restoring and Reviving Furniture
Are you someone who loves all things vintage? Do you enjoy scouring flea markets and garage sales for hidden gems? If so, then you’re probably no stranger to the thrill of finding a beautiful piece of furniture with lots of potential. One such item that is often overlooked is an oak table. While it may be worn down and in need of some TLC, restoring and reviving an oak table can bring a new life and value to this timeless piece of furniture.
Oak tables have been around for centuries, known for their durability and strength. They were often used in homes and taverns, making them a staple in many cultures. While modern trends may favor sleeker designs, there is still something special about owning a piece of history like an oak table. Not only does it add character to any space, but it also holds sentimental value for those who appreciate the craftsmanship and history behind it.

One of the main benefits of restoring an oak table is its durability. Oak wood is known for its strength and resistance to wear and tear, making it a practical choice for furniture.
By refinishing the table, you are not only restoring its beauty but also ensuring that it will last for many years to come. This is especially important if you plan on passing down the table to future generations.
Another advantage of refinishing an oak table is the cost-effectiveness. Buying new furniture can be expensive, and often, the quality may not be as good as older pieces. By reviving an old oak table, you are essentially getting a high-quality piece of furniture at a fraction of the cost. Plus, by putting in some elbow grease and doing it yourself, you can save even more money.
10 Methods How to Refinish an Oak Table
1. Sanding
The first step in refinishing an oak table is to sand the surface. This will remove any existing paint or varnish, as well as any other imperfections on the wood. Start with a medium-grit sandpaper and work your way up to a finer grit for a smooth finish. Be sure to wear safety glasses and dust masks when sanding to protect yourself from flying debris.
2. Stripping
If you are refinishing an old oak table, you may need to strip off the existing finish before you can begin sanding. There are several different types of stripping agents available on the market, so be sure to read the instructions carefully before using one. Once you have stripped off the old finish, use a damp cloth to wipe away any residue before proceeding with sanding.

3. Cleaning
Once you have finished sanding and stripping, it is important to clean the surface of your table thoroughly before applying any new finishes. Use a vacuum cleaner and/or soft brush attachment to remove any dust or dirt that may still be present on the wood’s surface. You can also use a damp cloth or tack cloth to pick up any remaining debris.
4. Staining
Staining is an optional step in refinishing an oak table, but it can help bring out the natural beauty of the wood’s grain pattern and coloration. Choose a stain that matches your desired look and apply it evenly over the entire surface of your table using a brush or rag, following all manufacturer instructions for best results. Allow the stain to dry completely before proceeding with other steps in this process.
5. Sealing
Once your stain has dried completely, it is time to seal it in order to protect it from scratches and spills in future use of your furniture piece. There are several different types of sealers available on the market, so be sure to choose one that works best for your needs (e.g., water-based vs oil-based).
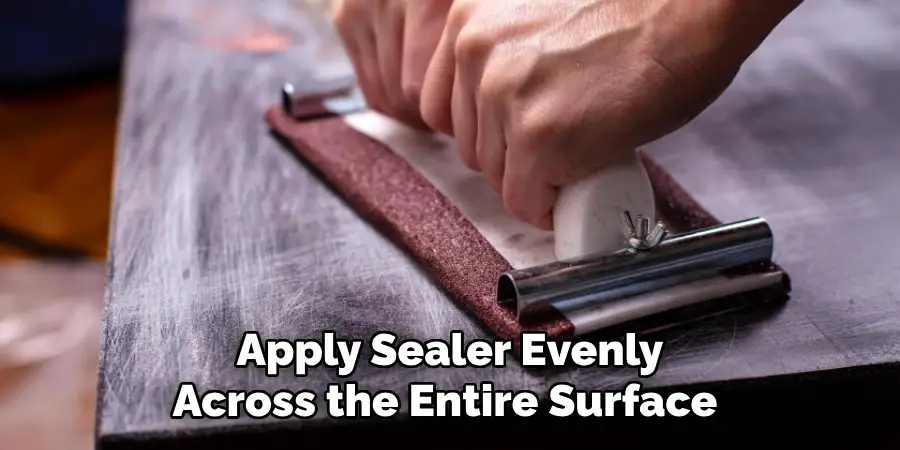
Apply sealer evenly across the entire surface using either a brush or rag, following all manufacturer instructions for best results, and allow the sealer to dry completely before proceeding with the next step in this process.

6. Applying Finish
Now that you have sealed in your stain, it is time to apply a clear finish such as polyurethane or lacquer over top of it for added protection against scratches and spills in the future use of your furniture piece(s). Again, there are several different types of finishes available on the market, so be sure to choose one that works best for your needs (e.g., water-based vs oil-based).
7. Waxing
An optional but recommended last step when refinishing an oak table is waxing its surface with either paste wax or liquid wax, depending on what type of look you prefer for your furniture piece(s). Paste wax tends to give more of an antique look, while liquid wax gives more of a glossy shine; both will help protect against scratches and spills in future use, however, so choose whichever type suits your needs best!
8. Buffering
Buffering is another optional but recommended last step when refinishing an oak table if you want its surfaces even shinier than what they were after applying wax! Use steel wool (grade 0000) lightly over areas where the wax was applied previously; do not press too hard, as this could cause damage instead, just lightly buff until the desired level of shine has been achieved!
9. Finishing Touches
After completing all the steps above successfully, finishing touches such as adding felt pads under legs/feet can help protect floors from scratches caused by moving furniture around; adding brass hardware can also give extra flair if desired! So try experimenting with these small details if you wish.
10. Enjoyment Time!
Last but not least, once all steps above have been completed successfully, now comes the time for enjoyment – sit back, relax & enjoy how beautiful & functional the newly refinished oak table looks & feels! Repeat the process every few years as needed to keep furniture pieces looking their best & lasting longer!
Things to Consider When Refinishing an Oak Table
Refinishing an oak table can be a great way to give new life to old, worn-out furniture. However, it’s important to take certain things into consideration before starting the refinishing process. Here are some key factors to keep in mind when refinishing an oak table.
1. Material Type and Condition
Before diving into the refinishing process, it’s important to consider the type and condition of the oak table. Different types of oak may require different methods or products for optimal results. Additionally, if the table is in poor condition with deep scratches or gouges, extra steps may be needed to properly repair and prepare the surface before refinishing.
2. Personal Safety
Refinishing an oak table can involve the use of harsh chemicals and tools, so it’s important to take proper safety precautions. Always wear protective gear such as gloves, goggles, and a mask to protect your skin, eyes, and lungs from potential hazards. Work in a well-ventilated area to avoid breathing in fumes from chemical products.

3. Time and Patience
Refinishing an oak table is not a quick process and requires patience and attention to detail. It’s important to set aside enough time for each step of the process, from sanding to staining and sealing. Rushing through the refinishing process can lead to subpar results.
Conclusion
Congratulations on deciding to update the look of your oak table and refurbish it to fit in with the modern decor of your home. Refinishing this type of wood can be a daunting task, but by following the steps outlined in this blog post, you can give your beautiful oak furniture a new life.
From sanding off the old finish to applying the fresh color stain and sealer, you have now completed an exciting home improvement project. Now that you know how to refinish an oak table, milk paint is just one of several options available to give your furniture a unique and stylish finished look.
Go forth and explore all of the possibilities; it’s time to create something beautiful! Enjoy your newly refinished piece of solid oak and may it bring smiles into your home for years to come.

