
Are you looking for a creative way to spruce up your holiday decor? Every year, ornaments take center stage in Christmas decorations – adding a special touch to trees and creating lasting memories for generations to come. But this year, it’s time to upgrade your decorations with vinyl! Adding vinyl accents will make any ornament more unique and adds an extra sparkle of custom flare.
Whether you’re gifting them as personalized presents, spicing up your own tree, or having fun with crafts around the family table – we’ll show you how this simple method adds holiday cheer quickly and easily!

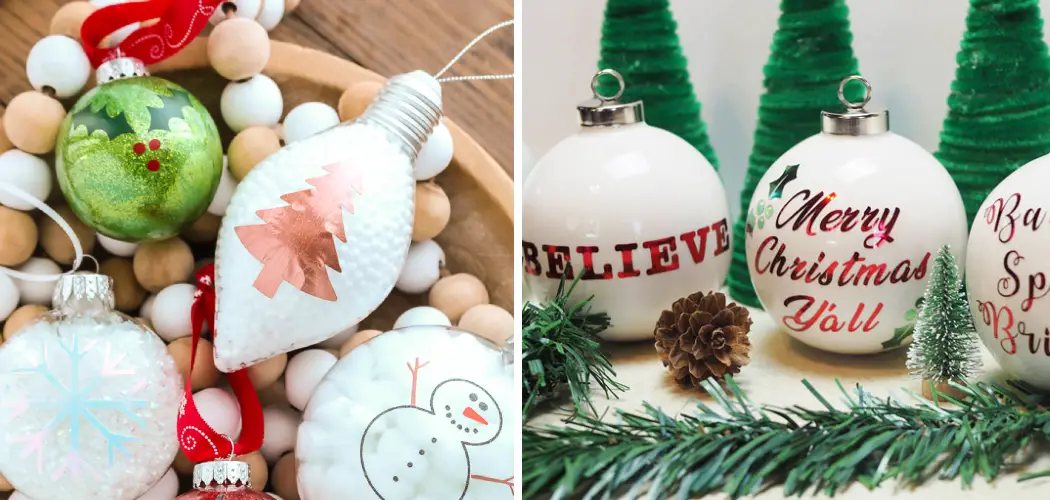
We’ll show you how easy it is (seriously!) to put Vinyl on Ornaments – whether you’re working with glass balls or porcelain figurines – so that your tree truly stands out from all the rest! Read on to learn how to put vinyl on ornaments.
What is Vinyl?
Vinyl is a type of plastic that’s often used to make signs, banners, and decals. It’s an incredibly versatile material – perfect for putting custom designs onto ornaments! Thanks to its long lasting durability and vibrant colors, it’s also one of the most popular materials for customizing just about any item.
Why Do You Need to Put Vinyl on Ornaments?
1. Add Style
Adding vinyl to your ornaments is a great way to add color, texture, and personality. Whether you want some extra sparkle on a glass ball or figurine or are looking for a way to customize store-bought decorations – putting vinyl on an ornament can be the perfect solution! It’s also an easy way to make special gifts for family and friends.
2. Make It Last
Vinyl is a great material for creating lasting memories. Whether ornaments are passed down, given away as presents, or kept on the tree year after year – adding vinyl to them ensures that the decorations will stay vibrant and beautiful for many years to come! With vinyl, you can add extra charm to any memory without worrying about potential fading or chipping.

Tools You Need
To get started, you’ll need the following supplies:
- Vinyl (choose your favorite colors!)
- An X-acto knife or scissors
- A cutting mat (optional)
- Transfer tape
- Cotton swabs and rubbing alcohol
- Ornament of your choice
How to Put Vinyl on Ornaments in 10 Easy Steps
Now that you know why vinyl is the perfect choice for adding some extra sparkle and color to your holiday decorations, it’s time to learn the basics of how to put vinyl on ornaments! All you need is a few simple tools and some patience. Here’s a step-by-step guide to help you get started:
Step 1: Cut the Vinyl
Cut the vinyl into desired shape/design (you can use scissors or an X-acto knife). While cutting, make sure to use a cutting mat (if you have one) – this will prevent damaging your work surface.
Step 2: Peel the Backing
Once you’ve cut out your design, carefully peel off the backing from the vinyl and discard it. Be careful not to tear or crease the vinyl in this step. Peeling off the backing will reveal the adhesive side of the vinyl.

Step 3: Apply Transfer Tape
Take a piece of transfer tape and place it over your cut-out design, pressing lightly on all sides until it’s firmly attached. The transfer tape will help you apply your designs with accuracy and precision.
Step 4: Clean the Ornament
Before you apply the design, make sure to clean your ornament with rubbing alcohol and a cotton swab. This will ensure that the vinyl adheres properly – allowing for a longer-lasting finish.
Step 5: Position Vinyl on the Ornament
Now it’s time to start the application! Peel off half of the transfer tape and place the vinyl design on your ornament. Position it in the desired spot, then carefully press down until it is firmly secured.
Step 6: Peel Off the Transfer Tape
Carefully peel off the rest of the transfer tape – this should leave just the vinyl design securely attached to your ornament. If you’re using a glass ball, make sure you’re gentle to avoid damaging the surface.
Step 7: Smooth Out Air Pockets
If you notice any air pockets or wrinkles, use a cotton swab dipped in rubbing alcohol to smooth them out. This will ensure that your design stays securely attached and looks crisp and vibrant!
Step 8: Add Any Additional Accents
If desired, you can add extra accents to your design by attaching smaller pieces of vinyl. For example, if you’re making a Christmas tree ornament, you could use additional vinyl to make stars or snowflakes.

Step 9: Place on Display
Once your design is complete, it’s time to show it off! Place your ornament on the tree or in a bowl of evergreen branches – and you’re done! Playing around with different shapes and colors can help you create unique holiday decorations that are sure to be a hit.
Step 10: Enjoy!
Sit back and admire your handiwork. You’ve just created a beautiful, custom ornament – perfect for decorating the tree or gifting as presents! With vinyl, it’s easy to make something special and unique – for yourself or someone else.
We hope you find this guide helpful! Now that you know how to put vinyl on ornaments, get creative and show off your holiday spirit with some custom decorations.
8 Common Mistakes to Avoid when Putting Vinyl on Ornaments
Putting vinyl on ornaments is a great way to customize and personalize your decorations. However, it can be tricky and time-consuming if you don’t know what you’re doing. Here are eight common mistakes that people make when putting vinyl on ornaments so that you can avoid them:
- Not Cleaning the Ornament and Vinyl Properly. Before applying vinyl to an ornament, make sure both surfaces are completely clean and free of dirt or debris. This will help ensure a better adhesion and longer-lasting design.
- Choosing the Wrong Transfer Tape. When applying vinyl to an ornament, you should always use transfer tape that is specifically designed for vinyl. This will ensure that the design won’t peel off in the future.
- Not Applying Pressure when Removing Transfer Tape. Once you’ve applied your design to an ornament, it is important to press firmly on the transfer tape after removing it from the ornament so that all of the pieces of vinyl adhere properly.
- Not Understanding How Vinyl Works with Different Surfaces. Some surfaces, such as glass or plastic, may require a different type of vinyl than other materials. Be sure to do your research before applying vinyl to an ornament to ensure that you’re using the right kind for the job.
- Not Applying Enough Heat when Weeding Your Design. When weeding or removing the excess vinyl from your design, it is important to use enough heat. If you don’t apply enough heat to the vinyl, it may not come off properly and can cause problems with adhesion later on.
- Not Applying Enough Pressure when Applying Vinyl. When applying your design to an ornament, make sure that you press firmly on the vinyl. If you don’t apply enough pressure, it may not adhere properly and could result in a poor-quality design.
- Not Using Enough Transfer Tape. When applying your design to an ornament, make sure that you use enough transfer tape so that all of the pieces stay in place and adhere properly. Otherwise, your design may end up being crooked or misaligned.
- Not Testing the Vinyl Before Applying it to an Ornament. Before applying your design to an ornament, make sure that you test the vinyl on a piece of scrap material first so that you can make sure it will adhere properly and look good when applied. This will help ensure a successful project!

By following these tips on how to put vinyl on ornaments, you can ensure that your vinyl ornaments turn out perfectly every time! With a little practice and patience, putting vinyl on ornaments is a fun and rewarding activity. So go ahead and give it a try – you won’t regret it!
4 Tips for Preventing Vinyl from Peeling Off Ornaments
When applying vinyl to an ornament, you want to make sure it adheres properly so that it doesn’t start peeling off in the future. Here are some tips that you should follow to make sure your vinyl stays on your ornament:
- Make sure your ornament is clean before applying any vinyl. Dirt and oil can prevent the vinyl from sticking properly. Clearing the surface first with rubbing alcohol or a mild soap and water solution will help ensure that your vinyl adheres properly to the ornament.
- Make sure the vinyl you’re using is meant for use on ornaments. Certain types of vinyl won’t stick well to certain types of surfaces, like plastic or glass, so it’s important to read the label and choose one that is specifically designed for your intended application.
- Cut your vinyl into smaller pieces if necessary. If an ornament has intricate details or curves, it can be difficult to cover the entire surface with one large piece of vinyl. It’s better to cut the vinyl into smaller pieces and apply those individually so that it follows the ornament’s shape more closely.
- Take your time when applying the vinyl. You want to make sure you press down firmly on each section of vinyl as you go, making sure that there aren’t any air bubbles trapped underneath.

Conclusion
Overall, applying vinyl to ornaments is a great way to add some DIY-style flair to any Christmas tree. Not only is it simple and easy enough for novices to do, but you can also create unique and personalized decorations that are sure to stand out. If you’re looking for something new this holiday season, experimenting with vinyl on Christmas ornaments is the perfect way to do so!
Taking a few simple steps in the right order – preparing the item, cutting the vinyl decal, weeding the excess vinyl material, and finally laying down the decal – will have your home smelling like pine needles and filled with custom-made ornamentation in no time.
Have fun crafting your very own unique decorations that will stand out among store-bought items! Following the steps on how to put vinyl on ornaments mentioned above and avoiding the mistakes listed in this article will ensure that you have a successful and enjoyable experience with vinyl ornaments.