
Putting on plastic snaps without the use of pliers may seem like a daunting task, but with the right technique, it can be easily accomplished. Plastic snaps are a popular choice for securing fabric layers together, whether in clothing, accessories, or crafts. While pliers specifically designed for snaps provide a convenient and efficient method, not everyone may have access to them.

In this article, we will guide you through the process of how to put on plastic snaps without pliers. We’ll explore alternative methods using household tools, such as a hammer or a mallet, along with a few simple tricks to ensure a secure and professional-looking snap installation.
Get ready to discover the versatility of plastic snaps and learn how to apply them effectively without the need for specialized pliers.
The Concept of Using Plastic Snaps for Fastening
Plastic snaps, also known as press studs or poppers, are a great way to secure two pieces of fabric together. They are easy to use and don’t require the use of special tools like pliers or snap sets. Many people have used plastic snaps for fastening garments such as jackets, skirts, dresses and bags for years. They can also be used to repair small rips or tears in fabric.
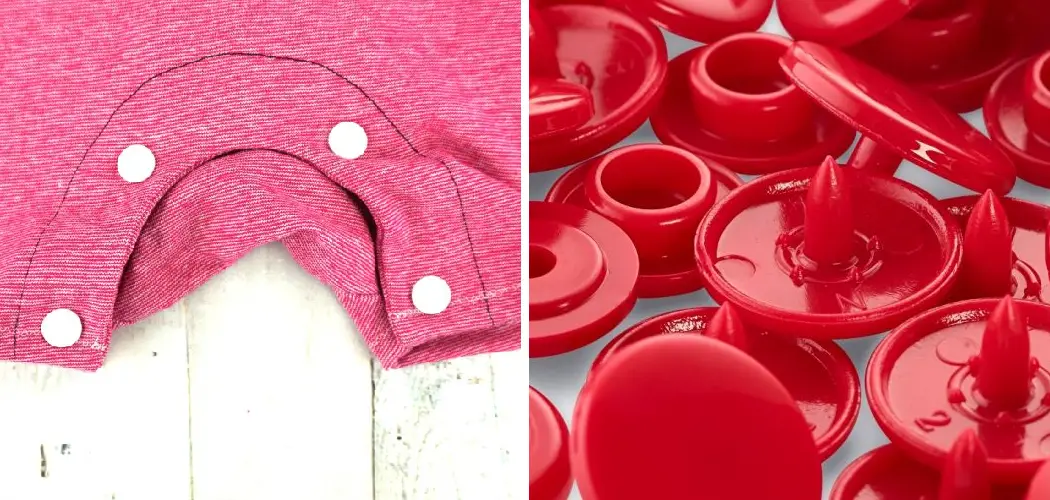
The two main components of a plastic snap are the cap and socket. The cap is the visible part of the snap that attaches to one piece of fabric, while the socket attaches to the other piece of fabric. To secure them together, you simply press down on the cap until it snaps into place.
There are many types of plastic snaps available for purchase, from colorful ones with patterns to fasteners made out of strong metal alloys. Most though are made out of durable plastic that won’t corrode over time. Whatever kind you choose, make sure it is compatible with your project and will hold up against frequent use.
When you are using plastic snaps, the most important factor is to ensure that they are securely fastened. Make sure that the cap and socket pieces fit together properly and that you press down firmly on the cap until it snaps into place. This will ensure that your garment or item stays secure while in use.

The Versatility and Convenience of Plastic Snaps
Plastic snaps are a versatile and convenient way to fasten fabric, such as clothing, linens, quilts, toys, or bags. Unlike buttons or zippers that require threading and manual labor, plastic snaps can easily be attached with just a few simple steps.
In addition to being a durable closure option for hemming and cuffs on clothing items like jeans, jackets, and skirts; they also provide an easy-to-use closure for diaper covers or bibs.
The application of plastic snaps without the use of pliers is especially helpful when needing to quickly attach them in tight spaces or areas where access is limited. Additionally, plastic snaps come in a variety of colors and designs that easily coordinate with the fabric or material.
With just a few simple steps, anyone can learn how to put on plastic snaps without pliers for an easy and secure closure option.
While there are various methods available for applying plastic snaps without pliers, one popular way involves using a hammer and two pieces of scrap wood. The first step is to place the snap onto the scrap wood, making sure it is centered; then fit the other piece of wood securely over the snap so that it is sandwiched between both pieces of wood.
10 Methods How to Put on Plastic Snaps without Pliers
Method 1: Using a Hammer and an Anvil
Place the snap components on a sturdy surface with the socket or female part facing up. Position the stud or male part over it. Cover the snap with a scrap piece of fabric or a soft cloth.

Hold the snap firmly in place and strike the stud with a hammer or mallet. Repeat the process on the opposite side of the fabric, ensuring the snap components align correctly. This method relies on the force of the hammer to secure the snaps in place.
Method 2: Using a Mallet and a Hard Surface
Similar to the hammer method, place the snap components on a hard surface, but instead of using a hammer, use a rubber or wooden mallet. Strike the stud with the mallet, applying enough force to secure the snap components together.
Be careful not to strike too forcefully, as it may damage the snaps or the fabric. Test the snap’s hold by gently tugging on both sides to ensure a secure connection.
Method 3: Using Pliers with Flat Jaws
If you have pliers with flat jaws but not specifically designed for snaps, you can still use them to attach plastic snaps. Position the snap components as desired, with the socket or female part facing up.
Hold the pliers with the flat jaws parallel to the snap, and squeeze firmly and evenly to press the stud onto the socket. Repeat the process on the opposite side. Take care not to apply excessive pressure, as it may cause the pliers to slip or damage the snaps.
Method 4: Using a Vise
If you have access to a vise, you can use it to apply plastic snaps. Open the vise and position the snap components inside, with the socket or female part facing up. Close the vise to apply pressure evenly, securing the snap components together. Check the alignment and ensure a tight connection.
Adjust the vise’s pressure as needed, being cautious not to overtighten and damage the snaps or the fabric.
Method 5: Using a Rubber Mallet and a Dapping Block
For a more controlled and precise application, place the snap components on a dapping block or a similar hard surface. Position the socket or female part facing up. Place the stud or male part on top, aligning them correctly. Hold the snap in place and strike the stud gently with a rubber mallet. The dapping block helps evenly distribute the force, ensuring a secure snap attachment.

Method 6: Using Hand Pressure and Friction
If you have strong hands, you can use manual pressure and friction to secure plastic snaps. Position the snap components with the socket or female part facing up. Place the stud or male part on top, aligning them correctly.
Hold the snap firmly between your thumb and fingers, and apply steady pressure while rubbing the snap in a circular motion. This method creates friction and heat, helping the plastic soften and form a secure connection.
Method 7: Using a Bone Folder or a Spoon
If you don’t have access to specialized tools, a bone folder or a spoon can be used as alternatives. Place the snap components on a sturdy surface with the socket or female part facing up. Position the stud or male part over it.
Hold the snap firmly in place and press the stud onto the socket using the edge of the bone folder or the back of the spoon. Apply even pressure and make sure the snap components align correctly.
Method 8: Using a C-Clamp
If you have a C-clamp, you can use it to attach plastic snaps. Place the snap components with the socket or female part facing up. Position the stud or male part over it. Insert the bottom of the C-clamp through the socket, and the top of the C-clamp over the stud.
Tighten the C-clamp slowly and evenly until the snap components are securely connected. Check the alignment and adjust the clamp’s pressure if needed.
Method 9: Using Heat and a Flat Surface
In some cases, heat can be used to attach plastic snaps. Place the snap components on a heat-resistant flat surface, with the socket or female part facing up. Position the stud or male part on top.
Use a heat source, such as a clothes iron set to a low heat setting or a heat gun on a low setting, and apply gentle heat to the snap components for a few seconds. Press the snap components together firmly while they are still warm to ensure a secure bond.

Method 10: Using Adhesive
As a temporary or non-permanent solution, adhesive can be used to attach plastic snaps. Apply a small amount of fabric or craft adhesive to the back of the snap components. Press the socket and stud firmly onto the fabric, aligning them correctly.
Allow the adhesive to dry according to the manufacturer’s instructions. Keep in mind that this method may not provide the same level of durability as other methods and may not withstand frequent use or washing.
Conclusion
Learning how to put on plastic snaps without pliers can be a great time saving skill and can open up a range of creative possibilities when planning craft projects. With the right supplies and technique, anyone can find success in mastering this simple task.
Even if pliers are always used for the final closure – just remember knowing how to do it by hand means one less tool is needed for many craft projects. The basic steps have been outlined in this blog post – practice and patience makes perfect! And the best part? Putting on plastic snaps without pliers affords you more freedom when creating your projects.