
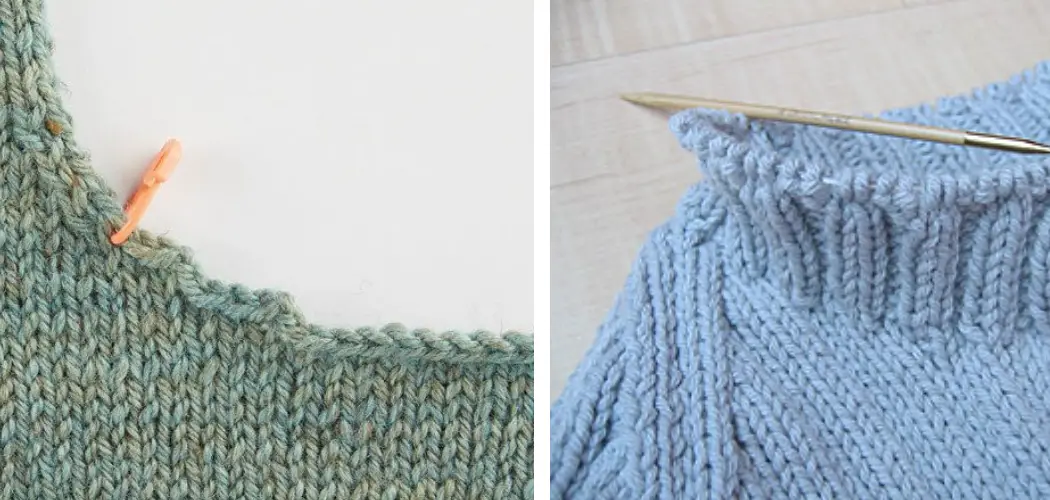
Are you looking to add a finishing touch that will give your project a polished look? Maybe you’re in need of a quick way to cover up mistakes or hide unappealing seams. If so, then picking up stitches for collars may be just what your project needs!

Knitting can be a great way to express your creativity and add unique details to any piece of clothing or accessory. Adding a collar is one of the easiest ways to spruce up an old hat, dress, shirt or jacket – but what exactly do you need to know to make and attach that perfect collar? The answer lies in understanding how to pick up stitches.
In this blog post, we’ll guide you through all the basics on how to pick up stitches for a collar so you can enjoy creating detailed garments with ease!
What Will You Need?
To pick up stitches for a collar, you will need the following items:
- Yarn of your chosen color
- A pair of knitting needles
- A crochet hook
- A tapestry needle (for weaving in ends)
- Scissors
Once you have all the items listed above, you’re ready to begin!
10 Easy Steps on How to Pick Up Stitches for a Collar
Step 1. Decide the Number of Stitch
Before you begin, decide how many stitches you’ll need to pick up. The number of stitches will depend on the size of your project – it should match the width of the collar opening so that it fits nicely around the neckline. Be careful not to pick up too many stitches, or your collar will be bulky.
Step 2. Prepare Your Yarn
Next, prepare your yarn by cutting a long enough length for the number of stitches you will pick up, plus an inch or two extra. Don’t forget to leave a bit of extra yarn for weaving in the ends. Because this is a collar, you may want to use worsted weight or thicker yarn for added support.
Step 3. Begin Picking Up Stitches
Using the crochet hook, insert it into the edge of the fabric where you want to begin picking up stitches and pull out a loop. Then, transfer this loop onto one of your knitting needles by inserting it through the loop from front to back and pulling it tight, so it won’t come off until you are ready to knit with it. This process is how you create each stitch.

Step 4. Count Your Stitches
As you continue to pick up stitches, it’s important to count how many you’ve created so far and keep track of how many more you need to make. This will ensure that the number of stitches stays consistent with your project size. Ensure that you don’t pick up too many stitches, as it can make the collar bulky. Additionally, ensure that each stitch is even and tight so your collar looks neat.
Step 5. Bind Off
Once all the stitches have been picked up and counted, it’s time to bind them off by knitting them together until only one stitch is left on the needle.
Cut your yarn, leaving a tail long enough for weaving in ends later, then pull it through the last remaining loop on the knitting needle before securing it tightly into place. You can now move on to the next step. But be careful not to pull the yarn too tight, or it might cause your fabric to bunch.
Step 6. Weave in Ends
Now that your stitches are secured using a tapestry needle to weave in any loose ends. This will help keep the collar neat and tidy while preventing it from coming undone. Remember to weave in both ends of the yarn. It is important to take your time and do this step carefully, as any loose ends can easily unravel.
Step 7. Join the Seams
Your next step is to join the seams of your collar by knitting them together using the mattress stitch technique. This technique involves aligning both pieces of knit fabric right sides up and then inserting a tapestry needle through both layers simultaneously, back and forth across each row until you reach where you began.

Once all seams have been joined, secure them with a few knots before weaving in any remaining ends with your tapestry needle.
Step 8. Place Your Collar
Now that all the seams have been joined, it’s time to place your collar onto the garment’s neckline. This can be done by simply laying the collar on top of the neckline and tucking in any overlapping fabric. You can use pins or clips to hold the collar in place while you sew it in.
Step 9. Sew Your Collar
Once you’ve placed your collar onto the garment, it’s time to sew it in place. To do this, thread a tapestry needle with matching yarn or thread and then stitch around the edges of your collar using a whip stitch technique – make sure to keep your stitches nice and tight so that they don’t come undone easily!
Step 10. Finish Up
And there you have it – you are now ready to wear your beautiful new collar! Before you do, don’t forget to weave in any remaining loose ends with a tapestry needle and snip off any excess yarn. It is now time to show off your new look! Be sure to take a few pictures to share your hard work with friends and family.
Picking up stitches for a collar may seem intimidating, but with these easy steps, it doesn’t have to be! Just remember to take your time and double-check how many stitches you’ve created before binding them off. With patience and practice, picking up stitches will become second nature! Good luck!
5 Additional Tips and Tricks
- Use a tapestry needle that is the same size as your knitting needles. This will ensure that the stitches won’t be too tight or too loose when you pick them up.
- If you’re having difficulty picking up all of the stitches, use a stitch marker to mark how many stitches you need to pick up and how many rows they will be on.
- Always pick up your collar stitches with the right side facing outwards.
- To ensure that your picked-up collar edge is consistent and even, count how many stitches per inch you pick up as you go along.
- Increase or decrease the number of stitches in each row depending on how wide or narrow you want the collar to be. This will give you a more uniform look.

By following these tips, you can ensure that your collar looks neat and even!
5 Things You Should Avoid
- Don’t use a large needle to pick up the stitches. The bigger the needle, the more likely it is that you will end up with uneven stitch size and tension.
- Don’t pull too tightly when gathering stitches from the collar edge. This will distort the collar shape and cause puckering in your knitting or crocheting.
- Don’t stretch out your work as you go along. This will cause your knitting to lose shape over time and create unsightly gaps between stitches.
- Don’t skip any of the steps for picking up stitches. This could result in an incomplete collar that won’t lie flat around your neckline or shoulders properly.
- Don’t forget to use stitch markers! This will help ensure that you pick up the correct number of stitches evenly around your collar edge and ensure a neat, professional finish.
Remember, when it comes to picking up stitches for a collar, it pays to take your time and be meticulous to create the perfect piece of work that you can be proud of!
How Do You Calculate How Many Stitches to Pick Up?
The number of stitches to pick up will depend on how wide you want your collar to be. If you’re using a pattern, it should tell you how many stitches to pick up for each row. If not, you can easily calculate how many stitches to pick up by measuring the width of the collar and then dividing that number by how many rows you are working on.
For example, if your collar is 6 inches wide and you are working on 10 rows, divide 6 by 10 to get 0.6, which means you need to pick up 6 stitches per row (or 60 total stitches).
Once you have determined how many stitches need to be picked up for each row, use a tapestry needle and yarn to pick them up evenly around the collar edge. Make sure that you don’t pull the yarn too tightly – this will distort the shape of your collar and cause puckering in your knitting or crocheting.

With a bit of practice, it will become easy, and you’ll be able to create beautiful collars easily!
Conclusion
Once you’ve picked up the stitches for your collar, it’s time to complete the project and enjoy your newly created garment. Whether this is the first item of clothing you’ve ever made or one of many, taking the time to learn how to pick up stitches for a collar can be incredibly rewarding.
You are now equipped with easy-to-follow instructions for a smooth edge and great results. Enjoy being able to put on something that you created from start to finish!
After all, creating clothing items is an invigorating activity – something special that only comes from handmade pieces. There’s something wonderful about doing projects by hand and learning new skills in the process. Don’t be afraid to have fun while picking up stitches so that your collar will turn out beautiful and unique.
Now it’s time to get creative and create something that expresses who you are!
You Can Check It Out to Embroider on Denim