
Do you want to make your own homemade votive candles that can look just as stunning (or even more so!) than their store-bought counterparts? Fortunately, candle-making doesn’t have to be expensive or difficult. With a few supplies and some basic knowledge, you can create gorgeous beauties that will add a touch of warmth and ambiance to any décor.

Here, we’ll show you how easy it is to make votive candles at home in no time! So get ready for a fun DIY project – the perfect activity for your next rainy or snow day – and let’s start crafting!
Whether you’re looking for something special as a gift for someone else or trying to create the perfect glowy atmosphere in your own living space, making homemade votives can be an easy, fun, and creative way to upgrade your decor!
With just a few simple ingredients and supplies, you too can make stunning candles that will look amazing on your bookshelf or coffee table. Read on for our step-by-step guide on how to make votive candles!
Why May You Want to Make Votive Candles?
1 . To Save Money
If you are an avid candle lover, making your own votive candles can help save a lot of money in the long run. Votive candles are small and require minimal materials to make, so it can be more cost-effective to make them yourself rather than buying them from stores.
2 . To Create Customized Candles
Making your own votive candles allows you to have complete control over the scent, color, and design of the candle. You can experiment with different fragrances and colors to create your own unique combination that suits your personal preferences.

3 . As a Fun DIY Project
Making votive candles can be a fun and creative DIY project that you can do alone or with friends and family. It is a great way to spend quality time together and can be a relaxing and satisfying activity.
4 . As a Personalized Gift
Votive candles make for thoughtful and personalized gifts. You can create custom scents, colors, and designs that cater to the recipient’s tastes and preferences. It adds a special touch knowing that the candle was handmade with love.
5 . To Avoid Harmful Chemicals
Some commercial candles may contain harmful chemicals that can be released into the air when burned. By making your own votive candles, you have control over the ingredients and can ensure that they are natural and safe for you and your loved ones.
6 . To Reduce Waste
By making your own votive candles, you can reduce waste by reusing old candle jars or containers. This is a great way to be more environmentally friendly and sustainable by repurposing items that would have otherwise been thrown away.
7 . As a Creative Outlet
Making votive candles can serve as a creative outlet, allowing you to express your individuality and artistic abilities. You can try different techniques such as layering colors, adding decorative elements, or experimenting with different types of wax to create unique and beautiful candles.

How to Make Votive Candles in 6 Easy Steps
Step 1: Gather All The Tools
The very first step is to gather all the necessary tools and materials you will need to make your votive candles. This includes wax, wicks, a double boiler or melting pot, a thermometer, dye or color chips (if desired), fragrance oil (if desired), and containers for the candles.
Step 2: Prepare the Wax
Melt the wax using a double boiler or melting pot, making sure to follow the manufacturer’s instructions. Use a thermometer to monitor the temperature of the wax and ensure it does not exceed its flash point.
Step 3: Add Color and Fragrance (Optional)
If you want to add color or fragrance to your votive candles, now is the time to do so. You can use dye or color chips specifically made for candle making, and fragrance oils that are safe for use in candles. Mix them into the melted wax using a wooden stick or spoon.
Step 4: Prepare the Containers
While waiting for the wax to cool down slightly, prepare your containers by placing a wick at the center of each one. You can use a dab of hot glue to secure the wicks in place, or use a wick sticker if your container has a flat bottom.
Step 5: Pour the Wax
Once the wax has cooled down to around 160-170 degrees Fahrenheit, carefully pour it into the prepared containers. Leave about half an inch of space at the top to prevent overflow when burning.

Step 6: Let it Cool and Trim the Wicks
Allow the candles to cool and solidify completely, which may take a few hours. Once cooled, trim the wicks to about ¼ inch in length before burning.
Some Additional Tips to Make Votive Candles
1 . Do Not Leave Candles Unattended
It is important to never leave a burning candle unattended. Always make sure to extinguish the flame when you leave the room or go to bed. Also make sure to keep candles away from flammable materials, such as curtains or paper. Safety should always be a top priority when working with any type of candle.
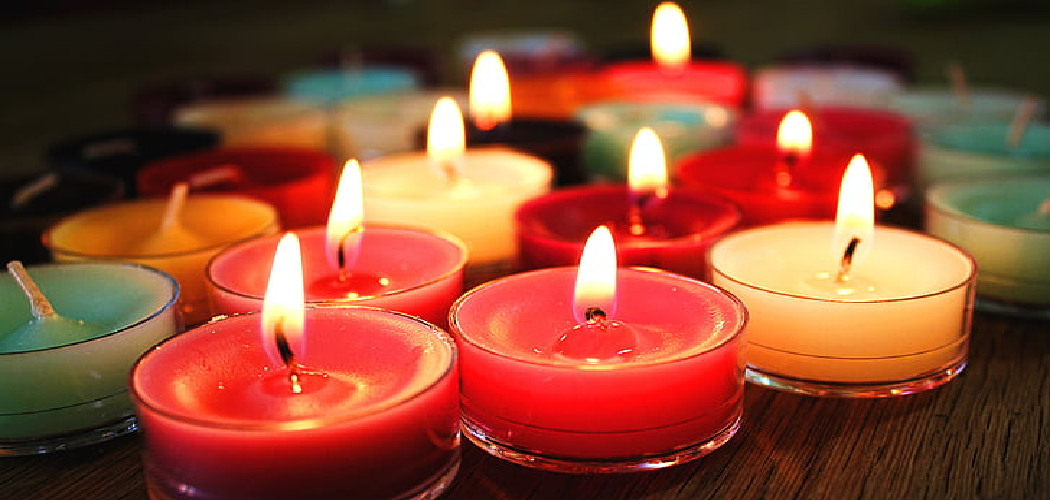
2 . Accentuate with Colors
One way to make your votive candles stand out is by using different colors. You can add color to your candles by using liquid dyes or even crayons. When adding color, keep in mind that it will be diluted once the wax is melted. So use brighter shades to achieve a more vibrant color.
3 . Experiment with Scents
Another way to make your votive candles unique is by adding scents. You can use essential oils, fragrance oils or even herbs and spices to add a pleasant aroma to your candles. Before adding any scent, make sure it is suitable for candles and follow the recommended usage amount to avoid overwhelming the fragrance.
4 . Personalize with Decorations
Votive candles are also great for personalization. You can decorate your candles with ribbons, beads, dried flowers or anything else that fits your style. This is a fun and creative way to add a personal touch to your candles. Just make sure to secure the decorations properly so they don’t fall off while the candle is burning.
5 . Practice Makes Perfect
Lastly, remember that making votive candles takes practice. Don’t be discouraged if your first few attempts don’t turn out perfect. Keep experimenting and trying different techniques until you find what works best for you.
With time and practice, you will become a pro at making beautiful votive candles. So don’t give up and keep creating! So, these were some additional tips to help you on your journey of learning how to make votive candles. Happy candle-making! # [To be added after translation]
6 . Share Your Creations
Once you have mastered the art of making votive candles, don’t forget to share your creations with others. You can gift them to friends and family or even sell them at local markets or online. Your unique and personalized candles are sure to be a hit. Plus, it’s a great way to spread the joy and relaxation that comes with burning homemade candles.

7 . Explore Different Techniques
As you continue to make votive candles, don’t be afraid to explore different techniques and styles. You can try using different types of wax, experimenting with different scents and colors, or even incorporating unique materials into your candle-making process. This will not only keep things interesting for you, but also allow you to create truly one-of-a-kind candles.
Frequently Asked Questions
What Precautions Should I Take When Making Votive Candles?
When making votive candles, there are a few precautions that you should keep in mind to ensure your safety and the quality of your candles: Always use protective gear – wear gloves, an apron, and eye protection when handling melted wax or hot containers.
Make sure to use a double boiler or a heat-resistant container when melting wax to avoid any accidents. Keep children and pets away from the candle-making area, as hot wax can cause serious burns. And always make sure to read and follow the instructions provided by your chosen candle-making method or kit.
How Long Does It Take to Make Votive Candles?
The time it takes to make votive candles depends on the method and materials you use. If you are using a pre-made votive candle kit, it can take anywhere from 30 minutes to an hour to complete the process. However, if you are making your own votive candles from scratch, it may take longer as you will need to melt and mix your wax, pour it into molds, and wait for them to set.
Can I Add Fragrance or Color to My Votive Candles?
Yes, you can add fragrance and color to your votive candles. However, it is important to use fragrances and dyes that are specifically made for candle making. Adding too much of either can affect the quality of your candles, so be sure to follow the recommended measurements provided by your chosen method or kit.

It is also important to note that certain fragrances and dyes may affect the burning time of your candles, so be sure to test a small batch first before making larger quantities.
How Do I Store My Votive Candles?
Once your votive candles have completely cooled and set, you can store them in a cool, dry place away from direct sunlight. If you have used fragrances, it is best to store your candles in airtight containers or bags to preserve the scent. It is also important to keep them away from any heat sources as this can cause them to melt or warp.
Conclusion
Now that you know the fundamentals of how to make votive candles, it is time to start experimenting and creating a unique signature on your candles. Don’t forget that safety precautions need to be observed when mastering this craft as hot wax can cause serious burns. Remember to have fun with the process and take your time as you learn the nuances of candle making.
Be sure to pay attention to different wicks, wax types, and scents so that no two candles ever have to look or smell alike. Along the way, express your creativity by adding embellishments such as charms or glitter for extra flare.
With practice and patience, plenty of artistic finesse can be unearthed with candle making! So what are you waiting for? Grab your supplies today and get ready make some wonderful votive candles – who knows, maybe one day they will find their way into people’s homes all across the country!