
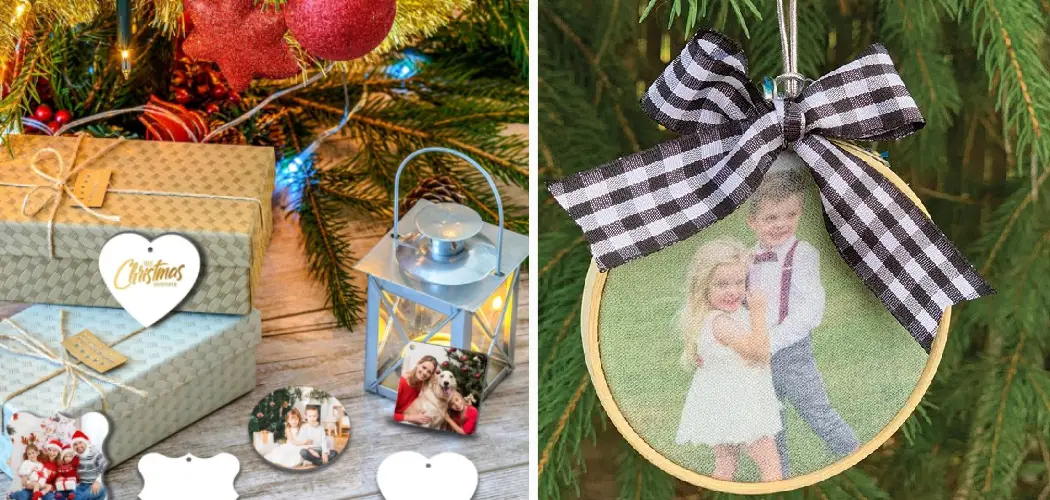
Are you looking for a creative way to bring individuality and personalized touch to your holiday decorations? Look no further than sublimation ornaments! Sublimation ornaments are unique, one-of-a-kind pieces that can be customized with family photos, names, monograms – you name it.
Don’t worry if you’ve never tried this craft before; we’ll walk through every step of the process in this blog post so that anyone can make their own custom sublimation ornaments.

In this blog post, we will go over everything you need to know about how to make sublimation ornaments – from start to finish – so you can create beautiful decorations for every season. Whether it’s Christmas decorations or something special just for yourself, doing it yourself with sublimation is sure to make your creations extra meaningful. Ready to get started? Let’s get crafting!
Why May You Want to Make Sublimation Ornaments?
1 . To Add a Personal Touch to Your Decorations
When it comes to decorating for the holidays or special occasions, many people want to create a warm and welcoming atmosphere. Making sublimation ornaments allows you to add a personal touch to your decorations. You can customize each ornament with different designs, pictures, and text that represent your family’s unique style.
2 . As a Thoughtful and Unique Gift Idea
Sublimation ornaments make for great gifts that are both thoughtful and unique. You can design an ornament to match a recipient’s interests, hobbies, or personality, making it a personalized gift they will treasure for years to come. Plus, these ornaments are budget-friendly, so you can make many of them without breaking the bank.

3 . To Start a New Family Tradition
Making sublimation ornaments is a fun and creative activity that the whole family can participate in. It can become an annual tradition where everyone gets to design their own ornament, creating cherished memories for years to come. You can even make themed ornaments each year, such as “family vacation” or “baby’s first Christmas,” adding to the sentimental value of the tradition.
4 . To Add to Your Product Line for Business Owners
For those who own a small business, making sublimation ornaments can be a great addition to your product line. You can offer custom-made ornaments as part of your services, which is especially popular during the holiday season. These unique and personalized gifts can attract more customers and help increase your profits.
How to Make Sublimation Ornaments in 6 Easy Steps
Step 1: Gather the Necessary Materials
Before you can start making your own sublimation ornaments, make sure you have all the necessary materials. This includes:
- Sublimation printer and ink
- Heat press or convection oven
- Sublimation transfer paper
- Blank ornaments (preferably made of ceramic, glass or metal)
- Protective gloves
Step 2: Design Your Ornament
The next step is to design your ornament using graphic design software such as Adobe Photoshop or Illustrator. Keep in mind that the final product will be a mirror image of your design, so make sure to flip it horizontally before printing.
Step 3: Print Your Design onto Sublimation Transfer Paper
Once you have finalized your design, print it onto sublimation transfer paper using your sublimation printer and ink. Make sure to follow the instructions given by the manufacturer for optimal printing results.

Step 4: Preheat Your Heat Press or Convection Oven
If you are using a heat press, preheat it to the recommended temperature according to the type of ornament you are using. If you are using a convection oven, preheat it to 400°F.
Step 5: Transfer Your Design onto the Ornament
Place your printed design face-down on the ornament and secure it with heat-resistant tape. If you are using a heat press, apply firm pressure for about 30-45 seconds. If you are using a convection oven, place the ornament inside for 5-7 minutes.
Step 6: Finishing Touches
Once the sublimation process is complete, remove the tape and peel off the transfer paper to reveal your beautiful sublimation ornament. You can also add any additional embellishments or personalization at this stage using paint markers or vinyl decals.
Now you have a unique and personalized sublimation ornament that can be used as a decoration or gift for any occasion. Experiment with different designs and types of ornaments to create an endless variety of beautiful creations.

Some Extra Tips to Make Sublimation Ornaments
1 . Choosing the Right Substrate
Sublimation ornaments are perfect for personalization and gift-giving, but getting the right substrate is important. The most common substrates used for sublimation ornaments include ceramic tiles, metal sheets, glass tiles, acrylic blanks, and wooden discs. Each of these materials produces different results and it’s crucial to experiment with them to find out which one works best for you.
2 . Preparing the Artwork
Before printing your artwork, make sure it is in CMYK format and follows the required resolution for sublimation printing (usually 300 dpi). Also, keep in mind that the final image will be mirrored when printed on transfer paper, so adjust your design accordingly. It’s a good idea to print a test copy on regular paper first to check for any errors before printing on the transfer paper.
3 . Heat Press Tips
When using a heat press, make sure to use proper pressure, temperature, and time settings. These can vary depending on the material you are using, so it’s important to do some research beforehand. Additionally, always protect your heat press with Teflon sheets to prevent any unwanted residue from transferring onto your ornaments.
4 . Preparing the Substrate
Before applying the transfer, wipe down the substrate with rubbing alcohol to remove any oils or dirt. This will ensure that the image transfers smoothly and produces vibrant colors. For some materials like ceramic tiles, it’s recommended to preheat them in the heat press for a few seconds to remove any moisture.
5 . Transferring the Image
Place your transfer paper face down on the substrate and use heat-resistant tape to secure it in place. Carefully place the substrate onto the heat press and apply the recommended settings. Once done, remove the transfer paper while it’s still hot. Be careful not to burn yourself and make sure the image has transferred completely before removing the paper.
6 . Adding Finishing Touches
Once your ornaments have cooled down, you can add additional touches to personalize them further. This could include adding ribbons, or glitter, or sealing them with a clear coat for added durability. Get creative and experiment with different techniques to make your sublimation ornaments stand out.
7 . Troubleshooting Tips
If you encounter any issues during the sublimation process, don’t be discouraged. Some common problems include ghosting, bleeding, or uneven transfer. These can often be fixed by adjusting your heat press settings or using a Teflon sheet to protect your ornaments from direct contact with the heat plate.

Frequently Asked Questions
What Precautions Should I Take When Making Sublimation Ornaments?
When creating sublimation ornaments, there are a few precautions you should keep in mind to ensure the best results. Use heat-resistant tape. This type of tape is specifically designed for high temperatures and will prevent your design from shifting during the sublimation process. It is also recommended to use a heat-resistant mat or pad to protect your work surface. Another important precaution is to avoid touching the sublimation paper after it has been printed. The oils from your fingers can transfer onto the paper and affect the quality of the final product. Make sure to handle the paper only by its edges or wear gloves while handling it.
What Type of Printer Do I Need for Sublimation?
To make sublimation ornaments, you will need a special type of printer called a dye-sublimation printer. These printers use heat to transfer dye onto various materials, such as ceramics, metals, and fabrics. They also require special sublimation ink cartridges and paper designed for sublimation printing. While these printers may be more expensive than traditional inkjet printers, they are necessary for achieving vibrant and long-lasting results with sublimation.
Can I Use Any Type of Material for Sublimation Ornaments?
The most common materials used for sublimation ornaments are ceramic or metal. These materials have a special coating on them that allows the dye to transfer onto their surface. However, you can also use other materials such as wood, acrylic, or even certain types of fabric with the appropriate coating. It is important to note that not all materials are suitable for sublimation and may result in poor-quality prints or damage to your printer.
Conclusion
Sublimation ornaments are a fun and creative way to add a personal touch to your holiday decorations or gifts. With the right materials, preparation, and techniques, you can create beautiful and vibrant ornaments that will impress anyone. Don’t be afraid to experiment and have fun with this unique form of printing.
Now you know how to make sublimation ornaments, so go ahead and start creating your personalized masterpieces! So go ahead and get started on making your own sublimation ornaments. Remember to always stay safe while using heat presses and other equipment, and to follow all manufacturer instructions carefully.