
Creating ribbon bracelets is a delightful and personalized way to adorn your wrists with a touch of charm. Whether you’re looking for a fun and fashionable DIY project or a thoughtful handmade gift, making ribbon bracelets provides a creative outlet for expressing your unique style. In this guide, we will explore how to make ribbon bracelets, suitable for crafters of all skill levels.

From selecting the right ribbons and color combinations to mastering various knotting and braiding techniques, this article offers a step-by-step tutorial to help you create stunning and custom accessories.
Whether you prefer a bohemian, chic, or playful aesthetic, the versatility of ribbon bracelets allows you to experiment with textures and styles, making each creation a reflection of your individual taste. Get ready to embark on a journey of creativity as we explore the wonderful world of making ribbon bracelets.
Personalization and Customization of Ribbon Bracelets
Ribbon bracelets have become increasingly popular in recent years, and for good reason. They are not only stylish and fashionable, but also incredibly versatile and easy to make. With a wide variety of colors, patterns, and materials available, ribbon bracelets can be customized to fit any personal style or occasion. In this section, we will explore how you can personalize and customize your own ribbon bracelets to make them unique to you.
Personalization is the process of adding a personal touch to an object, making it special and meaningful. One way to personalize your ribbon bracelet is by choosing a color or pattern that has a personal significance to you. For example, if pink is your favorite color, you can create a ribbon bracelet using different shades of pink to make it truly yours. You can also choose a pattern that is meaningful to you, such as stripes or polka dots.
Another way to personalize your ribbon bracelet is by adding charms or beads. Charms and beads are small decorative pieces that can be attached to the bracelet for added style and personalization. There are endless options when it comes to choosing charms and beads, from letters and symbols to animals and flowers. You can even choose charms that represent your interests or hobbies, making your bracelet truly unique to you.
10 Methods How to Make Ribbon Bracelets
1. Braiding Ribbon
Braiding ribbon is one of the most popular methods for making ribbon bracelets. To make a braided bracelet, you will need several strands of ribbon in different colors and a clasp or button to secure the ends. Start by tying a knot at one end of the ribbon and then braid the strands together until you reach your desired length. Secure the other end with a knot or clasp and you’re done!

2. Weaving Ribbon
Weaving is another technique that can be used to make beautiful ribbon bracelets. To weave ribbon, you will need two ribbons of different colors and some kind of closure such as a button or snap. Start by looping one ribbon around your wrist and securing it with the closure.
Then, take the second ribbon and weave it through the first, creating an intricate pattern as you go. When you reach your desired length, secure it with the closure and trim off any excess ribbon.
3. Knotting Ribbon
Knotting is a great way to create unique designs with ribbons for bracelets. To knot ribbons, start by cutting two pieces of equal length and tie them together in an overhand knot at one end. Then, begin looping each piece around itself in alternating directions until you reach your desired length. Finish off by tying another overhand knot at the other end to secure it in place!
4. Embellishing Ribbon
Embellishing is another fun way to add some flair to your bracelet design! You can use beads, charms, feathers, or any other decorations that strike your fancy! Simply attach them to the ends of each strand before braiding or weaving them together for an extra special touch!
5. Making Friendship Bracelets
Friendship bracelets are classic pieces that are perfect for sharing with friends! They’re easy to make using just a few simple knots and can be customized with different colors and patterns for added fun!

Start by cutting several strands of equal lengths and tie them all together at one end using an overhand knot. Then begin making half-hitch knots along each strand until you reach your desired length before finishing off with another overhand knot at the other end!
6. Sewing Ribbons Together
Sewing ribbons together is another method for creating unique designs with ribbons! You can use either hand-sewing or machine-sewing techniques depending on what type of look you’re going for; both work well for making bracelets out of ribbons!
For hand-sewing techniques, start by laying out two pieces of equal lengths side-by-side before stitching them together using small stitches along their edges; repeat this process until you have reached your desired length before finishing off with a few more stitches at either end to secure everything in place!
7. Wrapping Ribbons Around Cords
Wrapping ribbons around cords is another great way to make unique bracelet designs out of ribbon!
All you need is some cord (such as embroidery floss) and several strips of colorful ribbons cut into equal lengths; start by wrapping one strip around the cord tightly before adding additional strips on top in whatever pattern strikes your fancy before securing everything in place with a few knots at either end – voilà – instant bracelet design made from nothing but ribbons & cords!
8. Using Beads With Ribbons
Adding beads to your bracelet design gives it an extra sparkle that really stands out from others – plus, it’s super easy, too! All you need are some colorful beads (or charms) along with several strips of equal lengths cut from different colored ribbons; simply thread each bead onto its own strand before weaving/braiding/knotting/etc. them all together into whatever pattern/design strikes your fancy – voilà – instant sparkly bracelet made from nothing but beads & ribbons combined!

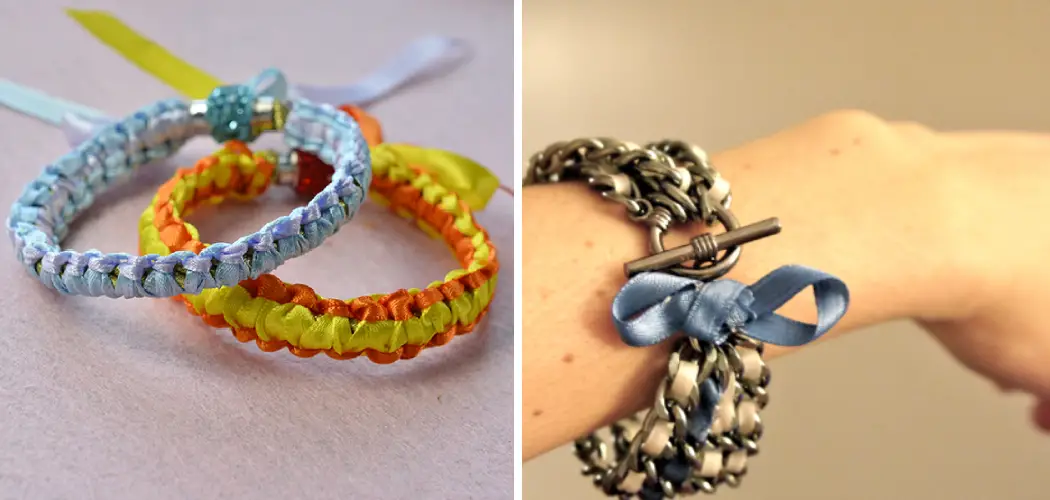
9. Making Bow Bracelets
Bow bracelets are perfect if you want something cute & girly – they’re also very easy to make – all you need are two pieces of equal lengths cut from different colored ribbons plus some kind of closure such as a snap button; start by folding each piece into thirds so that they form loops on either side – then thread them both onto the closure before pulling tight & securing everything in place – voilà – instant bow bracelet made with ribbons!
10. Using Fabric Glue
If you’re not great at knotting or braiding, using fabric glue can be a lifesaver when it comes to making ribbon bracelets! Simply lay out your desired design on a flat surface and use the glue to attach each strand together before setting them aside to dry completely – voilà – an instant bracelet made with ease! Just make sure to use a strong fabric glue that can withstand everyday wear and tear.
Things to Consider When Making Ribbon Bracelets
When making ribbon bracelets, there are a few things to keep in mind to ensure that your finished product turns out beautifully. Here are some key factors to consider:
- Choose the right materials: The first step in making any bracelet is choosing the right materials. When it comes to ribbon bracelets, you have a variety of options including different types of ribbons, clasps, and beads. Make sure to select materials that are of good quality and will complement each other.
- Pick the right width: The width of your ribbon can make a big difference in the overall look of your bracelet. Thinner ribbons create a more delicate and intricate design while wider ribbons give a bolder appearance. Consider the style you are going for and choose your ribbon width accordingly.
- Measure carefully: When cutting your ribbon, make sure to measure it accurately according to the length of your wrist. This will ensure that your bracelet fits comfortably and is not too loose or too tight.
- Use proper tools: To create a professional-looking ribbon bracelet, it is important to use the right tools. These may include pliers, scissors, and a ruler. Make sure to have these on hand before you start your project.
- Consider adding beads: Adding beads to your ribbon bracelet can elevate its overall look and add some sparkle. To avoid tangling or damaging the ribbon, make sure to use thin beading needles when threading beads onto the ribbon.

Conclusion
Now that you have all the necessary knowledge on how to make ribbon bracelets, it’s time for you to put your creative skills to the test. You can try out using different colors and combinations of ribbons and beads to create unique and stylish looking accessories. Not only will this be a fun and creative activity, but you’ll also end up with a stunning product that will make all your friends envious.
With the help of this guide, there is no doubt that you will be able to create one-of-a-kind pieces that won’t fail to grab attention. So why wait? Grab some ribbons, beads and clasps, and start making those beautiful bracelets today!
Expertise:
Crafting expert with a focus on innovative techniques and diverse materials.
Specialization:
- Textile arts (weaving, embroidery, and fabric dyeing)
- Woodworking and furniture design
- Mixed media and upcycling projects
Recognition:
- Featured in local art exhibits showcasing innovative craft projects
- Collaborated with community organizations to promote crafting workshops
- Received accolades for contributions to sustainable crafting initiatives
Mission:
- To inspire and empower crafters of all levels to discover their creative potential
- Encourages experimentation and self-expression through hands-on projects