
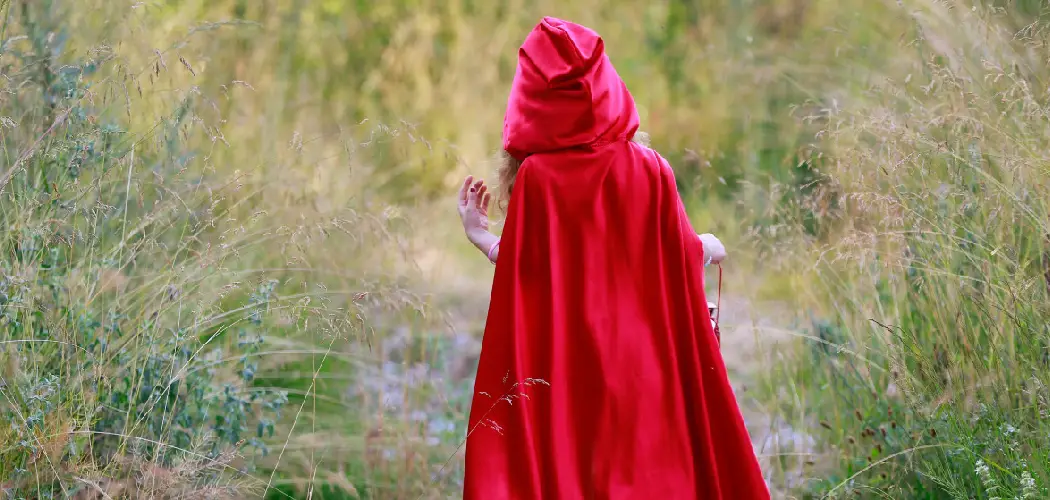
Are you looking for an easy, yet creative way to dress up this Halloween? Look no further than a classic Red Riding Hood costume! Not only is it simple and fun, but it’s also sure to catch everyone’s eye. Whether you’re planning on attending a socially-distanced gathering or just spending time with family, we’ve got all of the tools and tips that will help you craft the perfect Red Riding Hood look.
With some basic materials like fabric, ribbon, felt details and thread, plus our helpful step-by-step guide on how to make red riding hood costume below—you can transform into the legendary cute heroine in no time!

Needed Materials
- Red Fabric (Preferably Wool or Flannel)
- White Cotton Fabric
- Black Felt Fabric
- Sewing Machine (Hand-sewing is Also an Option)
- Scissors
- Pins
- Measuring Tape
- Red Ribbon (1 inch width)
- Buttons (Optional)
11 Step-by-Step Instructions on How to Make Red Riding Hood Costume
Step 1: Measure and Cut the Red Fabric
The length of your fabric should be double your desired dress length, plus 2 inches for seam allowance. The width should be twice the width of your waist, plus 2 inches for seam allowance. It’s better to have extra fabric than not enough. But if you’re unsure, don’t worry— you can always trim off extra later. You’ll also need a second strip of fabric that’s 3-4 inches wide to create the hood. It should be long enough to wrap around your head comfortably.
Step 2: Cut and Pin the White Cotton Fabric
Measure and cut a wide strip of white cotton fabric (3-4 inches). Fold it in half lengthwise to create a band. This will be used as a decorative trim for the bottom of the dress. This is optional, but it adds a nice contrast to the red fabric. If you’re not comfortable sewing, you can also buy pre-made ribbons in the same width. You’ll also need to cut out a white fabric square (4×4 inches) for the apron.

Step 3: Cut Out and Pin the Hood
To create the hood, you will need two pieces of red fabric—one for the outer layer and one for the lining. Trace and cut a hood shape onto both fabrics. The outer fabric should be slightly bigger than the lining, about 1 inch longer and wider. Pin both pieces together, with the right sides facing each other. You can also add some black felt details to the hood for a more authentic look, such as a wolf’s ears or eyes.
Step 4: Sew the Hood
Sew around the edge of the hood, leaving one side open. Turn it inside out and iron flat. Then, attach the red ribbon to the bottom edge of the hood using pins. This will help secure it in place. However, if you prefer a simpler hood without ribbon, that works too. It’s all about personal preference. This is also the time to add any felt details, such as ears or eyes, using fabric glue or by sewing them on.
Step 5: Create the Dress
Fold the red fabric in half with the right sides facing each other. Use your pins to secure it in place. Then, sew along both sides of the fabric, leaving a gap for your arms and shoulders. If you plan on adding buttons, now is the time to sew them on the front of your dress. It’s also a good idea to try on the dress at this point to make sure it fits comfortably.

Step 6: Sew and Add the Hood
Now that your dress is complete, it’s time to add the hood. Place the hood onto the neckline of your dress, with the right sides facing each other. Pin in place and sew them together along the neckline. It’s important to make sure the hood is centered and evenly attached. But don’t worry if it’s not perfect, you can always adjust it later.
Step 7: Make and Attach the Apron
Take your white fabric square and fold it in half diagonally, then press with an iron. Fold in half again to create a triangle shape. You can also use fabric glue or sew along the edges to keep the shape in place. You can choose to add a lace trim or some more felt details to the apron for an extra touch. Then, simply pin and sew it onto your dress at the waistline.
Step 8: Add the White Trim
Take your white cotton strip and pin it around the bottom edge of your dress. You can also fold in half lengthwise to create a thinner band. Sew along the edge of the trim to secure it in place. You can also choose to add some felt details or buttons to this trim for a more personal touch. This is also a great time to try on your costume and make any final adjustments.
Step 9: Make the Cape
Using your remaining red fabric, cut out a wide triangle shape. The length should reach from shoulder to shoulder with some extra for draping, and the width should be twice the length of your desired cape. Fold in half and sew along both sides. If you want a more structured cape, you can also add interfacing to the inside before sewing. You can also add black felt details or ribbon ties to keep it secure.

Step 10: Put on the Finishing Touches
Now that all of your main pieces are complete, it’s time to put on the finishing touches. Add some braids or curls to your hair for an extra cute and innocent look. You can also add a basket or small picnic blanket to really bring the Red Riding Hood story to life. If you plan on wearing this costume outside, make sure to wear some warm layers underneath!
Step 11: Have Fun!
Now that you’ve completed your Red Riding Hood costume, it’s time to have fun! Don’t forget to strike a pose for some photos and show off your handmade creation. And if someone asks you how you made your costume, be sure to share this guide with them so they can make their own Red Riding Hood look too! With these easy steps and materials, you’ll be the star of any Halloween party or cosplay event as the beloved Little Red Riding Hood.
Following these instructions on how to make red riding hood costume, you can customize your Red Riding Hood costume to fit your personal style and preferences. You can also make variations of this costume, such as a modern version with a shorter dress or adding different colors. Don’t be afraid to get creative and have fun with it!
Additional Tips
- To Add a More Spooky Twist, You Can Also Add Fake Blood or Torn Fabric to Your Costume to Make It Look Like the Wolf Has Attacked Red Riding Hood.
- If You’re Feeling Ambitious, You Can Also Create a Basket Prop Using a Wicker Basket and Some Faux Flowers. This Will Really Bring the Classic Fairytale to Life.
- To Complete Your Look, You Can Also Add Some Makeup to Give Yourself a Rosy-cheeked and Innocent Appearance. This Will Make You Look Like the Perfect Little Red Riding Hood.
- Don’t Worry if You’re Not an Expert Seamstress, There Are Plenty of No-sew Options That Can Still Result in a Great Costume. You Can Use Fabric Glue or Safety Pins to Attach Certain Pieces Together Instead of Sewing.
- If You Want to Make the Costume Even More Authentic, You Can Also Find a Red Cloak or Cape at a Thrift Store and Use It as Part of Your Costume. This Will Give You a Classic Red Riding Hood Look Without Having to Make It From Scratch.

Frequently Asked Questions
Q: Can I Use a Different Fabric Than Cotton for My Dress?
A: Absolutely! While cotton is the traditional choice, you can use any fabric that you like and feel comfortable in. It’s all about personal preference and what materials you have available. You could even use a patterned fabric to add more personality to your costume.
Q: How Long Will This Costume Take to Make?
A: The overall time it takes to make this costume will vary depending on your sewing skills and how detailed you want your costume to be. On average, it can take anywhere from 2-4 hours to complete, but the end result will be worth it. Take your time and enjoy the process!
Q: Do I Need Any Special Sewing Skills to Make This Costume?
A: Basic sewing skills are helpful, but not necessary. As long as you can sew a straight line, you’ll be able to make this costume. Plus, there are plenty of tutorials and resources available online for beginner sewers. Don’t be afraid to give it a try!
Q: Can I Make This Costume for Children?
A: Yes, you can easily adjust the measurements and materials to make this costume for children. Just make sure to measure properly and adjust the size of the dress and hood accordingly. You can also add some safety features like velcro instead of buttons for younger children.
Conclusion
All in all, creating a Red Riding Hood Halloween costume is easy and straightforward! From coming up with creative ideas for the look to using just a few materials to create it, you can be sure that yours will look unique and stunning on your special day. Experiment with colors and fabrics – have fun!
Don’t forget to take pictures so you can remember your favorite DIY costume for years to come. At the end of it all, if you still find yourself in doubt, don’t worry! There are plenty of retailers who offer pre-made costumes that will be sure to wow everyone. So take a chance this Halloween and transform into Red Riding Hood – you won’t regret it! Thanks for reading this article on how to make red riding hood costume.