
Are you looking for a fun and creative way to show off your style? Are you looking for a creative and easy way to express your own personal style? Why not try making a Perler necklace! This easy craft is perfect for jewelry lovers of all ages – from kids who want something sparkly to wear, to adults who are looking for an artistic accessory.

With just a few simple tools and lots of colorful beads, you’ll be able to make one-of-a-kind pieces that will stand out as part of any outfit. Through this blog post, we’ll provide step-by-step instructions on how to make perler necklace. So get ready because, with just some time and effort over the weekend, you’ll soon be flaunting a gorgeous handmade piece in no time!
What is a Perler Necklace?
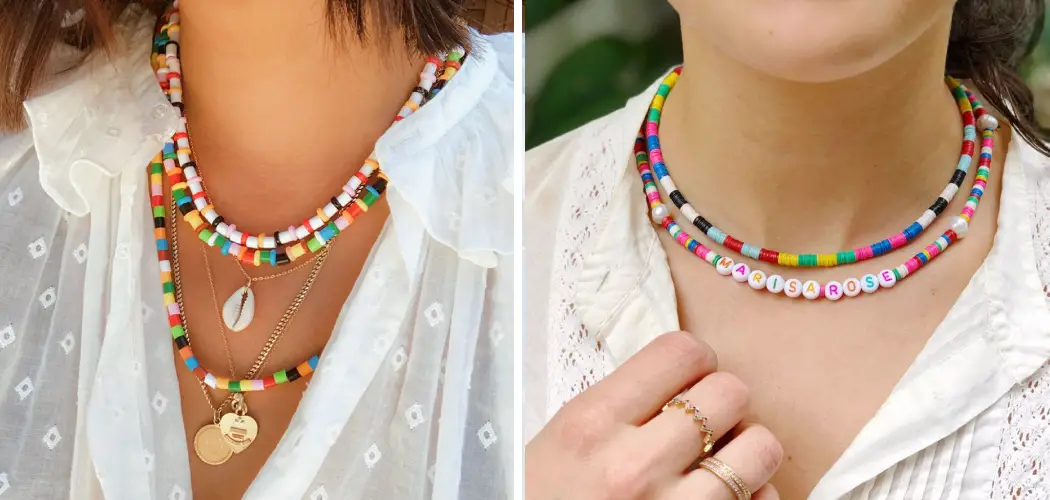
Perler necklace is a type of jewelry made with colorful beads arranged in patterns and strung on a string. It’s an easy and unique way to show off your own sense of style and creativity! You can be as bold or subtle as you want, with designs and colors that reflect your personality.
Things You Need to Keep in Mind While Making Perler Necklace
- Make sure to use a board that is large enough for the design you want. Otherwise, you won’t be able to fit all the beads. It is an important factor to consider.
- Make sure the beads are all securely attached to the board, as this will prevent them from slipping off or coming undone when you’re wearing your necklace.
- Be creative! Allow yourself to explore different colors and shapes, and don’t be afraid to try something new.
What Materials Are Needed to Make a Perler Necklace?
To make a Perler necklace, you’ll need the following materials:
- Perler beads
- String or cord (for necklaces)
- Needle
- Scissors

You’ll also need a flat surface to work on and an ironing board (or something similar) to flatten out your beads. You can find all of these materials at a craft store or online.
10 Ways How to Make Perler Necklace
1. Choose a Pattern
Start by choosing a pattern. Use the perler beads to create any design you want – from simple shapes to intricate patterns. Also, take the size of the board into consideration when designing your necklace.
2. Layout Your Design
Once you’ve chosen a pattern, it’s time to start laying out your design on the Perler board. Place each bead one at a time until you’re satisfied with the result.
3. Iron Your Design
When you’re done laying out your design, place the Perler board on an ironing board and cover it with a damp cloth. Then press the hot iron over the beads until they are securely fused together. Make sure to use a pressing motion and not a rubbing one, as this could dislodge some of the beads.
4. Turn Your Design Over
Once you’ve ironed one side of the board, turn it over and press the other side in the same way. This will ensure that all sides of your design are securely fused together.
5. Trim Away Any Excess Beads
When your design is fully ironed, use a pair of scissors to trim away any excess beads. This will ensure that your necklace looks neat and professional when it’s finished.

6. Attach the Necklace String
Once you’ve trimmed away any excess beads, you can now attach the necklace string or cord. The easiest way to do this is to use a needle and thread, but you can also use glue if that’s easier.
7. Secure the Necklace String
Once you’ve attached the string or cord, secure it in place with a knot. Make sure that the knot is tight so that your necklace won’t come undone while wearing it.
8. Add Accents
If you want to add a little extra sparkle to your necklace, you can use rhinestones or other small accents. Simply attach them to the top of each bead with a dab of glue and let it dry before wearing your necklace.
9. Trim Away Any Excess Threads
Once all of your accents are in place, use a pair of scissors to trim away any excess threads. This will give your necklace a neat and finished look. Trimming is especially important if you’re using delicate materials such as silk thread.
10. Wear Your Necklace with Pride!
Congrats, you’ve made your very own Perler necklace! Now it’s time to show off your hard work and creativity by wearing it proudly. With this easy craft, you don’t have to be an expert jewelry maker to make something beautiful. Just gather your supplies and start creating!
Making a perler necklace is a fun and creative way to express your own style. Whether you’re a beginner or an experienced crafter, with these 10 easy steps, anyone can make their own stylish accessory! So grab the beads and thread, and get creative!

8 Maintenance Tips for Your Perler Necklace
Once you’ve made your beautiful Perler necklace, there are some steps you should take to make sure it looks its best. Here are 8 maintenance tips that will help keep your Perler beads in tip-top shape:
- Avoid direct sunlight and humidity. Sunlight can fade the colors of your beads, and humidity can cause them to warp. Sunlight and humidity can also cause any metal or plastic pieces (like clasps) to corrode and rust.
- Keep your necklace from getting tangled by stringing it onto a piece of ribbon, thread, or even fishing line before storing it away. This will make sure that all the beads stay in place without getting knotted up.
- If the necklace starts to look dull or faded, you can spruce it up with a quick wash in soapy water and gentle scrubbing with an old toothbrush. Necklace designs with lots of details may be more difficult to clean, so use caution when washing these.
- If the perler beads start to become stiff or crunchy, you can re-hydrate them by soaking them in a bowl of water for an hour or two. This should help restore their flexibility and elasticity.
- If you notice any beads on your necklace that are cracked or chipped, you can replace them with new ones. Just make sure the color of the old and new beads match as closely as possible.
- If your necklace has metal or plastic parts, keep an eye out for signs of rust or corrosion. Clean it off with a soft cloth and some jewelry cleaner if necessary.
- Properly store your necklace when not wearing it. A zipped jewelry bag is ideal, as it will keep out dust and keep the beads in place.
- If you’re traveling with your necklace, wrap it up carefully and put it in a sturdy box or case for extra protection. This will help protect the beads from getting damaged in transit.

By following these 8 maintenance tips, your beautiful Perler necklace will remain looking like new for years to come. Enjoy wearing it often and showing off your unique creation!
What Kinds of Design Ideas Can You Make With Perler Beads?
Perler beads are an incredibly versatile craft material that can be used to create almost any kind of design imaginable. From simple geometric shapes to complex designs with millions of colorful beads, the possibilities are nearly endless! Here are some ideas you can use for your own creations:
- Make a portrait of your favorite celebrity or fictional character. It is ideal to show your appreciation and admiration for them! Also, you can make portraits of your family and friends as a special gift.
- Recreate famous logos or symbols for sports teams, companies, or organizations that you support. Recognizing your favorite things with a unique perler bead design is always a great way to show off your fandom.
- Create abstract patterns and shapes or take inspiration from nature for an even more eye-catching display. Nature scenes are particularly popular as it gives you the opportunity to use a range of colors and textures.
- Create scenes from your favorite movies or television shows by constructing the characters and settings out of perler beads. It’s a great way to relive those special moments with your friends and family.
Perler beads are a great way to express your creativity and explore various design ideas.
Conclusion
Crafting a beautiful perler necklace is an enjoyable and creative activity that can be done easily with minimal resources. The steps on how to make perler necklace outlined above are straightforward and should help you create something special.
Plus, you can get creative and explore different beads, chains, and colors to make it truly unique. If you’re feeling ambitious, why not try making other items using Perler beads, such as keychains or magnets?
With just a few supplies and a bit of creativity, you can create something one-of-a-kind! If you don’t have the materials at home, there are countless craft stores selling everything needed for your project.
Crafting projects such as this provide us with a sense of fulfillment, especially when we wear our own handmade creations. For anyone looking to express themselves in new ways or simply find joy through crafting, creating a perler bead necklace is the perfect go-to project!