
Are you looking to add a unique and eye-catching decoration to your home or garden? If you love rustic-inspired decor, a Pampas grass wreath is an affordable and easy craft that can help add something special to your home.
Whether placed on your front door or hung as wall art in any room of the house, a pampas grass wreath is an instant classic — with its natural texture and plush look providing depth and dimension to any space.
What’s more, this DIY project requires minimal materials and just a few simple steps on how to make pampas grass wreath to complete! This comprehensive guide covers everything you need to know so you can make your own unique pampas grass wreath at home.

From preparing the supplies needed to create the finished product, these tips will get you there faster! Read on for all our tips and advice on how to create your own stunning pampas grass wreath!
What is Pampas Grass Wreath?
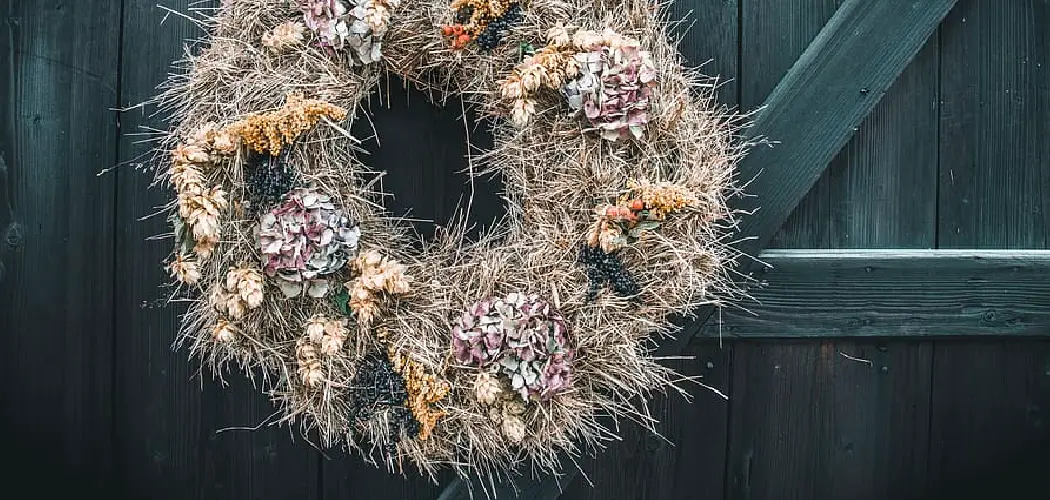
Pamps grass wreaths are made from dried pampas grass, a special form of ornamental grass that naturally grows in many areas around the world. The large, iconic plumes of pampas grass look great when used to decorate walls and doorways. Best of all, you can make your own unique pampas grass wreath right in the comfort of your own home!
Materials Needed
- Dried pampas grass
- Floral wire
- Scissors
- Wire cutters or clippers
10 Step-by-Step Instructions on How to Make Pampas Grass Wreath
Step 1: Gather Supplies
Begin by gathering your materials together. You’ll need dried pampas grass, floral wire, scissors, and wire cutters or clippers. Gathering all your supplies before starting will make the process easier and help you stay organized.
Step 2: Measure and Cut
Decide how large you want your pampas grass wreath to be, then measure and cut your floral wire accordingly. You’ll want an even length of wire for each side—it should fit snugly around the circumference of the pampas grass plumes you plan to use.
Step 3: Shape the Frame
Take the cut wire and shape it into a round hoop. This will be the frame of your wreath, so make sure it is even and balanced. You can adjust the shape as needed until you are satisfied with its size and symmetry.

Step 4: Attach the Plumes
Once your frame is ready, attach one plume of pampas grass to it. Use the wire cutters or clippers to clip the stem of the plume securely onto the hoop. Attaching one plume at a time will ensure that the wreath is even and that each plume is positioned correctly.
Step 5: Continue Attaching Plumes
Continue attaching additional plumes of pampas grass to your frame, making sure they are evenly spaced out. If you run out of wire before all the plumes are attached, cut and shape a new piece to use. This will help ensure that your wreath is evenly balanced and looks beautiful on display.
Step 6: Secure the Last Plume
When you have attached all of your plumes, secure the last one in place by clipping it to the hoop with the wire cutters or clippers. This will hold them all together and keep your wreath looking neat.
Step 7: Trim the Plumes
Once all the plumes are securely attached to the hoop, trim them to give your wreath a finished look. You can adjust the length of each one so that they are slightly different, or you can cut them all to be the same size.
Step 8: Secure the Plumes with Wire
To make sure that your wreath will be sturdy and secure, wrap additional floral wire around it to secure the plumes in place. This will also help keep them from shifting around once they’re hung up on display.
Step 9: Hang Your Wreath Up!
When you’re finished, hang your pampas grass wreath up on your wall or front door. It will instantly add a striking rustic touch to any space!
Step 10: Enjoy!
Enjoy your beautiful pampas grass wreath and admire the unique look it brings to your home. You’ve successfully created a timeless piece of decor that is sure to be admired by all who see it!

Making a Pampas grass wreath can be a simple but rewarding project. It will add a unique touch to your home and can be enjoyed for many seasons to come. Now that you know how to make pampas grass wreath, use these steps to create your own stunning piece of decor!
8 Tips to Make It Stay Longer
Now that you’ve made your beautiful pampas grass wreath, here are 8 tips to help it stay looking its best for longer:
- When storing the wreath, make sure it is out of direct sunlight and preferably in a dry place. If the pampas grass is exposed to heat and sunlight for too long, it will fade.
- It’s best not to hang the wreath on a door or window that opens often, as this can cause it to become matted. Instead, find an interior wall and secure it with nails or screws rather than using tacks or pins.
- If the wreath needs to be hung on a door or window, move it once in a while to prevent it from becoming matted down. Also, look for a way to secure the wreath so that it won’t get caught in the door when opened and closed.
- To keep the pampas grass looking full, you may need to fluff it up occasionally. Gently pull apart any areas that have become matted together. Keeping the wreath away from areas with high humidity will help to preserve its shape.
- To keep dust and dirt off your pampas grass wreath, use a soft dry brush or a vacuum cleaner on the lowest setting, set at least three inches away from the wreath.
- If you need to move your pampas grass wreath, be careful not to damage it. Use a large box or basket, wrap the wreath in a soft cloth, and secure it with twine if needed.
- If your wreath needs cleaning, use a mixture of water and dish detergent to gently clean off any dirt and dust particles on its surface. Do not soak the wreath in water as this will ruin it.
- To give your wreath a boost of color, use a spray bottle to mist it with water and let it air dry. This will bring out the vibrant colors of the pampas grass and make it look like new again.

These 8 tips should help you keep your pampas grass wreath looking its best for longer. With just a little bit of extra care and attention, your wreath will be a beautiful addition to any room for years to come.
To really take advantage of all its beauty, try adding some dried flowers or other natural decorations to give it an extra special touch. And don’t forget to keep it away from direct sunlight and heat as much as possible – this will ensure that your pampas grass wreath will look great for a long time.
Frequently Asked Questions
How Long Will It Take?
Making a pampas grass wreath will likely take around an hour or two, depending on your skill level. It can be made much faster if you already have the materials prepared and ready to go. If you are just starting out with making wreaths, it would be better to give yourself more time so that you don’t become frustrated or overwhelmed.
How Much Will It Cost?
The cost of making a pampas grass wreath will vary depending on the amount of materials you need to purchase. The good news is that pampas grass is relatively inexpensive, so buying enough for one wreath should not break the bank. Additionally, you can also find some materials around the house or at thrift stores which could save you some money.

Conclusion
The Pampas grass wreath is an excellent way to add some natural beauty and texture to any interior design. With just a few simple tips, you can keep it looking its best and make sure that it lasts for years to come. Making a Pampas grass wreath is an easy and fun project.
Not only can you add beauty to your home or porch, but you will have the satisfaction of creating something lovely from natural materials. Your wreath will be admired all season long and is sure to give your friends, family, and neighbors a reason to smile.
With some basic supplies and creativity, and this guide on how to make pampas grass wreath anyone can create a stunningly beautiful pampas grass wreath in no time at all. Furthermore, maybe this crafty project could become a beloved holiday tradition as you gift handmade wreaths every year and the memories that come with them!
Together we can conserve our environment by turning eco-friendly items into something meaningful, just like these holiday décor must-haves– so don’t forget to save those special pieces for future crafting sessions.