
Origami pumpkin is a great way to add extra fun to your festivities and decorate for the fall season. Not only will you have something beautiful to look at, but it’s also a great activity for kids or adults interested in paper folding. With just a few pieces of paper and simple instructions, anyone can make their origami pumpkin quickly.

Making an origami pumpkin is a great way to have fun and make something special during autumn or even for Halloween. It’s also a creative and inexpensive activity that you can do with children or family members.
With simple instructions and basic supplies like colored paper, scissors, tape, and markers, you can easily create your stylish origami pumpkin using just a few simple steps. You can find step-by-step instructions on how to make origami pumpkin in this blog article.
Materials You Will Need
- 1 Sheet of Origami Paper (preferably orange)
- 2 Sheets of Green Origami Paper
- Scissors
- Glue Stick
- Pen or Pencil
- Ruler or Measuring Tape
- Optional: A Pumpkin Stencil
Step-by-step Instructions for How to Make Origami Pumpkin
Step 1: Inspect Your Square Piece
To get started, make sure you have a piece of square paper. It should be approximately the size of a standard letter sheet of paper (8.5” x 11”). Inspect the edges to ensure it is evenly cut and folded without creases or tears.
Step 2: Fold the Paper in Half Diagonally
Take your paper and fold it in half diagonally, making sure the edges meet perfectly. Make a crease along the folded edge with your finger or a pencil. Then, open up the paper again so that it is flat. Fold the paper in half once more, perpendicular to the first fold. Make a crease along this edge, then open it back up so it is flat again.
Step 3: Fold One Corner to Meet the Middle

Take one corner of your paper and fold it towards the middle crease you made earlier. Line up the edges carefully and press firmly to create a sharp crease. Fold and unfold your paper several times, repeating the steps. This will help strengthen the creases and make them more visible when finished.
Step 4: Flip the Paper Over
Flip your paper over so that it is facing up. Make sure all of your folds are still in place and sharp. Take one edge of your paper and fold it over towards the center. Make sure each side is even, and press down firmly to create a crease.
Step 5: Flatten Out Your Origami Pumpkin
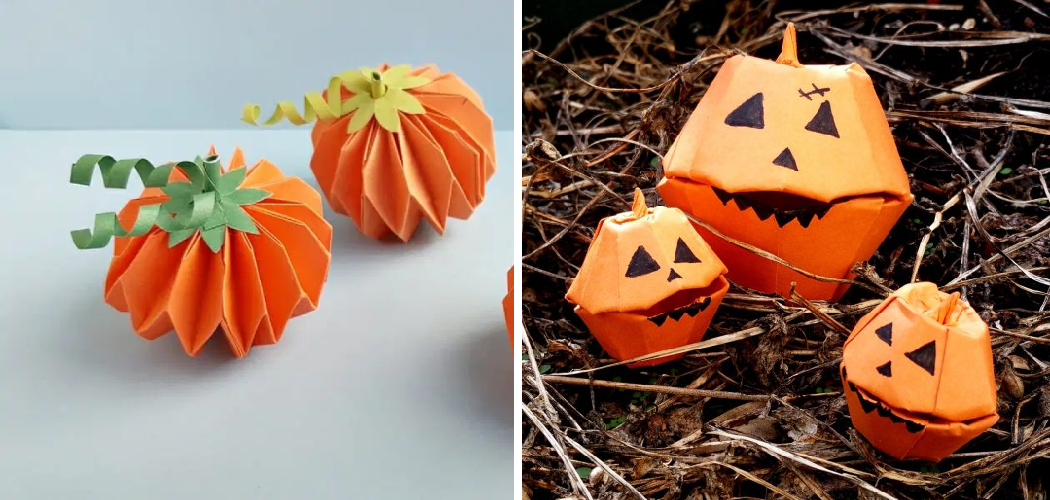
Once you’ve finished making your folds, you should have a pumpkin-shaped figure with four “leaves” sticking out from the top. Gently press down on the figure to ensure all your creases are sharp and even. You can also adjust the leaves at the top to give your origami pumpkin a more finished look.
Following these steps, you can create an origami pumpkin perfect for fall and Halloween decorations. Whether you’re making one for yourself or to give as a gift, your origami pumpkin will surely be appreciated.
Safety Tips for How to Make Origami Pumpkin
- Always supervise young children when making origami pumpkins or any other paper craft.
- Ensure you have an adult present if you use scissors to cut the paper for your pumpkin.
- Be careful not to cut yourself when folding and unfolding the paper.
- Do not eat any of the supplies, such as glue or paper.
- Avoid sticking the glue into your eyes or mouth when making origami pumpkins.
- Use only non-toxic materials for your project, such as acid-free paper and nontoxic glue.
- Store your origami pumpkin in a safe place where it won’t be damaged or broken.

Now that you know how to make an origami pumpkin and some safety tips, it’s time to start. Choose a bright orange paper for your project. Cut out two circles from the paper using scissors or a hole punch.
Is There a Certain Type of Paper Recommended for Making an Origami Pumpkin?
Yes, it is best to use origami paper with a nice orange or red tone, as the color will be visible through the pumpkin’s folds. You can also use regular printer paper and color it with markers or paint. If you’re using colored origami paper, make sure you choose a shade of orange or red that won’t blend in too much with the creases and folds of the pumpkin.
For intricate details, such as eyes and a nose, cut out small pieces of black or dark-colored origami paper and adhere them to your pumpkin for extra decoration. You can also use glue to affix buttons, beads, glitter, sequins, and other embellishments to make your pumpkin even more unique. Before you start folding, it’s a good idea to practice on scratch paper first to get the hang of making an origami pumpkin.
What is the Best Way to Store Your Finished Origami Pumpkin?
After you’ve finished making your origami pumpkin, it’s important to store it in a way that will keep it looking its best for as long as possible. The best way to do this is by keeping your pumpkin out of direct sunlight and away from moist environments.

Place the pumpkin in an airtight container with silica gel packets to absorb any excess humidity. You can also display your pumpkin in a glass or plastic container to protect it from dust and debris. For added protection, wrap the pumpkin in tissue paper before placing it inside the container.
How Can You Make Sure Your Origami Pumpkin Is Not Damaged in Transit?
When you send your origami pumpkin in the mail, you can do a few things to ensure that it does not get damaged in transit. First, be sure to use a sturdy box or large envelope to accommodate the pumpkin. Secondly, line the inside of the package with tissue paper or bubble wrap to provide extra padding and shock absorption.
Include a stiff cardboard insert inside the package as well. Finally, seal the box securely with packing tape and place lots of address labels on it – just in case the pumpkin gets lost in transit! With these steps, your origami pumpkin should arrive safely at its destination.
Are There Any Common Mistakes That People Make When Attempting This Craft Project?
Yes. One of the most common mistakes people make when attempting to make origami pumpkins is needing to follow through with each step in the directions carefully. It’s important to take your time and read each instruction thoroughly before moving on to the next one.
Additionally, many people attempt this craft project without preparing or gathering all the necessary supplies beforehand, leading to frustration and difficulty. To ensure your project is a success, ensure you have all the supplies on hand before you begin folding. Lastly, it’s important to remember that the finished product won’t be flawless; some pieces may need to be more perfectly symmetrical or folded correctly.
What is the Best Way to Store Your Finished Origami Pumpkin?
There are several ways to store your origami pumpkin and keep it looking its best. It’s important to keep your pumpkin away from direct sunlight and moisture. If you have limited storage space, consider placing the pumpkin in an airtight container with silica gel packets or displaying it in a glass or plastic container.
This will protect the paper against dust and other debris. Additionally, wrapping the origami pumpkin in tissue paper before putting it in a container can be a great way to protect it from further damage.

Finally, if you plan on sending your origami pumpkin in the mail, use a sturdy box or envelope large enough for the pumpkin. Place extra cushioning materials like bubble wrap or tissue paper inside the package, and insert a stiff cardboard insert if possible.
When sealing the box or envelope, use plenty of packing tape to ensure it’s secure. It may also be helpful to place multiple address labels on the package in case it gets lost during delivery.
Conclusion
The main disadvantage of origami pumpkins is the time and patience it takes to make them. Producing a neat origami shape is difficult, especially if you’re a beginner. The paper used needs to be thick enough for the folds to be crisp and reliable, but unfortunately, some of these papers can be expensive or hard to find.
In conclusion, making origami pumpkins is an enjoyable and creative way to express yourself. It’s a great activity for all ages, no matter how experienced you are with paper folding!
Whether you’re looking for a simple project to do with your kids or want something intricate and challenging, origami pumpkins can help bring out your creativity while providing lasting decoration. This article has been beneficial for learning how to make origami pumpkin. Make Sure the preventive measures are followed chronologically.