
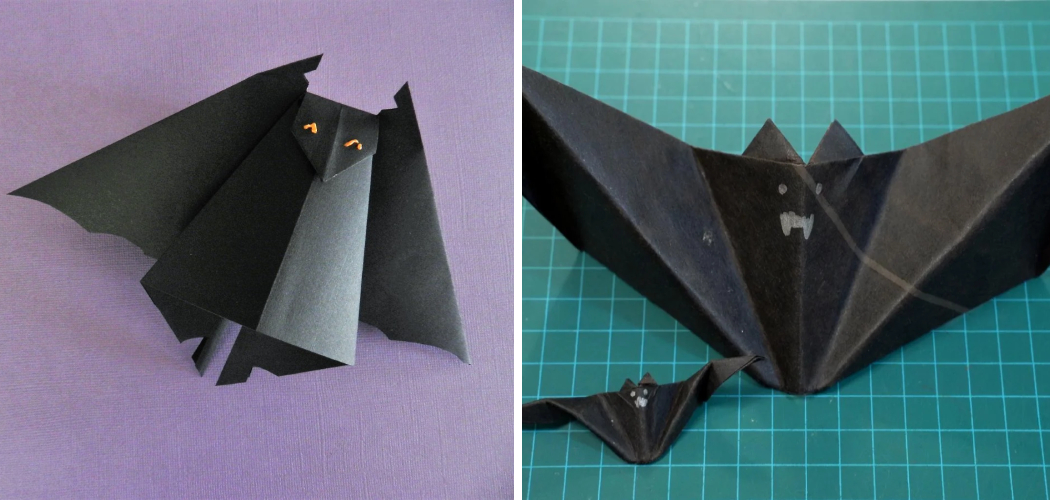
Origami is a great way to express creativity and have fun while making something beautiful. Origami bats are no exception! Not only are they fun and easy to make, but they’re also incredibly spooky and perfect for adding some Halloween spirit to any room or event. Read on for an easy-to-follow guide on how to make origami bats.

Making origami bats can be a fun and creative way to bring Halloween-themed decorations into your home. Not only are they a great addition to any spooky décor, but they’re also relatively easy to make with just a few simple steps. Start by cutting out two oval shapes from your paper.
The bat’s size will depend on how large you want it to be. Then, fold the two pieces together to overlap slightly in the middle. Now, take one end of your folded paper and fold it up into a triangle.
Materials You Will Need
- Two identical origami paper squares
- Glue or a stapler
- Scissors (optional)
- Ruler (optional)
- Pencil and eraser (optional)
- Thread and needle (optional)
- Glitter or pom-poms (optional)
- Beads and buttons (optional)
- Googly eyes (optional)
- Ribbon or fabric scraps (optional)
Step-by-step Instructions for How to Make Origami Bats
Step 1: Inspect Your Paper
Before you begin, have a paper with the same colors on both sides. This will help ensure that your origami bats look nice and symmetrical. Take your paper and fold it in half lengthwise. Make sure the edges of the paper line up perfectly when you do this.

Step 2: Open Your Paper
Unfold your paper so that it is once again flat on a surface. You should now have two creases running down the middle of the rectangle. Take your paper and fold it in half again, this time by taking the two edges of the rectangle and bringing them together. Ensure that the creases from before line up as straight as possible; if they don’t, use your fingers to push them back into place.
Step 3: Flip Your Paper Over
Flip your paper over so that the side you folded on is now facing down. You should now have a crease running down the middle of the rectangle that forms a triangle when you fold it in half. Take your paper and fold it in half again, this time by taking the two edges of the rectangle and bringing them together vertically. This will create a triangle shape with an extra crease running through it.
Step 4: Flip Your Paper Over Again
Flip your paper over so that the side you folded on is now facing down. You should now have three creases running down the middle of the rectangle, forming a triangle when you fold it in half. Take your paper and fold it upwards along one edge of the triangle, forming an extra crease running up from one side of the triangle. This will create an origami bat shape with wings on either side.
Step 5: Flip Your Paper Over Again
Flip your paper once your bat is formed so the wings face up and the triangle points downwards. You should now have four creases running down the middle of the rectangle, forming a triangle when you fold it in half.

Now, you can show your new creation to friends and family or even put it on display. Once you make origami bats, feel free to play around with different colors and patterns. You can even incorporate other origami shapes into your design to make it even more unique.
Tips for How to Make Origami Bats
- Always supervise children while making origami bats.
- Use only clean hands and the safest scissors to cut paper for origami bats.
- Be sure no small parts or pieces are left behind after putting together an origami bat.
- Make sure that paint markers or other craft supplies for decorating an origami bat are non-toxic and age-appropriate.
- Keep an eye out for sharp points or corners when making the origami bats, and use additional paper to cover them if needed.
- Use a hard, flat surface when folding and cutting paper for origami bats to avoid injury from scissors or other tools used during the project.
- Always store origami bats properly and keep them away from small children who may try to put the parts in their mouths.
Making an origami bat is a fun and creative way to explore your creativity while learning about the craft of paper folding. With just a few simple steps, you can create an impressive-looking origami bat that you can give friends and family as a special gift or decorate your living space with.
Is There a Good Way to Create Eyes for Your Origami Bat?

Yes. You can use black felt or foam to make eyes for your origami bat. It’s a great way to give it a spooky look and complete the classic bat design. Simply cut two circles out of the material of your choice and then glue them to either side of the nose area. You now have an origami bat with eyes you can be proud of.
If you want to take your bat-making skills to the next level, you can also try folding a unique origami bat pattern. Several designs are available online and in craft stores that will help you create a one-of-a-kind art piece. You can make a bat that will impress with just some paper-folding techniques and patience. Making the bat is just as enjoyable as the final product.
What Are the Best Techniques for Securing the Wings of the Bat Once You’re Finished Folding?
The best way to secure the wings of your origami bat is to use a bit of glue on the edges. This will help keep them in place and ensure your masterpiece doesn’t collapse during play or handling. If you’re using felt for the eyes, consider cutting out small circles from the felt and gluing them onto the ends of each wing.
This will provide extra stability and make sure your bat’s wings stay firmly in place. Another great way to secure the wings is using paper clips or brads. Simply attach the paper clip or brad at each end of the wing and press it onto the bat’s body. This will keep everything together without damaging or distorting your design.
How Can You Make Sure Your Origami Bat Looks Good From Every Angle?
Getting your origami bat to look good from every angle takes practice and patience. Start by folding the wings carefully to have a neat and symmetrical shape. Also, be sure to cut out the felt eyes, as this will ensure they are even on either side of the nose. Finally, you can use an adhesive that dries clear to secure the wings, giving your bat a polished and professional look.

Are There Any Special Techniques for Making an Origami Bat Look More Realistic?
Making an origami bat look more realistic is all about focusing on details. Consider adding a jagged edge to the wings or giving them an asymmetrical shape. Play with different folding techniques to create interesting patterns and shapes that give your origami bat a unique look.
Experimenting with different paper colors can also help produce a more lifelike result. Finally, don’t forget to add eyes and other realistic touches, such as claws and a tail.
By grouping several, you can create a realistic and impressive origami bat colony that is sure to be the envy of all your friends! So, what are you waiting for? Get folding and let your creativity run wild. With just a few steps and some imagination, you’ll have a flock of origami bats taking flight in no time.
Conclusion
In conclusion, making origami bats is a simple yet enjoyable craft that can be done with paper and a few simple steps. It’s a great way to get creative and have some fun while doing it. Different variations of origami bats can be created, so get creative and explore the possibilities.
With just a few supplies, some folding techniques, and patience, you will have an origami bat in no time. This article has been beneficial for learning how to make origami bats. Make Sure the preventive measures are followed chronologically.