
Embracing the trend of open shelving not only adds a touch of contemporary flair to your living space but also provides an opportunity for personalized and functional display. Crafting your own open shelves allows you to tailor the design to your preferences, creating a unique focal point in any room.
In this guide, we’ll embark on a journey into the world of DIY home improvement, exploring the step-by-step process of how to make open shelving.

From selecting the right materials to mastering essential woodworking techniques, we’ll empower you to bring your vision to life. Whether you’re aiming for a rustic farmhouse vibe or a sleek modern aesthetic, creating open shelves allows for versatility in design.
Join us on this creative endeavor as we unlock the secrets to constructing stylish, practical, and budget-friendly open shelving that seamlessly integrates into your home decor.
Benefits of Open Shelving in Home Decor
Open shelving is a popular trend in home decor, and for good reason. It offers both functional and aesthetic benefits that make it a favorite among interior designers and homeowners alike. In this section, we’ll explore the various benefits of incorporating open shelving into your home’s design.
Creates an Open and Airy Atmosphere
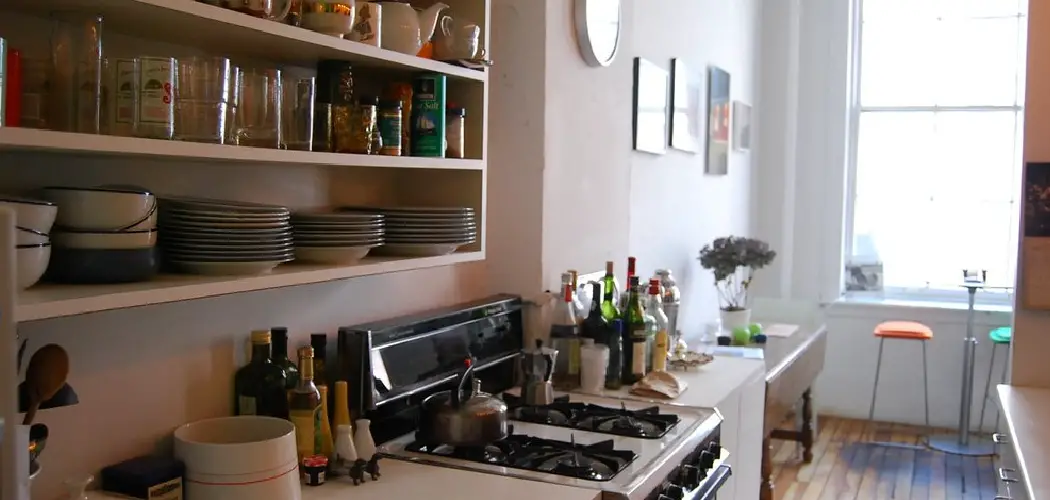
One of the main advantages of open shelving is its ability to create an open and airy atmosphere in any room. Traditional closed cabinets can make a space feel cramped and dark, especially in smaller rooms. By removing the doors and using open shelves, you can visually expand the space and allow more natural light to flow through.
Adds Visual Interest
Open shelving also adds visual interest to a room by breaking up the monotony of closed cabinets. The open shelves act as a canvas to display your favorite decorative items, such as books, plants, and art pieces. This not only adds character to the room but also allows you to showcase your personal style.
Provides Easy Access
Unlike traditional cabinets with doors that need to be opened and closed, open shelving provides easy access to items. This makes it ideal for frequently used items, such as dishes and cooking utensils in the kitchen, or books and stationary in a home office. With open shelves, you can easily grab what you need without having to search through closed cabinets.

Budget-Friendly
Another benefit of open shelving is that it is often more budget-friendly than traditional closed cabinets. Open shelves can be made from a variety of materials, such as wood, metal, or glass, making them more affordable than custom-made cabinets. They also require less labor and installation time, saving you money on professional services.
10 Methods How to Make Open Shelving
1. Measure the Space
The first step to making open shelving is to measure the space where you plan to install the shelves. You’ll need to know the exact dimensions of the space in order to determine how many shelves you’ll need and what size they should be. Additionally, it’s important to measure twice and cut once, as any mistakes made during this step can be costly.
2. Select Materials
Once you have measured the space, you’ll need to select the materials for your shelves. The most common materials used for open shelving are wood or metal, but there are other options available as well. Many people also choose to use recycled materials such as pallets or old doors for a more unique look.
3. Cut Shelves to Size
Once you have selected your materials, you’ll need to cut them down to size according to your measurements. If you’re using wood, it’s best to use a table saw or circular saw for this step, as these tools will give you a clean and precise cut every time. For metal shelves, an angle grinder is usually best for making accurate cuts quickly and easily.
4. Assemble Shelves
After cutting your shelves down to size, it’s time to assemble them into their final form. Depending on what type of material you’re using, this may involve drilling holes for screws or simply stacking pieces together in a certain order. It’s important that all pieces fit together snugly so that your shelf is sturdy and secure when installed in its place.

5. Sand Edges
Once your shelves are assembled, it’s important that all edges are sanded down smoothly before they’re installed in their place. This will help ensure that no one gets scratched by sharp edges when handling the shelves and also make them look more polished when installed in their place. A belt sander works best for this task, but hand sanding can also be done if necessary.
6. Paint or Stain Shelves
If desired, now is also a good time to paint or stain your shelves before they’re installed in their place. If painting with latex paint, be sure that all surfaces are properly primed first so that the paint adheres well and doesn’t chip off over time due to humidity or moisture exposure from cleaning products used on them later on down the road. Staining is another option that can give the wood an attractive finish without having to worry about chipping paint over time due to moisture exposure, etc.
7. Install Brackets
Installing brackets is an important step when making open shelving because they provide extra support and stability for your shelf unit once it’s mounted on the wall or ceiling joists, etc. When selecting brackets, make sure they’re rated for both the weight capacity of items stored on the shelf unit plus the length/width of the shelf unit itself so everything stays safe & secure when loaded up with items, etc.
8. Mount Shelves
Now comes the fun part: mounting your shelves! Depending on where you plan on installing them (on walls/ceilings/floors), different types of fasteners may be needed (e.g., screws/nails/anchors). Make sure all fasteners are properly secured into wall studs/ceiling joists/floorboards, etc., so everything stays safe & secure when loaded up with items, etc.
9. Add Decorative Elements
Finally, add any decorative elements such as trim pieces around the edges of each shelf unit if desired; this helps give each shelf unit a finished look plus prevents items from slipping off edges while being handled, etc. Other decorative elements include adding knobs/handles onto the front face of each shelf unit; this help provide easy access when loading & unloading items from each shelf unit etc.
10. Enjoy Your Open Shelving!
Congratulations – now enjoy all those beautiful open shelving units! Whether displaying books & photos at home or organizing office supplies at work – these open shelving units will help keep everything neat & tidy while providing easy access whenever needed!

Things to Consider When Making Open Shelving
Open shelving is a popular design trend that can add both functionality and style to any room. They are a great way to display your favorite items, keep frequently used items within reach, and make use of vertical space in small rooms. However, before diving into a DIY project or purchasing pre-made shelves, there are a few things to consider.
Location and Purpose
The first thing to think about is where you want your open shelving to be located and what its purpose will be. Will it be in the kitchen to display dishes and cookbooks? In the living room for decorative items? In a bedroom for books and personal belongings? The location and purpose will determine the size, style, and materials of your shelves.
Size and Style
Once you have determined the location and purpose of your shelves, it’s important to consider the size and style. Measure the space where the shelves will go to ensure they fit properly. You also want to make sure they match the overall design aesthetic of the room. For example, if your home has a modern feel, opt for sleek metal or wood shelves, while a farmhouse-style home would benefit from rustic wood shelves.
Materials
The materials you choose for your open shelving can greatly impact the style and functionality of the shelves. Wood is a popular choice for its natural beauty and versatility. Metal adds a modern touch and can withstand heavy items. Glass shelves create an open and airy feel, perfect for small spaces. Consider the weight of the items you will be placing on the shelves and choose materials accordingly.

Conclusion
Open shelving is a great feature to add to any home, and when done correctly, can result in stylish, up-to-date kitchens with plenty of storage. Not only do open shelves have a modern aesthetic, they’re also incredibly practical and can help cut down on clutter. Ultimately, the decision on whether to add open shelving or not comes down to personal preference.
Whether you are looking to improve your kitchen decor or just gain extra storage space, with a few tips and basic tools, creating DIY open shelving has never been easier! So now that you know how to make open shelving be sure to give it a try to spruce up your kitchen and create the perfect organized look you desire.