
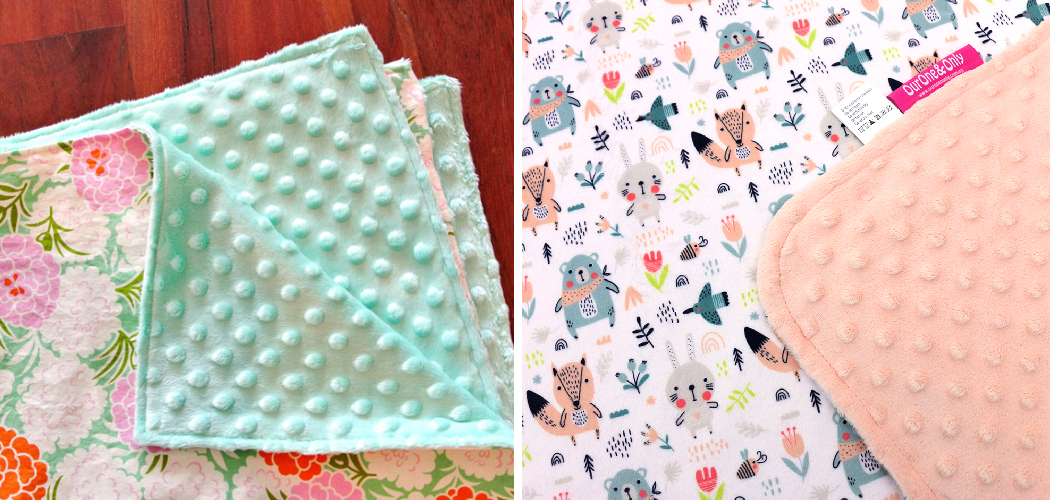
Do you want to give a thoughtful and cozy gift that’s sure to be appreciated? Look no further than making your own minky blanket! Soft, snuggly, and oh-so cuddly, this treat for yourself or someone special will be cherished for years.

Whether it’s an afternoon project or part of a longer endeavor, creating a handmade minky blanket is an easy task with the right materials. In this tutorial on how to make minky blanket, we’ll take you step by step through all the steps needed to make sure your perfect minky blanket produces nothing but smiles. Ready? Let’s get started!
Needed Materials
Given below are the materials and tools you will need to make your own minky blanket.
- 1 ½ Yards of Minky Fabric
- The Thread That Matches the Minky Fabric
- Sewing Machine
- Pins
- Scissors
- Measuring Tape or Ruler
- Iron
11 Step-by-step Guides on How to Make Minky Blanket
Step 1: Cut Your Fabric
The first step is to cut the fabric into two equal squares. Measure and mark the minky fabric where you want to cut it, then use a pair of scissors to cut through both layers of minky fabric along the same lines.
It is important to make sure the two pieces of fabric are the same size before continuing. But don’t worry if you make a mistake – minky fabric is very forgiving and can be trimmed down! This step is best done on a flat surface like your sewing machine table.

Step 2: Pin the Pieces Together
To keep the two pieces aligned, you need to pin them together along their edges. Place a few pins along each edge and be sure that they all face inwards. This will ensure that your minky blanket doesn’t move around while you are sewing.
It’s important to note that minky fabric is very slippery, so take extra care when pinning it together. But don’t worry too much – minky fabric is very forgiving so if you make a mistake, it can be easily corrected.
Step 3: Sew the Edges
Now it’s time to sew the edges together. Set up your sewing machine with the thread that matches your minky fabric and then start by sewing along one edge of the blanket. Make sure to backstitch at the beginning and end of each line so that your stitches are secure.
Repeat this process for all four edges of the blanket, being sure to keep the two layers of fabric aligned throughout. It’s helpful to use a zigzag stitch when sewing minky fabric, as this will help keep the edges from fraying.
Step 4: Trim Away Excess Fabric
Once you have finished sewing all four edges, use a pair of scissors to trim away any excess fabric that may be sticking out from the seam. This will help your minky blanket to have a neat and professional finish.
This step is especially important if you plan on giving this blanket as a gift. It’s always best to give a present that looks polished and put together!
Step 5: Press the Seams
It’s important to press the seams flat once you’re finished sewing them. This will make your minky blanket look even better when it is finished. Use an iron on low heat (or no heat) to press down each seam, then turn the blanket over and repeat on the other side.

However, be sure to never use a hot iron on minky fabric, as this could cause it to melt! If you need more heat to press down the seams, use a pressing cloth between the iron and the minky fabric.
Step 6: Create a Flange
To give your minky blanket an extra touch of luxury, you can add a flange to the edges. To do this, cut four strips of minky fabric that are each approximately 3 inches wide by 22 inches long.
Pin them around the edges of the blanket, making sure that they are aligned with the seams. However, take care not to stretch the flange as you pin it – minky fabric stretches easily and could distort your blanket.
Step 7: Sew the Flange to the Blanket
You will now need to sew the flanges to the edges of your minky blanket. Start by sewing along one edge of a flange and then move on to the other side. Make sure to keep the stitches straight and even so that your flange looks neat.
Otherwise, you may need to unpick the stitches and start again. It’s a good idea to use a zigzag stitch when sewing the flanges as this will help keep them from fraying over time.
Step 8: Trim Away Excess Flange Fabric
Once you have finished sewing the flanges to the blanket, use a pair of scissors to trim away any excess fabric. Be sure to do this carefully as minky fabric can become frayed or torn if handled too roughly.
If you do make a mistake, however, don’t worry – minky fabric is very forgiving and can often be corrected with just minor adjustments. This step is especially important if you are giving this blanket as a gift, as it will help give the finished product a neat and professional look.

Step 9: Sew the Flanges Together
To finish your flanges, you will need to sew them together. Start by aligning two of the flanges at one corner and then pinning them in place. Sew along each edge of the flange until all four flanges have been sewn together. But be careful not to stretch the fabric as you sew – minky fabric can easily become distorted if it is handled too roughly.
Step 10: Create a Binding
For the final step, you will need to create a binding for the edges of your minky blanket. To do this, cut four strips of minky fabric that are each approximately 2 inches wide by 22 inches long.
Pin them around the edges and then sew them in place using an overcast stitch. It is important to make sure that your binding is even and straight, as this will help the edges of the blanket look neat and professional.
Step 11: Enjoy!
And now, your minky blanket is finished and ready for snuggling! We hope that you enjoyed this tutorial on how to make a minky blanket and that you will be able to find many cozy moments with your homemade creation. Happy crafting! Always remember to take your time when making projects like this, as it will help ensure that you end up with a beautiful finished product. Enjoy!
Following these steps on how to make minky blanket will ensure that you end up with a high-quality minky blanket that is as soft and snuggly as can be! Whether it’s for yourself or someone special, the time and effort you put into making this handmade gift will make it extra special. Have fun crafting your minky blanket, enjoy the process every step of the way, and don’t forget to share the love!
Frequently Asked Questions
Q: Do I Need a Serger for Making Minky Blankets?
A: No, you do not need to use a serger when making a minky blanket. You can use a regular sewing machine with the correct thread and settings to sew the minky fabric together. However, if you do have access to a serger it can make the job much easier and faster.
Q: What is the Best Way to Cut Minky Fabric?
A: The best way to cut minky fabric is with sharp scissors and a ruler or measuring tape. Make sure to measure twice before you cut, as it can be difficult to make small adjustments if the pieces end up being the wrong size. Additionally, always use a cutting mat and rotary cutter when working with minky fabric to ensure that your edges are clean and straight.

Q: How Can I Make My Minky Blanket Last Longer?
A: To make your minky blanket last longer, it’s important to take good care of it. When washing, use a gentle cycle on the machine and choose a mild detergent that is designed for delicate fabrics.
Also avoid drying your minky blanket in the dryer, as this can damage the fabric over time. Instead, you should lay it flat to dry or hang it up to air dry. Following these tips will help your minky blanket stay soft and cozy for many years to come!
Q: What Are Some Tips For Sewing Minky Fabric?
A: When sewing with minky fabric, there are a few things to keep in mind. First, make sure to use the correct type of thread (either polyester or a cotton-poly blend) and needle size (80/12). Secondly, adjust your sewing machine setting to accommodate the thickness of the minky fabric. This may include increasing the stitch length as well as decreasing the presser foot pressure.
Finally, use plenty of pins when joining minky fabric pieces together to ensure that the edges remain aligned throughout the sewing process. Following these tips will help you create an even, professional finish on your minky projects.
Conclusion
To conclude on how to make minky blanket, making a minky blanket is something that comes with great satisfaction when the job is finished! With the steps provided above, it can be a relatively easy task. All you need to remember for success is that pins are your best friend and help create smooth lines as you sew.
Don’t be intimidated if you have never seen it before there is always room to grow and learn new skills. You can take pride in knowing that you made something by hand, and it only gets easier from here. Whether giving this minky blanket away as a gift or using it yourself, it promises plenty of warmth and comfort! Thank you for reading now let us go out there and start crafting our next masterpiece.