
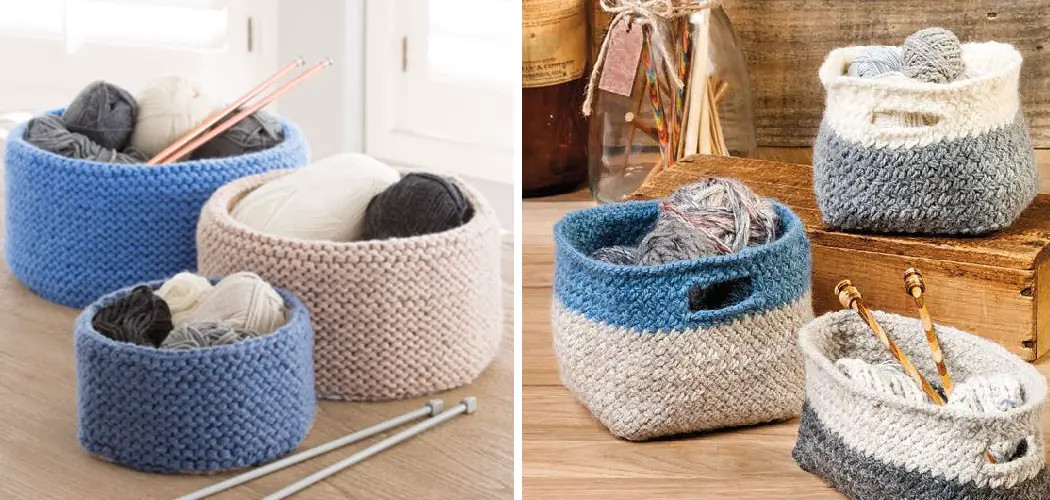
Knitting a basket is a great way to create something beautiful and useful. It’s relatively easy, and you can make the perfect basket for any room in your home. Whether it’s a small basket to hold jewelry or a large one to store blankets, you can customize it with different colors and sizes. Plus, it’s an inexpensive project that can be completed quickly.
Knitting a basket is a great project for beginners to gain confidence in their knitting skills. It’s relatively easy, and the techniques used are quite straightforward. You can use any type of yarn or thread you have on hand, and it doesn’t require too many tools.

Plus, if you make a mistake, it’s easy to unravel and start the process over again. You can find step-by-step instructions on how to knit a basket in this blog article.
Materials You Will Need
- Yarn or thread
- Knitting needles
- Crochet hook
- Scissors
- Tapestry needle
- Ruler or measuring tape
- Pencil and paper for taking measurements
- Large hoop (optional, depending on the size and shape of your basket)
- Embellishments like ribbons, beads, and buttons (optional)
- Pins for holding the basket in shape as it dries
Step-by-step Instructions for How to Knit a Basket
Step 1: Inspect the Yarn or Thread
Check the yarn or thread to make sure it’s in good condition. Ensure there are no knots or tangles and all the fibers are even. Select knitting needles or crochet hooks that will be appropriate for your project. Generally, a thicker yarn requires larger needles, while thinner yarns work best with smaller needles.
Step 2: Take Measurements
Use a ruler or measuring tape to determine the circumference and height of your basket. This will help you decide how much yarn or thread to use and the size of the knitting needles. Write down these measurements so that you can refer back to them later.

Step 3: Begin Knitting or Crocheting
You can begin knitting or crocheting once you have all the materials and measurements ready. Depending on your project, this could involve various techniques like ribbing, garter stitch, and slip stitches. Create the bottom of the basket by using a flat circle or square shape. Ensure the stitches are tight so the shape doesn’t lose its form once finished.
Step 4: Start Building Upwards
Once you have a flat bottom, start building upwards with rows of knitting. This will create the side walls of your basket. Continue until you reach the desired height of your basket as per your measurements. When you reach the desired height, finish off the top of your basket by creating a lip. This can be done either by using crochet stitches or simply binding off.
Step 5: Add Embellishments
If desired, add embellishments like ribbons, beads, and buttons. This will add an extra touch of style to your basket. If desired, you can use a large hoop to help maintain the basket’s shape as it dries. This is especially helpful with larger baskets.
Step 6: Allow the Basket to Dry
Allow the basket to dry completely before using it. Use pins to help hold the shape if needed. When fully dry, you can enjoy your beautiful knit basket.
Following these simple steps, you can create a stylish and useful basket for any room in your home. Have fun experimenting with different colors, sizes, and shapes to make the perfect basket fit for your needs.

Safety Tips for How to Knit a Basket
- Choose a suitable yarn or thread for the project, and ensure it’s in good condition before beginning.
- Ensure to measure accurately so that your basket has proper dimensions when finished.
- Use caution when using scissors to cut off excess yarn or thread.
- Take care to keep all stitches even and tight for a sturdy basket.
- Be careful when handling the hoop if using one to maintain shape while drying.
- Make sure to use the appropriate tools for the stitches you are using.
- Be aware of any embellishments used, as they may be sharp or dangerous if mishandled.
- Allow the basket to dry completely before handling or using it.
By following these safety tips, you can ensure that your knitting adventure is smooth and enjoyable.
How Many Rows and Stitches Should You Use for the Base of Your Basket?
The number of rows and stitches you should use for the base of your basket will depend on the size and shape you are aiming for. Generally, it’s a good idea to start with 10-15 rows and increase as needed. For example, if you want a round basket, start by knitting in the round using an appropriate amount of stitches.
If you’re making a square or rectangular basket, cast on double the amount of stitches as your desired width and knit in rows until the bottom is complete. When in doubt, refer to online tutorials or books for more guidance.
By taking the time to consider the parameters of your project ahead of time, you can ensure that your knitting experience is as enjoyable as possible. With a little patience and dedication, you can create beautiful baskets that will last many years.

What Techniques Should You Use to Shape Your Basket as You Knit?
When knitting a basket, there are several techniques that you should use to help shape your project. To begin, you can use a circular cast to create the base of your basket.
This technique will allow you to easily knit in rounds and build a steady foundation for your basket. Another helpful technique for creating your basket is corrugated ribbing. This will help give your basket a sturdier shape and add interest to the design.
Once you’ve finished knitting your basket, you can add texture. You could use techniques like cabling or slip stitching to make the fabric more interesting and create textured patterns on your project. Lastly, if you want to bring color to your basket, you can incorporate intarsia knitting. This will allow you to create more intricate patterns in the fabric and add vibrant pops of color.
How Do You Finish Knitting Your Basket and Keep It Together?
Once you’ve finished knitting your basket, a few final steps help ensure it is held together securely. The first step involves weaving the ends of the yarn into the stitches so that they do not unravel or become loose.
To do this, cut the yarn several inches from where it is attached to your work and thread a tapestry needle with the ends. You can then weave the yarn through any nearby stitches to secure it in place.

The second step is to apply a fabric stiffener, such as starch or sizing glue, to your basket. This will help ensure the basket holds its shape and does not become too floppy over time. To do this, brush or spray the product onto the outside of your basket in even, light layers.
Allow this to dry for several hours before use. Finally, make sure that any loose ends are tucked away safely. You can do this by securely tying these ends with a knot or tucking them into stitches inside the basket.
Are There Any Other Details That Are Important When Knitting a Basket?
Yes, you should keep a few other things in mind before you start knitting. First of all, the type of yarn you choose is important. You’ll want to find one that’s strong, durable, and easy to work with.
Baskets are usually made from natural fibers like cotton or wool to hold their shape better. If you’re planning on using synthetic yarn, make sure it has enough elasticity to keep the basket from stretching too much.
Once you’ve chosen your yarn, think about what size basket you want to knit. If you’re making a large basket, use thicker yarn and bigger needles; if you’re knitting a smaller one, opt for thinner yarn with smaller needles. It’s also a good idea to measure out the size of the basket before you start knitting so you know how much yarn to buy.
Conclusion
In conclusion, knitting a basket is a great way to create something unique and special that you can proudly display in your home. It may seem intimidating initially, but with patience and practice, anyone can learn how to knit a beautiful, sturdy basket.
Whether it’s for yourself or as a thoughtful gift for someone else, there’s nothing quite like the satisfaction of creating something with your own hands. I hope reading this post has helped you learn how to knit a basket. Make sure the safety precautions are carried out in the order listed.