
Are you ready to make your fashionable hobo bag? Making a hobo bag is surprisingly easy, and they make great gifts! All you need are some basic sewing supplies and some fabric.

Hobo bags are a great way to tote your belongings around in style. Whether off to the office or running errands, having a homemade hobo bag can give you the advantage of individualizing your look. Plus, they’re straightforward and inexpensive to make!
In this post, we’ll run through all of the steps necessary for how to make hobo bags. We’ll discuss what materials you need, how to assemble them into a stylish, functional fashion accessory, and other design elements that will help turn heads when you walk down the street with it on your arm. Let’s get started!
What Will You Need?
To make hobo bags, you will need the following materials:
- Fabric: You can use cotton or other lightweight fabrics like felt. The fabric you will need depends on the bag size you want to make.
- Clasp: Choose a clasp that complements your fabric and fits snugly when closed.
- Thread: Make sure to get the thread in a color that matches or complements your fabric.
- Scissors: You need scissors to cut out your pattern pieces.
- Sewing Machine: This is optional, but it makes assembling the hobo bags much easier than hand-sewing them together.
- Pins: Used for pinning pattern pieces together before sewing them together with the machine or by hand
- Ribbon/Cord/Rope: You will need a piece of ribbon or cord to create the strap for your hobo bag.
Once you have all of your materials, it’s time to assemble your hobo bag.
10 Easy Steps on How to Make Hobo Bags
Step 1. Cut Out Your Fabric Pieces:
Take your fabric and fold it in half twice, then cut out the two pieces you need for your bag. You will need one piece for the outside of the bag and another for the lining. The outside piece should be slightly larger than the lining.

Step 2. Sew Together Your Outside Pieces:
With the right sides together, sew around three sides of each outside piece. Leave one side open for turning later on. If you are using a machine, use a straight stitch. If you are hand-sewing, use a running stitch.
Step 3. Sew Together Your Lining Pieces:
Repeat step two with the lining pieces, leaving an opening at the bottom for turning later on as well. You can use a straight stitch or a running stitch here as well. Be careful to stitch the sides together with a neat, even seam.
Step 4. Turn Your Pieces Right Side Out:
Turn both your lining and outer pieces’ right sides out so that your seams are now inside both pieces. As you turn the pieces, use a chopstick or other long thin object to push out the corners gently. Remember also to turn the bottom of your lining piece out.
Step 5. Assemble Your Bag:
Place the lining inside the outer bag, with the right sides facing each other. Pin the top edges together and sew them together using a straight or running stitch. Additionally, you can add a clasp for an extra bit of decoration.
Step 6. Create Your Straps:
Cut two pieces of ribbon, cord, or rope to the length you want your straps to be. Sew the ends of both pieces together so they form a loop. Then sew one end of each strap onto either side of your bag’s top edge. Try to make sure that the straps are even. Otherwise, the bag will not hang correctly.
Step 7. Sew on Your Clasp:
Sew the clasp onto your bag’s front and ensure it is securely attached. This will help keep all your belongings inside safe and sound! You can use a straight stitch or running stitch for this step.

Step 8. Turn Out Bag Again:
Turn the bag right side out and check that all of your seams are straight. If you want, you can topstitch around the entire bag for a more polished look. Keep in mind that this will make the bag slightly stiffer.
Step 9. Add Any Additional Decoration:
This is where you get to make your hobo bag unique! You can add pockets, buttons, embroidery, or any other type of decoration to give it some extra oomph. Get creative and have fun with this step! Always sew on any additional pieces securely so they don’t come off.
Step 10. Enjoy Your New Bag:
You’ve made it! Now you can show off your stylish new hobo bag to everyone. It’s sure to be a hit wherever you go! Remember, if you mess up any of the steps, don’t worry – just start over and go slowly.
By following these easy steps, you can make a hobo bag that is both fashionable and functional. Now you know how to make hobo bags, so get creative and start sewing!
5 Additional Tips and Tricks
- Choose fabrics that are durable and machine washable so that they will last for a long time.
- Use interfacing to give your bag extra structure.
- Make sure to check the tension on your sewing machine before starting to sew, as this can affect how your seams look when assembled together.
- If you want your hobo bag to be reversible, cut out four pieces of fabric instead of two – two for each side.
- use a backstitch instead of a running stitch for extra strength and durability when hand-sewing.
With these steps and tips, you have all the information you need to make your hobo bags! Now get creative with fabric choices and design elements to make a truly unique and individualized piece.

5 Things You Should Avoid
- Don’t use fabrics that are too thick or stiff; they won’t fold and move easily when sewing.
- Avoid using buttons, zippers, or other bulky decorations, as this can add unnecessary bulk to the bag.
- Don’t choose too small clasps – you want something that will stay securely closed.
- Try not to sew over any of your straps or cords, as this can weaken them over time.
- Avoid using a low-quality thread as it may break after a few wears of your hobo bag.
If you remember these tips, you should have no problem making beautiful hobo bags!
Enjoy crafting and styling your unique pieces.
5 Different Style Ideas
- For a fun and funky look, use bright colors and different patterns for the outside and lining of your bag.
- Add pockets to the lining for extra storage space.
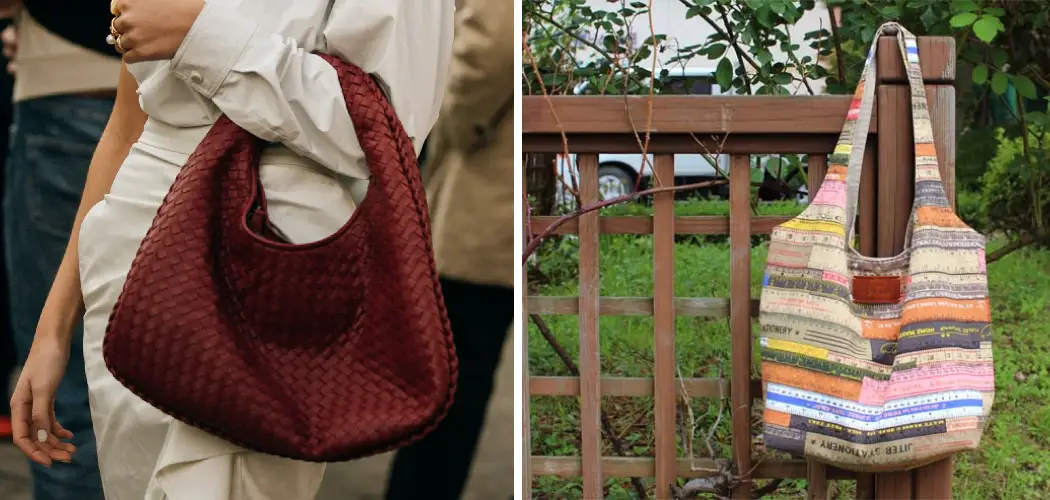
- Create a patchwork-style hobo bag using different fabrics and colors – this will make your bag one of a kind!
- Embellish the outside with buttons, ribbons, or lace for a creative touch.
- Use an upcycled sweater to make a one-of-a-kind bag that is cozy and stylish at the same time!
No matter your style, it’s sure to be unique and eye-catching! These tips and ideas give you all the information you need to make your personalized hobo bags.
Which is the Best Material for Bags?
The best material for bags depends on the type of bag you are making and its intended purpose. For everyday use, canvas is a great choice as it is durable and lightweight.
Leather is also trendy for designer items or when you need something with extra strength. If you’re looking for something more eco-friendly, opt for organic cotton or linen fabrics– they’ll be better for the environment and look good too!

Additionally, synthetic materials such as polyester can be waterproof and low maintenance. Ultimately, the best material will depend on your preference and what kind of bag you’re trying to make.
Now that you know make hobo bags and which material is best to use, go ahead and get started! You can make your stylish bag quickly with a few simple steps and creativity. Have fun crafting, and show off your unique piece to the world.
How Can I Make My Bag More Durable?
To make your bag more durable, use quality materials and double-stitch all the seams.
Additionally, if you use a fabric with a pattern or texture, you should prewash it before beginning construction to avoid any potential shrinkage. You can also reinforce stress points such as straps and handles by adding extra layers of stitching or by using metal grommets.
Add an inner lining to the bag for extra protection against wear and tear. Finally, be sure to use good quality thread appropriate for the weight of your fabric; this will help ensure your bag lasts longer.
With these tips in mind, you’ll have a sturdy and reliable hobo bag that will last many years!
Conclusion
Crafting your hobo bag is an engaging and creative way to accessorize any outfit. Not only can you customize the fabric and strap length, but each design you create is bound to be one-of-a-kind! You can easily whip up a stylish bag with a few simple steps without the hefty price tag.
Whether for yourself or as a gift for someone special, adding this unique touch of handmade flair is sure to be a welcome addition. When walking out the door with your handmade hobo bag, you’ll feel confident knowing that your creativity has made something extraordinary!
The article on how to make hobo bags has given you the knowledge and confidence to get started on your hobo bag. Have fun as you create something unique and stylish! Good luck!