
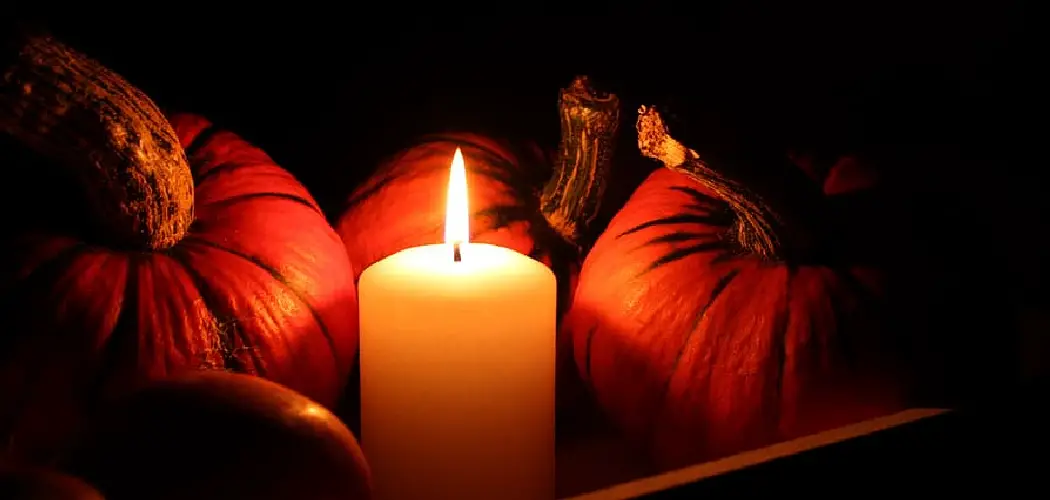
Are you ready to add extra spookiness to your home this Halloween? Who doesn’t love getting creative this time of the year, especially when it comes to decorating for Halloween? After test-driving and perfecting a few different methods, we’re excited to share our go-to steps for creating the best homemade Halloween candles!
With a little bit of planning and these easy steps, you can make your own unique DIY Halloween candles that are both fun and spooky. Whether you’re looking for decorations that feature eerie silhouettes, charming pumpkins, or twisted skulls and spiders – follow along with our tutorial below as we show you how to make Halloween candles worthy of any haunted house.

So grab some supplies, get inspired by our ideas, and start making charmingly sinister decorations everyone will be talking about.
What to Keep in Mind When Making Halloween Candles?
1. Choose the Candle
Before we dive into the steps for making your own Halloween candles, there are a few things to keep in mind first. We recommend choosing the right candle wax and wick size based on the candle’s diameter and length, as well as opting for high-quality safety supplies so you can avoid any accidents. It’s also important to think about the kind of look and ambiance you want to create. Are you going for a spooky atmosphere or something more whimsical?
2. Gather Your Supplies
Now that you know what type of candle you want to make, it’s time to gather all the materials and supplies. You’ll need wax, a wick, dye chips (for color), and a double boiler to melt the wax. Depending on the design you want for your Halloween candles, you may also need some molds or stamps like pumpkins or spiders.
3. Get Creative With Your Designs
Once all your supplies are ready it’s time to get creative with your design. We recommend starting by melting the wax in a double boiler and stirring in your dye chips until you have reached the desired color. Once melted, pour the wax into the mold of your choice and add any additional decorations like creepy spiders or spooky bats.

4. Let It Dry
Let your candle cool completely before removing it from the mold. This is an important step to make sure the design you carefully created holds its shape. If you’re making a larger candle, we recommend adding a wick holder so it stays in place and doesn’t move around while cooling.
You’ve now successfully made your own Halloween candles! These decorations are perfect for creating a spooky atmosphere at home and making sure your night is a hauntingly good one.
Required Items
- Wax- You can use either paraffin wax or beeswax.
- Wicks- Make sure you buy pre-tabbed wicks so that they are easy to insert into the mold.
- Candle Molds- These need to be heat-resistant, as they will come in direct contact with hot wax.
- An Empty Can and Glass Jars- Both are for heating the wax.
- Additives and Fragrances- If you want to add color or scent, these items can help.
- Thermometer- This will help you monitor and maintain a safe temperature for your wax when melting it.
- Pouring Pot or Ladle -This is used for pouring the melted wax into the molds.
- Candle Dye- This is used for adding color to your candles.
- Glue Gun- You can use a hot glue gun to attach your wicks.
10 Easy Steps How to Make Halloween Candles in
Step 1: Gather Supplies
Make sure you have all the required items listed above and set them aside. If you have purchased wicks, make sure they have pre-tabbed ends for easy insertion into the molds.
Step 2: Preparing the Molds

Prepare your candle molds by spraying them with a light coat of non-stick cooking spray. This will help the wax come out more easily after it has solidified. Also, use a hot glue gun to attach the wicks securely to the bottom of each mold.
Step 3: Heating the Wax
Fill an empty can or glass jar with wax and place it in a pot of boiling water. Monitor the temperature using your thermometer and wait until the wax melts completely before removing it from the heat. You can also add dyes and fragrances to the wax at this stage.
Step 4: Pouring the Wax
Once your wax is melted, use a pouring pot or ladle to pour it into your molds. Make sure you fill them up to the desired level and leave some space at the top for adding decorations later. Place the filled molds in a cool place for about 8 hours or until the wax has solidified.
Step 5: Removing the Candles
Once the wax is completely hardened, carefully remove the candles from their molds. You can use a knife to gently break any suction seal that may be holding them in place.
Step 6: Finishing Touches
At this point, you can apply any additional decorations or finishes to your candles. This can include adding a layer of glitter, painting the surface with candle dye, or attaching decorations such as charms and beads to the sides of the candles.

Step 7: Trimming the Wicks
Before lighting your candles, make sure to trim the wicks so that they are no longer than ¼ inch. This will help ensure that your candles burn cleanly and evenly without producing smoke or soot.
Step 8: Testing Your Candles
Light one of your candles and observe how it burns. If it seems too weak, add another layer of wax to increase the size. If it’s too strong, trim the wick a bit more or add another layer of wax to reduce the flame.
Step 9: Storing Your Candles
If you are not using your candles right away, make sure to store them in an airtight container in a cool and dry place. This will help ensure that your candles maintain their quality and fragrance for a longer period of time.
Step 10: Enjoy Your Candles!
Now you are ready to enjoy your homemade Halloween candles! Whether you use them to decorate your home or give them as gifts, these spooky creations will be sure to delight you.
Following these steps will help you create beautiful and unique Halloween candles that you can enjoy year after year. Have fun and be creative with your designs- the possibilities are endless!
8 Maintenance Tips for Halloween Candles
Once you have made your own candles in time for the spooky season, it is important to take care of them correctly. Here are eight maintenance tips that will ensure your homemade Halloween candles provide a safe and enjoyable ambiance all evening long:

- It’s important to trim the wick down to ¼ inch before lighting your candle. This prevents soot and smoke from forming when the wick burns too long.
- Make sure you use a wick trimmer or scissors to cut the wick instead of trying to blow it out once your candle is lit! Not only can this be dangerous, but it can also cause unnecessary stress on your candle.
- Keep your candles away from drafts and sources of air (e.g., fans, air conditioners). Drafts can cause your candle to burn unevenly and create an unsightly flame.
- Always keep a watch on any flames in the house — never leave them unattended! This is especially important with homemade candles because they may not be as stable as store-bought ones.
- Don’t move your candle while it’s lit — if you do, you may end up spilling hot wax on yourself or someone else.
- Make sure to extinguish the candle when it is no longer in use and dispose of the wick properly. Wax can still be re-used if you store it in a cool place away from direct sunlight.
- Keep your candles away from children and pets. You don’t want them to accidentally get burned or hurt when they’re playing around!
- Finally, if the candle starts to drip, don’t despair — just extinguish the flame immediately and wipe up the excess wax with a damp cloth before relighting the candle.
These maintenance tips will ensure that your homemade Halloween candles provide a safe and enjoyable atmosphere throughout the spooky season! Have fun, and stay safe.
Additionally, be sure to use caution when making your own candles! Melted wax can become very hot, so it’s important to keep it away from children and pets at all times. Additionally, you will want to make sure that the area is well-ventilated, as the fumes from melting wax can be hazardous.
Conclusion
What better way to wind down after a night of trick or treating than by relaxing with your own handcrafted Halloween candles? You now have the tools you need to create any spooky, whimsical, or sophisticated candle designs you can imagine. And if you get stuck along the way, don’t forget to refer back to this article for tips and tricks on how to make Halloween candles.
As with any craft project, remember to have fun and find enjoyment in the creative process. With your newfound skills, share your handcrafted candles with family, friends, and neighbors – they’ll be sure to love them! So grab some wax and get ready for a ghoulishly good time; it’s time to let those Halloween candles shine!
You Can Check It Out to Pinata for Halloween