
Looking to add some festive fun to your Halloween celebrations? Making a pinata for Halloween is a fantastic way to engage both kids and adults in a playful and exciting activity. Whether you’re hosting a party or simply want to surprise your family with a unique Halloween tradition, crafting your own pinata is easier than you might think.
In this article, we will guide you through the step-by-step process of how to make a pinata for Halloween. From choosing the right design to constructing and decorating your masterpiece, we’ll provide you with valuable tips and creative ideas.

Get ready to unleash your creativity and create a one-of-a-kind pinata that will be the highlight of your Halloween festivities. Let’s dive into the world of papier-mâché, colorful decorations, and sugary treats, and make this Halloween truly memorable.
Adding Excitement to Halloween: Homemade Piñatas
Creating a homemade piñata is a fun way to add excitement to the Halloween season. Piñatas are an exciting party game that can be customized for any theme or occasion. Creating your own unique piñata allows you to personalize it for your special event and truly make it your own!
Making a piñata does take some time; however, with the right materials and supplies, you can easily create something that will wow all of your guests. Start by deciding what shape and size you want your pinata to be. Then collect newspaper, balloons, tape, string, scissors, glue sticks, tissue paper, markers and other art supplies as needed.
To begin constructing your pinata, blow up the balloon and then tape it in place. Next, cover the entire balloon with strips of newspaper that have been dipped in glue. Allow the first layer to dry before adding another layer. When you are done covering your piñata shell in newspaper, let it dry overnight so that it becomes sturdy enough to hang.
Materials and Supplies Needed for a Halloween Piñata
Making a piñata for Halloween is an exciting way to create a fun and festive decoration. To make sure the project is successful, it’s important to gather the right supplies first. Here are some of the materials and supplies you need to make your own Halloween piñata:
1. Cardboard Boxes
You will need several different cardboard boxes to make the piñata. These can typically be found at craft stores or even dollar stores. The size of the box will depend on how large you want your piñata to be, so consider this before buying one.

2. Crepe Paper
Crepe paper is essential for making a piñata look festive and colorful. You’ll need several different colors in order to create an eye-catching design. Make sure you get enough crepe paper to cover the entire surface of the cardboard box, as well as extra for decorations like fringes and pom-poms.
3. Glue
For most projects, it’s best to use white glue or hot glue guns. These glues are strong enough to hold the cardboard pieces together and keep the crepe paper in place.
4. Scissors
You will need a pair of scissors for cutting out the shapes from cardboard boxes and trimming the crepe paper. Make sure they’re sharp so you can make precise cuts.
5. Tape
Tape is essential for taping down the edges of the cardboard and securing pieces together. Use packing tape or duct tape, depending on how hardy you want your piñata to be.
6. Fillings
Once you have finished making your Halloween piñata, it’s time to fill it with treats! Consider choosing small Halloween-themed candies, such as chocolates or lollipops. You can also add small toys or other trinkets for a fun surprise!
10 Steps How to Make a Pinata for Halloween
Step 1: Gather Materials
Before starting your pinata-making project, gather all the necessary materials. You will need a large balloon, newspaper strips, flour or glue, water, scissors, a bowl, a mixing spoon, colorful tissue paper, crepe paper streamers, string or yarn, and candy or small treats to fill the pinata.
Step 2: Inflate the Balloon
Start by inflating the balloon to the desired size of your pinata. A round or oval shape works well for a classic pinata design. Tie off the balloon securely.

Step 3: Prepare the Papier-Mâché Mixture
In a bowl, mix equal parts flour and water (or use a mixture of glue and water) to create a paste-like consistency. Stir well until there are no lumps.
Step 4: Apply Papier-Mâché Layers
Dip the newspaper strips into the papier-mâché mixture, ensuring they are fully coated. Apply the strips to the balloon, smoothing them out and overlapping to create a sturdy structure. Continue layering until the balloon is completely covered, leaving a small opening near the knot for filling later. Let the papier-mâché dry completely, which may take a day or two.
Step 5: Add Decorative Layers
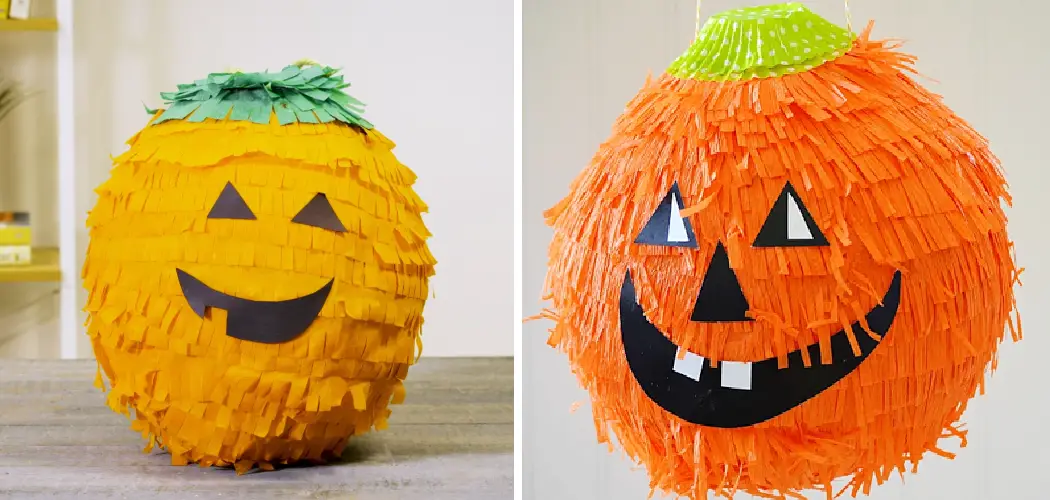
Once the papier-mâché is dry, you can add decorative layers using colorful tissue paper or crepe paper streamers. Cut them into strips or shapes and apply them to the pinata using glue or additional papier-mâché mixture. Get creative with patterns and designs that fit the Halloween theme, such as ghosts, witches, pumpkins, or bats.
Step 6: Reinforce the Hanging Loop
To hang the pinata, reinforce the area near the balloon knot with additional papier-mâché layers. This will ensure that the pinata can hold its weight when filled and hung.
Step 7: Fill the Pinata
Carefully insert candy or small treats into the pinata through the opening left earlier. You can also add small Halloween-themed toys or trinkets for added excitement. Fill the pinata to a reasonable capacity, making sure not to overload it and compromise its structural integrity.
Step 8: Seal the Opening
Once the pinata is filled, close the opening by applying more papier-mâché layers. Make sure it is securely sealed to prevent the treats from falling out prematurely. Allow it to dry thoroughly.
Step 9: Create Hanging Mechanism
Using a sharp object, make two small holes near the top of the pinata. Thread a strong string or yarn through the holes and tie it securely. This will serve as the hanging mechanism for your pinata.

Step 10: Hang and Celebrate
Find a suitable location, such as a sturdy tree branch or a hook, to hang the pinata. Make sure there is enough space for participants to swing at the pinata safely. Gather your Halloween party guests, blindfold the first player, and let the fun begin! Participants take turns trying to break open the pinata with a stick or bat while others cheer them on. Once the pinata breaks, everyone can enjoy the treats that spill out.
Some Common Mistakes When Making Pinyata for Halloween
When making a pinata for Halloween, it is important to be aware of some common mistakes that can occur. One mistake that many people make is not cutting the opening in the right spot.
1. Not Cutting the Opening in the Right Spot:
It is important to cut your pinata at the top or near the bottom, depending on how you will be hanging your pinata. If you cut too far away from the top, it could cause your pinata to break open prematurely or not at all.
2. Not Filling the Pinata Properly:
You should take care to fill your pinata with the correct type and amount of filler, such as candy or small prizes. If you use too much or too little, it could cause your pinata to be too heavy or not sturdy enough to hold up during its use.
3. Not Using Strong Enough Tape:
When wrapping tissue paper around a pinata, make sure you use strong tape that won’t come undone easily and will stay in place when it is being hit by people trying to break it open. It’s also important to avoid using tape that may contain any dangerous chemicals that could be harmful if ingested.
4. Not Attaching the Pinata to a Support Structure:
When you hang your pinata, make sure that it is securely attached to a strong support structure. If it isn’t, it will likely break open too soon or even fall down and injure anyone below.
Making a pinata for Halloween can be fun and exciting, but it’s important to avoid these common mistakes in order to ensure your safety and the safety of those around you. With some care and attention, your pinata should be ready for all the smashing excitement! Enjoy!

Conclusion
Halloween is an exciting time, and creating a pinata for kids or adults can add to the fun. By following these simple steps, you can create a unique and memorable experience for everyone involved. Choose your materials carefully, taking into consideration weather considerations, the strength of decorations, and personalization.
Have fun with colors, patterns, shapes, and sizes for added effect. Most importantly, take plenty of pictures to capture the moment! So why not get creative this year?
With the right supplies on hand, you’ll be ready to make your own memorable pinata that will surely offer hours of laughter and entertainment at your next Halloween gathering. Thanks for reading our blog post on how to make a pinata for halloween! We hope you found it helpful and informative. Happy crocheting!