
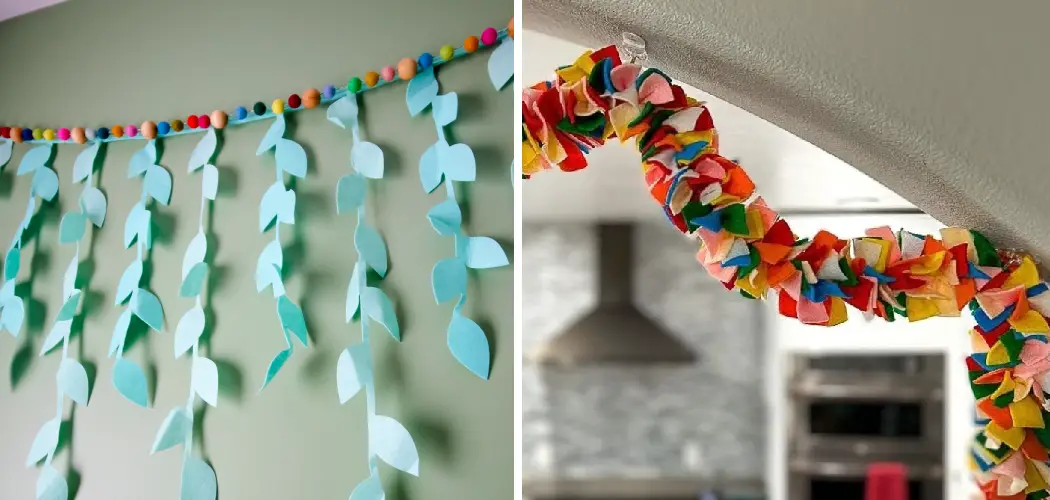
A felt garland is a delightful and versatile decorative piece that adds a touch of whimsy and color to any space. Whether for a special occasion or to adorn your living area, making a felt garland is a creative and enjoyable endeavor. In this comprehensive guide, we’ll take you through the process of how to make felt garland step by step.

From choosing the right colors and patterns to cutting and assembling the felt pieces, you’ll learn the techniques needed to craft a beautiful garland. Whether you’re a crafting novice or a seasoned DIY enthusiast, crafting a felt garland is a rewarding experience that allows you to personalize your decor and celebrate the joy of creativity.
Importance of Crafting Felt Garland
Felt garlands are a popular choice when it comes to decorating homes or events. They add a touch of charm and warmth to any space, making them an essential piece for crafting enthusiasts. But why is felt garland so special? Let’s explore the importance of this versatile craft item.
Versatile Decoration Piece
One of the main reasons why felt garland is so popular is its versatility. It can be used in a variety of ways to add a special touch to any occasion. Whether it’s for Christmas, birthdays, weddings, or even as everyday decor, felt garlands have become a staple in crafting due to their adaptability.
They can be hung on walls, mantels, windows, doorways, or draped around objects such as Christmas trees or picture frames. They can also be made in various shapes and sizes, allowing for endless possibilities and creativity.
Budget-Friendly
Another great aspect of felt garlands is that they are budget-friendly. Felt is a relatively inexpensive material, making it the perfect choice for those on a tight budget. With just a few basic crafting supplies and some creativity, you can create beautiful and unique felt garlands for a fraction of the cost of store-bought decorations.
Customizable
Felt garlands offer endless opportunities for customization. You can choose from a wide range of colors, patterns, and textures to match any theme or style. Furthermore, you can add personal touches such as embroidery, sewing, or applique to make your felt garland truly one-of-a-kind.
Beginner-Friendly
Crafting felt garlands doesn’t require any advanced skills, making it a perfect project for beginners. The process is simple and straightforward, making it an excellent way to introduce someone to the world of crafting. With just a few basic techniques, you can easily create beautiful felt garlands that will impress your friends and family.
Great for Kids

Felt garlands are also great projects to involve kids in. Whether it’s a rainy day or during the holiday season, making felt garlands is a fun and engaging activity that will keep children entertained for hours. It allows them to use their imagination and develop their fine motor skills while creating something they can be proud of.
10 Steps How to Make Felt Garland
1. Gather Supplies:
Before you begin making your felt garland, gather all of the supplies you will need. This includes felt in various colors and sizes, scissors, a needle, and thread, ribbon, and any other decorations or embellishments you would like to use. Having everything you need on hand will make the process smoother and more enjoyable.
2. Cut the Felt:
Once you have all of your supplies ready to go, it’s time to start cutting the felt into strips. You can make your garland as long or as short as you like, so decide on a length before beginning to cut the felt. Cut each strip about 1 inch wide and make sure they are all even in size. You will need about 25-30 strips to make a full garland. Although felt is relatively easy to cut, you may want to use a pair of sharp fabric scissors to help make the process smoother.
3. Stitch the Strips Together:
Once you have all of your strips cut out, it’s time to stitch them together. Take two strips and place them right sides together. Use a needle and thread to sew along one side of the strips until they are securely attached together. Repeat this process until all of the strips are stitched together into one long piece of felt garland. With each stitch, be sure to pull the thread tight so that the strips lay flat and there are no gaps between them.
4. Add Embellishments:
Now that your garland is assembled, it’s time to add some embellishments! You can add buttons, beads, sequins, ribbons, or anything else that you think would look nice on your garland. Sew these items onto the felt using a needle and thread for a secure hold. You can also use fabric glue or a hot glue gun if you don’t want to sew. Play around with different combinations and placements until you are happy with how it looks.
5. Hang Your Garland:

Once all of your embellishments have been added to the felt garland, it’s time to hang it up! Measure out how much ribbon or string you will need for hanging purposes and then attach it securely at either end of the garland with a few stitches from a needle and thread. Make sure to leave enough excess ribbon or string on either end for hanging.
Though the felt garland can be hung as is, you can also add additional accents to your hanging ribbon or string to make it even more festive. Try tying on some small ornaments, pinecones, or other decorations to complement your felt garland and create a cohesive look.
6. Make Tassels:
If desired, you can also add tassels onto each end of your garland for an extra decorative touch! To make tassels, simply cut small pieces of yarn in various lengths (about 6 inches should do). Then tie them together at one end with another piece of yarn before attaching them securely onto either end of the garland with some stitches from a needle and thread. You can also use a hot glue gun for a quicker method. Experiment with different colors and lengths to create a fun and unique look!
7 . Make Pom Poms:
Another fun way to decorate your felt garland is by adding pom poms! Simply wrap colorful yarn around two fingers several times (depending on how big or small you want your pom poms) until it forms a ball shape then tie off with an additional piece of yarn before trimming off any excess pieces with scissors. Attach these pom poms onto either end of the felt garland using some stitches from a needle and thread for an extra decorative touch!
8 . Add Glitter:

For an extra sparkly effect, sprinkle glitter over portions of your felt garland while still on its string or ribbon hanger. To ensure that no glitter falls off, spray lightly over top with hairspray once finished. If you prefer a more subtle look, mix the glitter with clear glue and paint it onto your felt shapes before threading onto the string.
This will give your garland a shiny finish without any mess. To create a cohesive look, choose one or two colors of glitter to use throughout the garland. While glitter may add an extra step to the process, it will make your felt garland stand out and catch the light in a beautiful way. You can also add other embellishments such as sequins or beads for additional texture and shine.
9 . Sew Beads:

Beads are another great way to add texture and color to any craft project – including making felt garlands! Simply take some colorful beads (glass, plastic, wooden etc.) and sew them onto certain parts along the length of the felted material using either embroidery floss or regular sewing thread depending on what type of bead is being used.
This will add a fun and playful touch to your garland, making it truly unique. You can also vary the bead sizes and colors to create different patterns or designs.
10 . Use Paint:
If desired, paint can also be used when making felted decorations such as this one! Simply paint sections along certain parts along its length using fabric paint – just be sure not to let too much seep through onto other parts so that everything looks neat once finished!
Conclusion
Crafting can quickly turn into a fulfilling hobby that you can enjoy for years to come, and making felt garland is one of the most enjoyable activities you can experience. It’s an easy and rewarding project to take on for any beginner, and it’s an inexpensive way to brighten up any room in your home. The beautiful colors paired with the creative possibilities are endless – this could be the start of a lifelong love affair with crafting.
While yarn garlands may seem intimidating, they’re much easier than they look when created with felt! You’ll find that it’s quite fun and satisfying once you understand the technique. With some craft felt, needle and thread or glue gun supplies, create a simple pattern or elaborate sculpture to make festive decorations for your space. Now is the perfect time to get started: why not try making how to make felt garland today?