
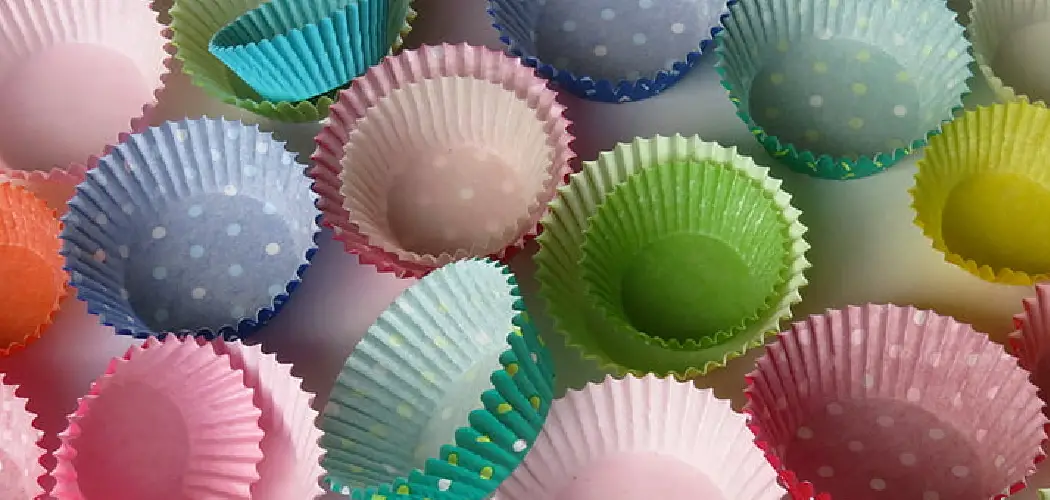
Are you in the mood to get creative? Have you ever wanted to learn how to make your own cupcake wrappers? If so, then we have a treat for you! Today we’ll be giving you step-by-step instructions on how to make cupcake wrappers.
Not only will they look amazing, but making them yourself is also economical and environmentally friendly since it eliminates buying pre-made disposable ones. Plus, if you’re feeling really daring -you can even customize your wrappers with colors or patterns that match the food theme of your event. So grab some supplies and let’s begin!

Necessary Supplies
- Scissors
- Cardstock Paper or Scrapbooking Paper in the Desired Color/pattern
- Pencil
- Ruler or Measuring Tape
- Glue Stick or Tape
10 Simple Step-by-step Guidelines on How to Make Cupcake Wrappers
Step 1: Measure the Cupcake Liner
To start off, measure the diameter of your cupcake liner. This will be used to determine the length and width of your wrapper. It’s important to note that the liner is used as a guide and not an exact measurement. You may need to adjust the measurements slightly based on the size of your cupcake and the liner. But for standard-sized cupcakes, a measurement of 3 inches should work just fine.

Step 2: Choose the Paper
Choose your desired color or pattern for the wrapper. Scrapbooking paper works well as it comes in various designs and is thicker than regular paper, making it sturdy enough to hold up to frosting and toppings. This is also a great way to add a personal touch to your cupcakes for special occasions. You can even use holiday-themed paper for festive events. You can purchase scrapbooking paper at most craft stores or online.
Step 3: Measure and Cut the Paper
Using a ruler or measuring tape, mark the length and width of your wrapper on the paper. For standard-sized cupcakes, you’ll need a 9×2-inch rectangle. Once marked, use scissors to cut the paper along the lines. It’s always better to start with a larger piece of paper and trim it down if needed, rather than cutting it too small in the beginning.
Step 4: Create the Scalloped Edge
To create a decorative edge for your wrapper, use scalloped-edged scissors or any other decorative scissors you have on hand. Carefully cut along one of the longer sides of the rectangle. This will be used as the top edge of your wrapper. Although scalloped edges are popular, you can also experiment with different edging styles.
Step 5: Fold the Rectangle
Fold the rectangle in half lengthwise, creating a crease in the middle. This will be the fold line for the wrapper. However, do not press down too hard as you may need to adjust the size of the wrapper later. It’s best to use a light hand when folding the paper. If you’re unsure, you can always use a pencil to lightly mark the fold line instead. This will make it easier to adjust later on.

Step 6: Measure and Mark the Template
Using your cupcake liner as a guide, place it on top of the folded paper. Then, using a pencil, trace around the bottom half of the liner onto the paper. This will create a semi-circle shape on one half of the paper. Next, add about 1/4 inch to each side of the semi-circle to determine where the cutting line will be. You can use a ruler to help measure this.
Step 7: Cut Along the Marked Lines
Carefully cut along the marked lines, following the semi-circle shape and adding an extra 1/4 inch on each side. This will create a curved edge for your wrapper which will fit nicely around your cupcake. But remember, it’s always better to cut less initially and trim more if needed. This will ensure a perfect fit for your cupcakes. You can also use a pair of small scissors for more precise cutting.
Step 8: Open Up the Wrapper
Gently unfold the wrapper, being careful not to crease or damage it. You should now have a rectangle with a curved edge on one side. If needed, you can make any additional adjustments to the size of the wrapper at this point. It’s better to make any changes now before moving on to the next step. You want to make sure your wrapper fits snugly around the cupcake. This will prevent it from sliding off or being too loose.
Step 9: Create the Overlap
To secure the wrapper around your cupcake, create an overlap by folding in one of the long edges of the rectangle towards the inside of the wrapper. Then, fold the other long edge over top and use a piece of double-sided tape to hold both sides together. You can also use a decorative sticker to secure the overlap, adding an extra touch of flair to your wrapper. It’s important to make sure the overlap is not too tight or too loose, as this can affect the fit of your wrapper on the cupcake.
Step 10: Insert Cupcake and Enjoy!
Now that your wrapper is complete, simply insert your cupcake into it and voila! You have a personalized, homemade cupcake wrapper ready to showcase your delicious creation. Not only is it functional, but it also adds a unique and personal touch to your cupcakes. So go ahead and impress your friends and family with your newfound cupcake wrapper-making skills! And remember, don’t be afraid to experiment with different colors, patterns, and edging styles for endless possibilities.

Following these simple steps on how to make cupcake wrappers, you can easily make your own cupcake wrappers and add a special touch to any event. So next time you’re baking up a batch of cupcakes, why not give it a try? We guarantee your guests will be impressed with your creativity and attention to detail. Happy baking!
Do You Need to Look for Professional Support?
Making cupcake wrappers is a fun and simple DIY project that anyone can do. However, if you’re short on time or don’t feel confident in your crafting skills, there are many professional services available that can create custom cupcake wrappers for you. From printing companies to specialized party supply stores, these options provide a convenient and hassle-free solution for those looking for unique and professionally-made cupcake wrappers. So don’t hesitate to seek out professional support if you need it, and continue enjoying your delicious cupcakes with beautifully designed wrappers.
Frequently Asked Questions
Q: Can I Use Any Type of Paper for My Cupcake Wrappers?
A: While you can technically use any paper for your cupcake wrappers, thicker and sturdier papers such as scrapbooking paper or cardstock paper work best. This ensures that the wrapper will hold up to frosting and toppings without getting soggy or collapsing.
Q: Can I Use Template Designs for My Cupcake Wrappers?
A: Yes, there are many template designs available online that you can use for your cupcake wrappers. These templates provide a guide for cutting and folding the paper, making the process even easier. Just be sure to adjust the size of the template according to your cupcake size.
Q: How Far in Advance Can I Make My Cupcake Wrappers?
A: It’s best to make your cupcake wrappers no more than a day or two in advance. This ensures that the paper stays fresh and doesn’t get any creases or wrinkles from being stored for too long. However, if you need to make them further in advance, be sure to store them flat in an airtight container until ready to use.
Q: Can I Decorate My Cupcake Wrappers?
A: Absolutely! In fact, decorating your cupcake wrappers is part of the fun and creativity of making them. You can use markers, stickers, glitter, or any other craft supplies to add a personal touch to your wrappers. Just be sure not to overdo it so the design doesn’t interfere with the functionality of the wrapper. Happy crafting! So now that you know how to make cupcake wrappers, go ahead and put your skills to the test.

Conclusion
All in all on how to make cupcake wrappers, making cupcake wrappers can be a fun and creative project for adults and children alike. Creating the wrappers yourself is also one way to save time and money. To start your crafting journey, gather the necessary materials and decide on a design. Then get to work cutting out the wrapping paper, gluing it around the cupcakes, and making sure that no sweet treats are exposed! With practice comes perfection, so don’t hesitate to remake them if anything goes wrong.
And finally, enjoy admiring the cupcakes now beautifully presented in handmade wrappers – that you made! So why not create beautiful cupcake wrappers today? After all, homemade craft projects always bring joy to any occasion.