
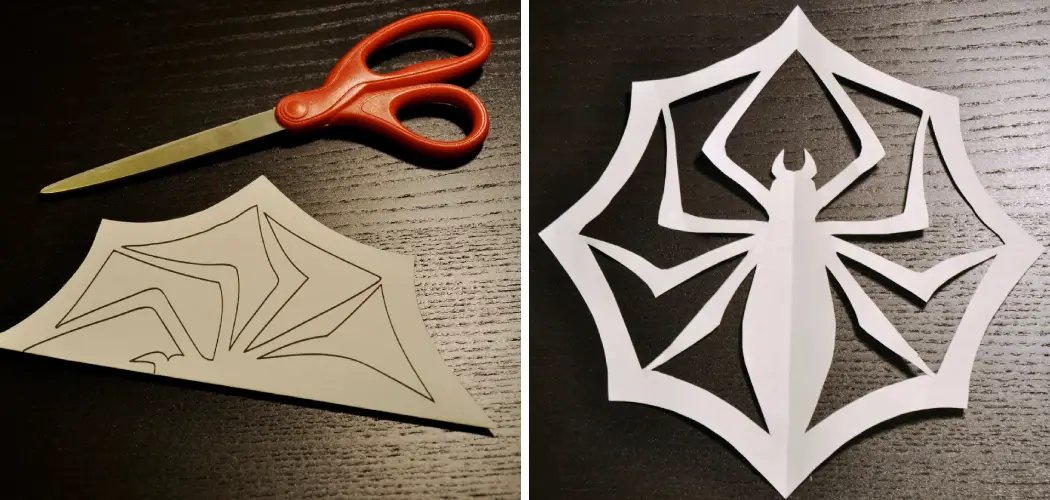
Making a paper spider is an easy and fun craft project that can take just minutes. It requires minimal supplies, and you can customize the look of your creation by using different types of paper or adding features like googly eyes. Not only that, but it’s also a great way to practice your scissors skills! So why not give it a try? Here’s how to make your own paper spider.

One of the biggest advantages of making a spider out of paper and scissors is that it is an easy and inexpensive craft. All you need to make a spider are some colored construction paper, scissors, glue, and markers. Because spiders are usually made with just paper and scissors, they can be enjoyed by people of all ages. Plus, they can be made quickly and easily, no matter how experienced a crafter you are. In this blog post, You will learn in detail how to make a spider out of paper and scissors
Step by Step Processes for How to Make a Spider Out of Paper and Scissors
Step 1: Inspect Your Materials
Gather a piece of black paper, scissors, glue, and a pencil. Draw an oval shape on your paper with your pencil as the basis for your spider’s body. Cut out this shape with the scissors.
Step 2: Cut Out the Spider’s Legs
Cut out eight long strips of paper, each about 1 inch wide. Fold all the strips in half lengthwise and cut along the fold. This will give you 16 thin strips, which will be used to make your spider’s legs.

Step 3: Assemble Your Spider
Use the glue to attach all eight of the strips to the backside of your oval shape. The folded edge should be at the top of each strip and evenly spaced around the edge of your spider’s body. Let this dry before moving on.
Step 4: Cut Out Your Spider’s Head
Draw an elongated oval shape on a separate piece of paper and cut it out with your scissors. Attach this to the front side of your spider’s body using glue and let it dry. Use glue to attach two small circles or dots of white paper for the eyes to the spider’s head.
Step 5: Make Your Spider’s Spinnerets
Cut out two small triangles of black paper and attach them to the underside of your spider’s body. These will be used as spinnerets. Then cut out a piece of black paper and draw two lines down the middle. Fold this in half and attach it to the underside of your spider’s body using glue.
Step 6: Outline Your Spider
Use a pencil or marker to trace around the edges of your spider. This will give it a finished look. Then using a pencil or marker to draw details such as hair and patterns onto your spider. You can also use colored markers if you like.

Safety Tips for How to Make a Spider Out of Paper and Scissors
- Always use sharp scissors when cutting paper. Dull scissors can pressure your fingers and make it difficult to cut the paper precisely.
- Wear safety goggles or glasses to protect your eyes from any minute flying pieces of paper, as well as from the possibility of a broken scissor tip.
- Keep children away from the scissors and be aware of their presence if they are around.
- Cut away from your body to minimize any risk of cutting yourself or anyone else with the scissors.
- Use a ruler to draw straight lines when necessary and evenly cut through paper instead of folding it, which can lead to an uneven outcome.
- Cut slowly and carefully to avoid any accidental paper cuts or tearing of the paper.
- If cutting intricate shapes or patterns, practice drawing them on a separate piece of paper before attempting to cut them out.
- Use dull scissors or a craft knife when cutting intricate shapes or patterns as these tools will be more precise and reduce the risk of injury.
Following these safety tips can help ensure that your paper spider project is completed safely for everyone involved.
How Can You Make Multiple Spiders at the Same Time With One Sheet of Paper?
You must use scissors if you want to make multiple spiders simultaneously with one sheet of paper. Start by cutting a square out of the middle of your paper. Then fold the four corners inwards so that they meet in the center and cut out any excess paper around them. This will give you four triangular pieces of paper.
Next, fold these pieces of paper in half and cut each one so that they’re all the same length. Now take two of the triangular pieces and glue them together on their flat sides to make a spider body. Repeat this process with the other two pieces until you have four spiders total.

Finally, you can add eyes and legs to your spiders with a black marker or other decorations. Practice makes perfect, and soon you’ll be able to create paper spiders that look just like the real thing! Have fun and enjoy your creative craft project.
How Can You Decorate Your Spider After It’s Made?
- After you have made your spider using paper and scissors, it’s time to give it some extra character. You can decorate the spider’s body with googly eyes, sequins, glitter, or even markers.
- Use a black marker to draw on legs and a face for your spider. For instance, you can draw a smile on its face and eight legs extending from its body.
- You can also make your spider look more realistic by adding pipe cleaners or thin strips of paper for the legs so it looks like it is moving.
- For even more fun, you can decorate the webs around the spider with different colors and patterns. You can also give your spider a hat or scarf to make it look even more unique and fun.
- You can also use these items to decorate your spider if you have other art supplies, such as beads, clay, feathers, buttons, or fabric scraps. Get creative and have fun with the decorations.
- Once you’re done decorating your spider, give it a place to hang out in your room or use it as an accessory for Halloween decor.
By following these steps, you can easily create a spider out of paper and scissors and decorate it however you like. Have fun with the process, and enjoy your finished product.
How Long Will It Take Me to Make a Spider Out of Paper and Scissors?
Making a spider out of paper and scissors is a fun and simple craft project. Depending on your skill level or the complexity of your design, it should take less than an hour to complete. To begin, choose either thick cardstock paper or thin construction paper in black, red, or orange (or any other color) for the spider’s body.

Next, measure and cut out eight legs for your spider. Trace around a kitchen utensil (like a spatula or spoon) to get the right shape and size of legs. You can also draw a jagged line down the length of all eight legs with scissors or an X-ACTO knife to give the legs a more realistic look.
How Can You Store the Spiders After They Are Made?
- After making the spider out of paper and scissors, place it on a flat surface that is easy to clean up.
- Place a thin layer of glue around the edges of the spider, paying special attention to ensure that all of the legs remain in place and secure. Allow time for the glue to dry completely before proceeding.
- Once the glue has dried, use clear packing tape to cover the spider and ensure it is secure. The tape will also help protect the spider from any potential damage.
- Carefully store the spider in a Ziploc bag or other airtight container. This will keep it safe and dust-free until it is ready to be used.
- If you plan to display the spider, consider mounting it on a piece of foam core or other stiff backing material before storing it. This will ensure that the spider maintains its shape and won’t get bent out of shape when taken out of storage.
- When using the spider, simply remove it from the bag or container and enjoy. It is sure to be a hit at any Halloween party or a themed event.
Making a spider out of paper and scissors is an inexpensive way to create something fun and creepy for any occasion. Plus, with proper storage, you can keep your spiders looking good for many years to come.
Conclusion
The biggest disadvantage to making a spider out of paper and scissors is that it requires quite a bit of skill. Even if you are an experienced craftsperson, making a realistic-looking spider out of paper and scissors can take some practice. If you’re looking for a spider that will last, you may want to consider using other materials such as felt or foam. Also, the design of the spider may be limited by what can be achieved with paper and scissors. For more complex designs, other materials may need to be used.
In conclusion, making a spider out of paper and scissors is an easy, fun project that anyone can do. With just a few simple supplies – paper, scissors, glue, and markers or crayons for decoration – you can craft your own unique spider. Not only does this project provide a creative outlet for all ages, it’s also a great way to bring the family together in an enjoyable and meaningful activity.
Whether you’re a beginner or an advanced crafter, making a spider out of paper and scissors is a fun project that all can enjoy. I hope reading this post has helped you learn how to make a spider out of paper and scissors. Make sure the safety precautions are carried out in the order listed.
You Can Check It Out to Make a Bee with Paper