
Are you looking for a fun and creative DIY project to add color to your home décor? Try making personalized crayon letters! It’s a simple and affordable way to showcase your creativity and brighten up any space. In this blog post, we will guide you through the step-by-step process of How to Make Crayon Letters.

Can You Make Crayon Letters?
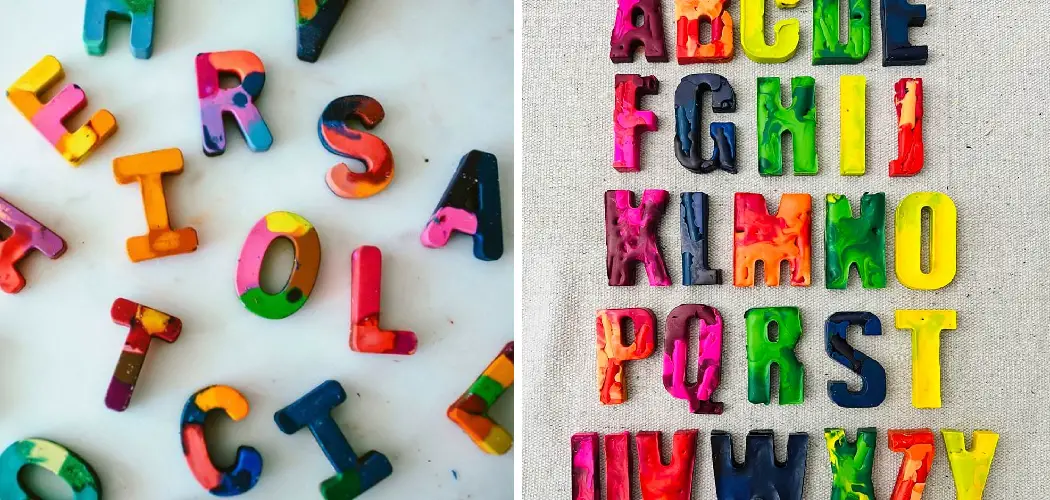
Have you ever wanted to add a pop of color to a project or artwork? One fun way to do this is by using crayon letters! By melting down some of your favorite crayon colors and pouring the liquid wax into silicone letter molds, you can create unique and eye-catching letters perfect for adding personality to any piece.
It’s a great way to get creative and experiment with different color combinations. Plus, the process is simple enough to easily be done at home with just a few materials. So why not try making your own crayon letters and add some extra flair to your next project?
Why Should You Make Crayon Letters?
Crayon letters are a fun and easy way to add personality and charm to any space. By creating your own crayon letters, you can add a pop of color and creativity to your home decor.
Whether you want to spell out your child’s name on their bedroom wall or create a colorful welcome sign for your front porch, crayon letters allow you to showcase your unique style and creativity.
Plus, making crayon letters is a great activity to do with kids or as a relaxing solo project. So why settle for boring, plain letters when you can create vibrant and personalized ones? Give it a try and see the fun and creativity of making your crayon letters!
How to Make Crayon Letters for Your Home Décor
Step 1: Gather Materials
Before you start your crayon letter project, gather all the necessary materials. You’ll need a pencil, crayons, a hot glue gun, cardboard letters, and a hair dryer. You can buy letters from any craft store or make your cardboard letters using cardstock paper. Once you have these items, let’s move on to the next step.

Step 2: Glue Crayons
Now, it’s time to glue the crayons! Choose the colors of your choice and arrange them along the top of each letter. Be sure to use a hot glue gun to keep the crayons in place. Make sure to keep the crayons touching each other to prevent gaps between the colors.
Step 3: Melt the Crayons
After you have glued the crayons, it’s time to melt them. Put the hair dryer on the hottest setting and point it at the crayons. Watch as the colors melt down the sides of the letters, creating a beautiful, unique design. Keep moving the hair dryer around to avoid burning the crayons.
Step 4: Clean Up
After the crayons have melted down the letters, let the letters completely dry and cool off. Once they have cooled down, remove any remaining glue strands and uneven spots with scissors or cutters. You can also use a wet sponge to clean up any bits of crayon that may have fallen.
Step 5: Display Your Crayon Letters
After all the cleanup, it’s time to display your new beautiful artwork! Crayon letters can make a colorful statement in any room. You can hang the letters on your walls or place them on a shelf. These letters are also ideal for kids’ rooms, classrooms, or playrooms as they add a fun and playful feeling to any space.
Step 6: Make More Letters
If you enjoyed making your crayon letters and want to make more, go for it! Feel free to experiment with different colors, sizes, and shapes. There are endless possibilities when creating custom letters out of crayons.
Step 7: Enjoy Your Work!
Now that you have finished your crayon letter project take a step back and appreciate all your hard work. Enjoy the vibrant colors and creative design of your letters! Whether displaying them in your own home or giving them away as a gift, these letters will surely brighten up any space. Congratulations on completing such an impressive project!

That’s it! You’ve now learned how to make crayon letters. With a few supplies and creativity, you can create unique artwork quickly. Get ready to show off your colorful creation!
5 Considerations Things When You Need to Make Crayon Letters
1. Fonts
One of the first things to consider when making crayon letters is the font you will use. Various fonts are available, from classic serif and sans-serif fonts to more modern display fonts. Take the time to research each font and determine which one best suits your project. Additionally, make sure that the font you choose is legible when written in crayon.
2. Colors
Another important consideration when making crayon letters is the colors that you will use. You can choose a single color or mix multiple colors for a unique look. Consider the effect you want to create with your letters and choose colors accordingly. Additionally, ensure that the colors you select are bright enough to be easily seen on paper or other surfaces.
3. Size
The size of your crayon letters is also an important factor to consider before beginning your project. If you’re creating large letters for a sign or poster, make sure they’re big enough to be easily seen from a distance. Conversely, if you’re creating small letters for a card or invitation, make sure they’re small enough to fit on the page without looking crowded or cluttered.

4. Letter Spacing
When writing with crayons, it’s important to pay attention to letter spacing, size, and font selection. Ensure there is enough space between each letter so they don’t run together or look cluttered when viewed from a distance. Additionally, pay attention to how close together certain combinations of letters may look when written in crayon (e.g., “th” or “oo”).
5. Surface
Finally, consider the surface on which you will write your crayon letters before beginning your project. Different surfaces require different techniques and materials; for example, if you are writing on wood, you may need special markers designed for use on wood surfaces rather than regular crayons or markers.
Additionally, some surfaces may require special adhesives for your crayon designs to stay put once completed. Take the time to research the best materials and techniques for your chosen surface before starting your project.
With these considerations in mind, you’ll be ready to easily create beautiful crayon letters! Have fun experimenting with different fonts, colors, sizes, letter spacing, and surfaces to create a unique design that fits your desired aesthetic.
5 Benefits of Making Crayon Letters
1. Fun and Creative Activity
Making crayon letters is a fun and creative activity for children of all ages. This activity encourages kids to use their imaginations as they create colorful words and designs.
It also helps them practice their fine motor skills as they learn to hold the crayons and make shapes with them. Additionally, making crayon letters is an excellent way for kids to express themselves creatively while learning about the alphabet.
2. Affordable
Making crayon letters is affordable as it only requires a few basic materials such as paper, wax crayons, and an oven or hot plate. These items can be found at most local stores for a reasonable price, making this activity accessible to all families regardless of their budget.
3. Easy Clean Up
Another great benefit of making crayon letters is that it’s easy to clean up afterward. All you need to do is put the used wax paper in the trash or recycling bin and wipe down any surfaces that may have gotten messy during the process. This makes it ideal for parents who don’t want to spend much time cleaning up after their children’s activities.
4. Lasting Memories
Making crayon letters also creates lasting memories for parents and children alike as they can look back on the artwork created together fondly for years to come. The artwork created through this activity can also act as a keepsake that can be shared with family members or friends to commemorate special occasions such as birthdays or holidays.

5 Educational Tool
Finally, making crayon letters can also be an educational tool for young children just starting out with learning the alphabet and other basic concepts related to reading and writing. By having them trace over each letter with different colored waxes, they will become more familiar with how each letter looks, which will help them when they start learning how to read and write properly later on in life.
So, if you’re looking for a fun and educational activity with your children, making crayon letters is worth considering! Not only will it be enjoyable for everyone involved, but it can also help young kids creatively develop their literacy skills. Considering these five benefits, there’s no reason not to try it!
Conclusion
Creating your crayon letters is an easy and fun DIY project that can add color to your home décor. Following these simple steps, you can craft your own custom artwork. Get creative with colors and designs and have fun while doing so. Thanks for reading our post about how to make crayon letters, and happy crafting!