
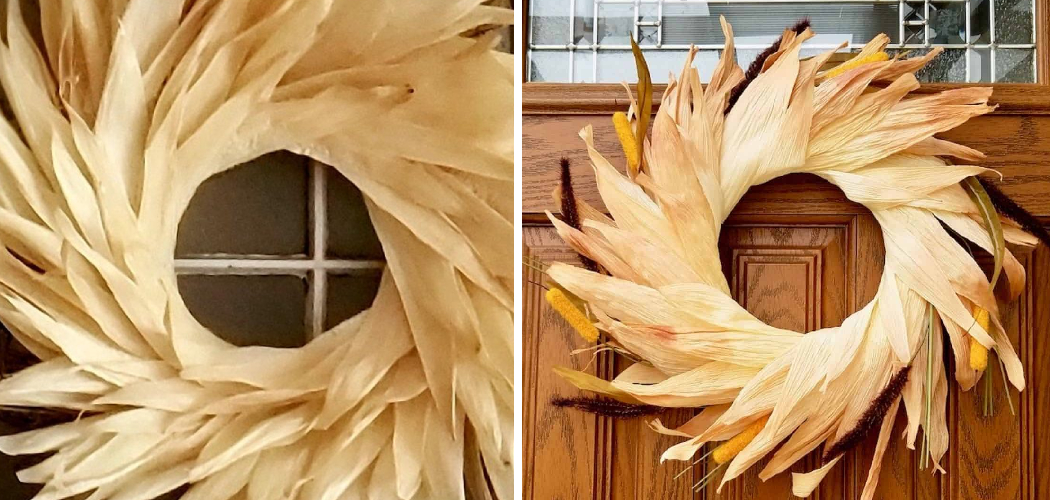
Are you looking for a way to add a unique touch of rustic charm to your décor? If so, have you ever thought of making a corn husk wreath? These natural materials’ distinct look and texture can make any space feel warm and inviting. Not only are corn husks beautiful, but they are also surprisingly easy to work with. With just some basic crafting supplies, you can create stunning corn husk wreaths in no time.
Whether you’re a beginner or an experienced crafter, making a corn husk wreath is a fun and easy DIY project. To get started, take a look at this step-by-step guide on how to make corn husk wreath.

In this blog post, we’ll explore creating your gorgeous piece of rustic decor using dried and bleached corn husks. So, let’s go ahead and get started!
What Will You Need?
- Corn husks, either bleached or unbleached
- A wreath form
- Hot glue gun and sticks
- Scissors
- Ribbon (optional)
Once you’ve gathered all of your supplies, it’s time to start crafting.
8 Easy Steps on How to Make Corn Husk Wreath
Step 1: Preparing the Corn Husks
Take a few minutes to separate the corn husks, removing any leaves or stems that may be attached. Once they are clean and ready to go, you can begin working on assembling your wreath. Ensure that each husk is completely dry before you start.
Step 2: Attaching the Husks to the Wreath Form
Using hot glue, attach the husks in a circular pattern around the wreath form. Make sure to overlap each piece slightly as you go. Glue down one end of each husk and then wrap it all around the wreath form until it is in a complete circle.
Step 3: Adding Additional Layers
Once you’ve finished wrapping the first layer of husks, you can begin adding additional layers for texture and depth. Glue down each layer, slightly overlapping the last one to build up your wreath. You can use as many or as few layers as you wish to create your desired look.

Step 4: Trimming and Shaping
After you have added all the layers you want, take a pair of sharp scissors and trim the corn husks to your desired shape and size. You can opt for a uniform circular shape or go for an uneven, organic look – it’s all up to your personal preference!
Be careful to cut only a little at once, as you can always trim more if necessary, but you can’t add it back once it’s gone. Your corn husk wreath is almost complete once you are satisfied with the shape.
Step 5: Adding the Final Touches
Now it’s time to give your corn husk wreath a finishing touch. If you want to add a bit of color or festive spirit to your wreath, now is the time to do it. This could involve painting some of the husks, attaching faux flowers, autumn leaves, or small pieces of rope for a rustic look.
You can also use a ribbon to make a bow and glue it to the top or bottom of your wreath. Remember, the goal is to enhance the natural beauty of the corn husks, not overshadow it.
Step 6: Securing the Wreath
After adding the final touches, make sure all elements of your wreath are securely attached. You don’t want any corn husks or decorations falling off. Use your hot glue gun to reinforce any loose or unstable areas. Take a moment to review your work, ensuring that the wreath looks balanced and each element is in place.
Step 7: Displaying Your Corn Husk Wreath
Now, your corn husk wreath is ready to be displayed! Choose a spot in your home where it can be admired, such as your front door, on a wall, or over a mantle. If you’re hanging it on a door, be sure to use a sturdy hook or wreath hanger. Enjoy the rustic charm it adds to your home decor, and take pride in the fact that you crafted it yourself!

Step 8: Maintaining Your Corn Husk Wreath
Despite being made of natural materials, your corn husk wreath can last for a long time with proper care. Keep it away from direct sunlight and extreme elements to prevent color fading and damage. If the wreath gets dusty over time, gently blow on it with a hairdryer on the cool setting to remove the dust.
And if any husks become loose or fall off, simply glue them back into place. With these simple maintenance steps, you can ensure your rustic corn husk wreath remains a cherished part of your decor for seasons to come.
By following these easy steps, you can create a beautiful corn husk wreath to add an unforgettable touch of rustic charm to your home. Whether you’re looking for a DIY project or simply want to spruce up your décor with natural materials, this craft won’t disappoint you. So go ahead and get crafting!
5 Additional Tips and Tricks
- If you’re having trouble getting the husks to stay in place, consider using a hot glue gun. The heat of the glue will help secure them and ensure your wreath looks nice and neat.
- To add some extra texture and interest to your wreath, try interweaving different colored husks into it! This is especially helpful when creating multi-colored wreaths.
- If you’re using natural husks, soak them in water for a few hours before beginning your project. This will help make them more pliable and easier to use when crafting your wreath.
- To add even more dimension, consider adding dried flowers or leaves around the perimeter of the wreath. This will help give it a more rustic, natural look.
- Finally, adding a coat of varnish to your wreath will help keep it vibrant and beautiful for years! This is especially important if you use natural husks that may fade over time.
With these tips, crafting the perfect corn husk wreath is simple and fun. Get creative with your design, and you’ll have a nicely decorated wreath in no time!

5 Things You Should Avoid
- Don’t use materials that have been treated with chemicals or pesticides. This will not only make your wreath look less attractive but also be hazardous to you and your family’s health.
- Avoid using too dry husks; this can make them more brittle and difficult to work with.
- Don’t pull the husks too tightly when crafting a wreath, or they may break.
- Avoid using glue guns on colored husks, as this can cause the colors to bleed and distort your design.
- Finally, feel free to leave your wreath out in the rain or direct sunlight for extended periods of time. This can cause the husks to fade and become discolored, ruining your wreath.
Avoiding these pitfalls will help ensure that your wreath looks beautiful and lasts for years to come! With patience and creativity, you can craft an amazing corn husk wreath that everyone will admire.
5 Different Style Ideas
- Festive Fall: Combine your corn husks with autumnal elements like pine cones, acorns, and faux berries to create a wreath that embodies the spirit of fall. You can even paint some husks in shades of red, orange, and gold for added vibrancy.
- Rustic Farmhouse: Incorporate elements such as cotton bolls, dried wheat, and burlap ribbon to create a wreath that exudes a rustic, country vibe. This style would perfectly complement a farmhouse or cottage aesthetic.
- Minimalist Chic: Stick to a monochromatic color scheme for a simple yet elegant wreath. You can bleach the corn husks for a white, minimalist look and add a simple satin ribbon for elegance.
- Holiday-Themed: Paint a few corn husks in red and green for a Christmas-themed wreath. Add small ornaments, jingle bells, or a big red bow for a festive touch.
- Floral Decadence: For a spring-inspired wreath, consider affixing faux flowers amidst the corn husks. Pastel hues would create a soft, welcoming vibe, perfect as a front door decoration in the springtime.

With these style ideas, you can customize your corn husk wreath to suit any occasion, season, or decor style. Remember, the best part of crafting is putting your personal touch on your creation, so don’t be afraid to experiment and make it your own!
Conclusion
Making a corn husk wreath is a fun and creative way to decorate your home for the fall season. You can create a stunning, homemade corn husk wreath with minimal supplies and effort. You can customize it with different colors and textures of corn husks that represent your style. The beauty of this craft is that it’s one-of-a-kind and can be tailored according to individual taste.
Remember – get creative and have fun! Whether brightening up your front door or producing an unexpected centerpiece on a dining table, a Corn Husk Wreath adds charm to any room in your home.
Hopefully, the article on how to make corn husk wreath has been informative and gave you the confidence to craft your own. So what are you waiting for? Get inspired and create something special! Enjoy!