Looking to get creative this holiday season? Try making a cone Christmas tree! This festive decoration is easy and fun to make, plus you can customize it with whatever colors or decorations you’d like. With just a few basic supplies, some imagination, and our step-by-step guide on how to make cone christmas trees, your home will be looking merry and bright in no time. So put on your Santa hat and let’s get crafty!
What is Cone Christmas Tree?
A cone Christmas tree is a fun and festive decoration that can be used to adorn your home during the holiday season. Instead of the traditional tree, cone trees are made out of construction or poster paper and shaped like a cone. The cone is then decorated with lights, ribbon, ornaments, and other festive embellishments.

What You’ll Need
- Construction or Poster Paper
- Scissors
- Glue Gun
- Ribbon, String, or Twine
- Lights and Other Decorations of Your Choice
11 Step-by-step Instructions on How to Make Cone Christmas Trees
Step 1: Cut the Paper
Take the construction or poster paper and cut it into a rectangle that’s about twice as long as it is wide. The exact measurements don’t have to be exact. It’s up to you how big you’d like your tree to be. It also doesn’t have to be a perfect rectangle.
But try to make your cuts as straight and even as you can. This will help create a better-looking tree. It’s also helpful to use a ruler for straight lines. It’s important to have two pieces of the same size.
Step 2: Form the Cone
Fold the paper in half, then roll it up to form the cone shape. You should try rolling it at an angle so that one end is slightly larger than the other. Tape or glue the edges together as necessary. If you’re having trouble getting the shape right, trim off a little of the excess paper.
You want the cone to have a nice, even shape. This will create a better-looking tree. Although it’s ok if it doesn’t look perfect. It will still be beautiful when decorated! This step can be a bit tricky, so take your time.
Step 3: Secure the Cone
Secure your cone with either tape or hot glue along both of its sides and bottom edge. This will help keep it from unraveling when you are decorating it later on. But be careful when using the hot glue gun. It can cause burns if you’re not careful.
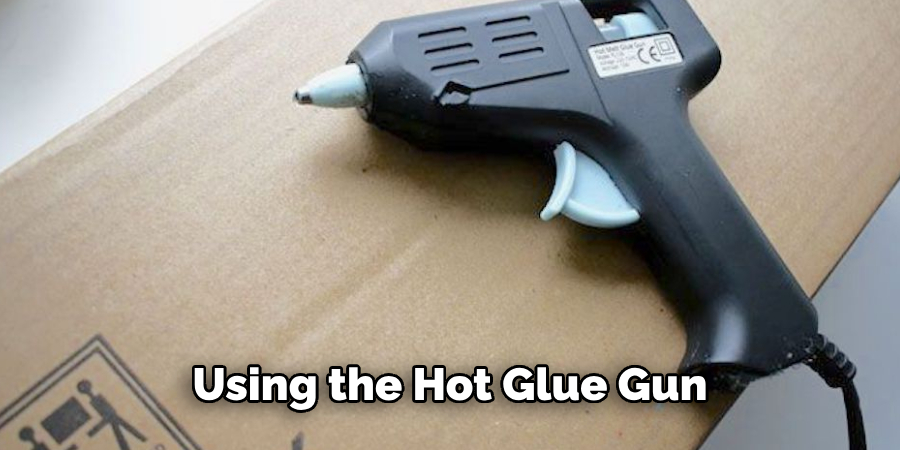
It’s also a good idea to put something underneath the cone like cardboard or newspaper. This will help protect your work surface and make cleanup easier too. It’s also a good idea to let the glue dry completely before moving on to the next step. But don’t worry if it’s not perfect. You can always touch up the glue later on.
Step 4: Add Lights (Optional)
If desired, you can add lights to your cone by carefully running a string of LED lights around the outside of it and securing them with hot glue. Make sure to be careful when working with the hot glue so that you don’t burn yourself or damage the paper.
If you’re using battery-powered lights, make sure they are off before you secure them onto the cone. This will help prevent them from shorting out. It’s also a good idea to test the lights first just to make sure they are all working.
Step 5: Cover with Ribbon (Optional)
If desired, you can also cover your cone with ribbon for extra sparkle and pizzazz. You can attach the ribbon either by using hot glue or a string of twine. It’s also a good idea to make sure the ribbon is secured firmly so it doesn’t come off when you are hanging up your tree.
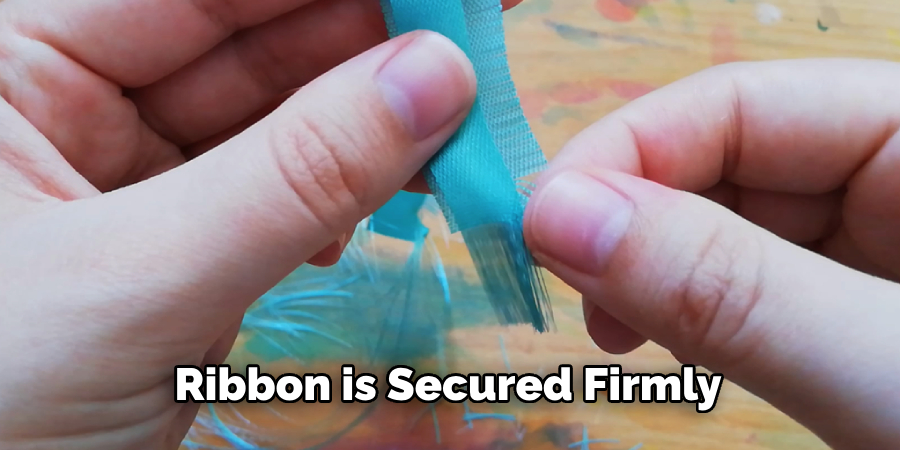
Again, be careful when working with the hot glue. This will help prevent any accidents or burns. It’s also a good idea to let the glue dry completely before moving on.
Step 6: Add Ornaments (Optional)
Add ornaments to your tree by either hanging them off of strings of twine or gluing them directly onto the surface of the cone. If you are using hot glue, make sure to be careful not to burn yourself or scorch the paper. But don’t worry if it doesn’t look perfect.
The imperfections will add to the charm of your handmade creation. It’s also a good idea to let the glue dry completely before moving on. But don’t worry if it’s not perfect. You can always touch up the glue later on. This will help prevent any accidents or burns.
Step 7: Hang Up Your Tree
Once you’re finished decorating your tree, hang it up in a prominent place. You can use either tape or a length of string to do this. It’s also a good idea to make sure the tree is securely fastened so it doesn’t fall over or come undone. Take extra care when doing this so that you don’t damage the tree or the wall.
But don’t worry if it doesn’t look perfect. The imperfections will add to the charm of your handmade creation. However, it’s important to remember that these are handmade and should be treated with care.
Step 8: Add More Decorations (Optional)
If desired, you can add more decorations like tinsel, garland, ornaments, and other festive items to make your cone tree even more eye-catching. It’s up to you how much you want to add, but it’s important to remember that these are handmade and should be treated with care.

This will help prevent any accidents or damage. But don’t worry if it’s not perfect. The imperfections will add to the charm of your handmade creation. It’s also a good idea to let the glue dry completely before moving on.
Step 9: Enjoy the Festive Atmosphere
Once you’ve hung your cone Christmas tree, sit back and admire your handiwork! Your home will be looking merry and bright in no time. This is a great way to get into the holiday spirit and add a special touch to your home decor. It’s also a great opportunity to involve the whole family in the decorating process.
If you have kids, they’ll love helping out and getting creative. You can also enjoy the festive atmosphere with friends and family when they come over to visit.
Step 10: Take Pictures (optional)
If desired, take pictures of your beautiful cone Christmas trees and share them with friends and family! However, it’s important to remember that these are handmade and should be treated with care. This will help prevent any accidents or damage.
Enjoy the festive atmosphere and show off your handiwork with pride! This is a great way to get into the holiday spirit. You can also use the pictures to make holiday cards or decorations for the home.
Step 11: Store Away for Next Year
After you’ve enjoyed your cone Christmas trees, store them away so that you can use them again next year. With proper storage, they should last for many years to come.
Always make sure to wrap them securely in tissue paper or bubble wrap and store them in a cool, dry place. This will help keep them safe until you’re ready to take them out again for the holidays. It’s also a good idea to add a few drops of lavender oil or other essential oils to help keep them smelling fresh.

And there it is! Now you know how to make cone Christmas trees – just follow the steps in this guide and soon your home will be looking merry and bright this holiday season. Have fun crafting!
Happy holidays!
Do You Need to Hire a Professional?
No, you don’t need to hire a professional to make a cone Christmas tree. With the supplies listed in this guide, you should be able to complete your project with relative ease. That being said, if at any time you feel like you need help or guidance, it never hurts to ask a professional for assistance. You can also find helpful videos online that will walk you through the steps of making your cone Christmas tree.
How Much Will It Cost?
The cost of making a cone Christmas tree will depend on the supplies you use. Generally speaking, however, it should not be too expensive – all you need is construction or poster paper, scissors, glue gun, ribbon/string/twine, lights and other decorations of your choice.
Now you have everything you need to make a cone Christmas tree! Get creative with your decorations and soon enough your home will be looking merry and bright this holiday season. Have fun crafting!
Frequently Asked Questions
Q: Can I Make Multiple Cone Christmas Trees?
A: Yes, you can make as many cone Christmas trees as you want! Just follow the steps in this guide and you can make multiple cone Christmas trees with ease.
Q: Can I Hang My Tree Outdoors?
A: Yes, you can hang your cone Christmas tree outdoors as long as it is properly secured and the weather conditions are suitable. This will help ensure that your tree stays in one piece and looks great all season long.

Q: What Other Materials Can I Use to Make a Cone Christmas Tree?
A: You can use other materials such as foam core board or cardboard to make a cone Christmas tree. Just make sure that the material is sturdy enough to withstand any potential wind, rain, or snow.
Q: How Should I Store My Cone Christmas Tree Once I’m Done Using It?
A: You should store your cone Christmas tree in a dry, cool place. Make sure to wrap it tightly in plastic or bubble wrap to protect it from dust and other elements.
We hope this guide has provided you with all the information you need to know about how to make cone Christmas trees! Get creative with your decorations and soon enough your home will be looking merry and bright during the holiday season. Happy crafting!
Conclusion
Making these cone Christmas trees is an easy, fun and eye-catching decoration that can be enjoyed by young and old alike. With a little creativity and some necessary materials, you can easily create a stunning piece from the comfort of your own home. They offer plenty of room for customizing it according to your needs, so don’t be afraid to let your creative side come out during this season!
Once you’ve created your cone Christmas tree, you can use a blink sync module to connect it to wifi, making sure that the lights automatically turn on and off for added convenience. Don’t forget that blinking lights are also separate from connected lights when it comes to connecting them – so make sure to read up about that before jumping in.
Your DIY cone Christmas tree will add sparkle this holiday season no matter how you choose to customize it. So what are you waiting for? Let’s get started! Thanks for reading this article on how to make cone christmas trees.

