
Cardboard, often considered a humble and utilitarian material, can be magically transformed into a stunning faux wood finish that rivals the beauty of natural timber. Whether you’re looking to enhance the aesthetics of a DIY project, create rustic home decor, or craft wooden props for theater or film, mastering the art of making cardboard look like wood opens up a realm of creative possibilities.
Through a combination of simple techniques, artistic skill, and a touch of imagination, you can achieve the warm, earthy tones and distinctive grain patterns of various wood types on cardboard surfaces.

In this comprehensive guide, we will explore step-by-step methods of how to make cardboard look like wood, allowing you to elevate your crafting to new heights of realism and artistic excellence. So, let’s delve into this transformative process and discover the joy of turning ordinary cardboard into a convincing and captivating wooden masterpiece.
Benefits of Cardboard Wood Simulation
One of the greatest benefits of making cardboard look like wood is that it doesn’t require any expensive materials. All you need to get started is some cardboard, paint, and glue. This makes it suitable for a wide variety of projects, from creating DIY furniture and decorations to props for theatrical productions.
Additionally, due to its lightweight properties, cardboard can be easily cut, manipulated, and transformed into whatever shape you desire.
Another great advantage of using cardboard is that it’s a sustainable resource. As the demand for recycled paper products continues to increase, so do the creative projects people are coming up with. You can even use old cereal boxes or other discarded materials!
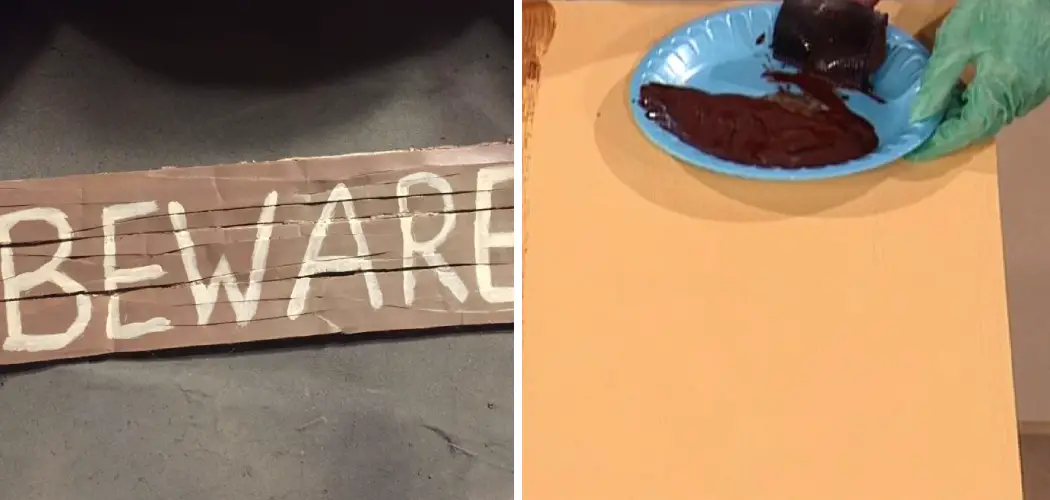
Materials You’ll Need
Before diving into the elaborate methods, ensure you have the following materials at hand to bring your faux wood vision to life:
- Sturdy Cardboard: Select cardboard with a smooth surface and adequate thickness for the best results.
- Craft Knife or Scissors: Use these tools for cutting and shaping the cardboard as needed.
- Sandpaper: Smooth the surface of the cardboard to eliminate rough edges and create texture.
- Acrylic Paint: Choose paint colors that closely resemble the wood species you wish to imitate.
- Paintbrushes: A variety of brush sizes will enable different painting techniques.
- Water and Palette: Use these to mix and dilute paint for blending and shading.
- Sponges: Create natural woodgrain patterns with the use of sponges.
- Woodgraining Tool or Toothpick: Add fine details and grain patterns for a more realistic finish.
- Wood Stains (optional): Introduce additional depth and richness in color, if desired.
- Varnish or Sealer: Protect and enhance the finish of your faux wood creation.

10 Methods How to Make Cardboard Look like Wood
Method 1: Preparing the Cardboard Surface
Begin your faux wood transformation by ensuring the cardboard surface is clean and free of any debris. Use a sandpaper to smooth the surface, eliminating rough areas and imperfections. This step creates a clean canvas, ensuring the paint adheres evenly and enhances the final appearance of your faux wood.
Method 2: Choosing the Wood Grain Pattern
A crucial aspect of achieving a convincing faux wood finish is selecting the appropriate wood grain pattern. Study real wood samples or images of various wood species to understand their distinct characteristics. Consider factors such as grain direction, knots, and color variations. This research will guide your painting process, lending authenticity to the final result.
Method 3: Base Coat Application
Start by applying a base coat of acrylic paint in the primary color of your chosen wood species. Use a paintbrush or sponge to achieve a smooth and even coverage. The base coat forms the foundation for your faux wood finish and determines the overall hue of the final result.
Method 4: Adding Wood Grain Texture
To create the appearance of wood grain on your cardboard, apply a second coat of acrylic paint using a dry brush or sponge. Choose a slightly darker or lighter shade than the base coat to imitate the natural variations in wood grain. Stroke the brush or sponge in the direction of the wood grain, replicating its texture.
Method 5: Woodgraining Tool or Toothpick Detailing
Enhance the realism of your faux wood finish by adding intricate details and finer grain lines. Dip a woodgraining tool or a toothpick into a darker shade of paint and carefully drag it along the surface of the cardboard, following the direction of the wood grain. This step adds depth and authenticity to the finish.

Method 6: Blending and Feathering
Achieve a natural look by blending and feathering the paint layers. Use a clean, dry brush or sponge to lightly blend the colors, creating seamless transitions between the base coat and the wood grain layers. This technique softens the appearance of the grain and adds depth to your faux wood finish.
Method 7: Introducing Knots and Knot Holes
To replicate the appearance of knots and knot holes found in real wood, use a smaller brush or a toothpick dipped in a dark paint shade. Carefully apply circular or irregular shapes on the cardboard to mimic these natural wood features. This step adds character and realism to your faux wood creation.
Method 8: Wood Staining (Optional)
For an even more authentic look, consider using wood stains in addition to acrylic paint. Apply the wood stain over the painted surface to add depth and richness to your faux wood finish. Allow the stain to dry thoroughly before proceeding to the next steps.
Method 9: Varnish or Seal the Finish
To protect and enhance the final appearance of your faux wood creation, apply a clear varnish or sealer. This step adds a polished finish, protecting the paint and enhancing the colors of your faux wood.
Method 10: Adding Character with Distressing (Optional)
If you desire an aged or weathered appearance, consider distressing your faux wood finish. Use sandpaper or a craft knife to gently scrape the surface, creating worn areas and exposing the base color. This technique adds character and charm to your faux wood creation, making it even more captivating.
Things to Consider When Making Cardboard Look like Wood
When trying to make cardboard look like wood, there are a few things to consider before starting the project. First and foremost, it’s important to understand what kind of paint or finish is needed in order to achieve the desired effect. Depending on the type of cardboard used, you will need different types of paints such as water-based, oil-based, enamel, and so on.

Another important factor to consider is the amount of detailing that will be done in order to make the cardboard look like wood. Depending on what kind of look you’re going for, you may need various tools such as sandpaper, drill bits, saws, chisels, etc. Lastly, it’s essential to determine how much time and preparation you can dedicate to the project.
All in all, making cardboard look like wood can be a fun and rewarding project that when done correctly looks very realistic. For best results, make sure to choose the right paint or finish for your type of cardboard and do plenty of research on the techniques needed for creating a wooden-like aesthetic.
With enough patience and practice, you can turn any plain piece of cardboard into a beautiful wooden masterpiece!
Some Common Mistakes to Avoid When making Cardboard Like Wood
When attempting to make cardboard look like wood, there are a few common mistakes people tend to make. Knowing what these pitfalls are can help you avoid them and get the perfect results for your project.
First, be sure to use the right type of primer on your cardboard. Using an oil-based primer will give you the best results as it will better mimic the grain and texture of real wood.
Second, take your time sanding down any rough edges. Making sure that all of the cardboard pieces have smooth surfaces will greatly improve the appearance once you are done painting them.
Third, be careful not to paint too thickly or else it can look heavy and unnatural. Instead, try using multiple light coats and build up the color slowly.
Finally, don’t forget to seal your project when you are done. This will prevent dirt, moisture, and other environmental debris from damaging your cardboard wood look-alike.

By following these simple tips and taking your time with the process, you can easily make cardboard look like real wood! Good luck!
Conclusion
Cardboard is an incredibly versatile material that can be used in many creative and resourceful ways. With a bit of painting and staining, you can make it look like wood, giving more of a polished and finished look for any project. Whether you’re creating a home decoration or props for a play, making cardboard look like wood is definitely a useful skill to learn.
Start experimenting with the techniques suggested here and see if they work best for your projects! And don’t forget to share the results – we’d love to see how you made cardboard look like wood! So, there you have it – a quick and easy guide on how to make cardboard look like wood.