
Are you looking for a creative, unique way to add some personal flair to your backyard or garden? What about making a tree gnome?! Gnomes have been around for centuries, often seen in gardens as playful little statues wearing tall pointed hats and big beards. Making one of these traditional symbols yourself will not only be an engaging project but it is also sure to bring life and character to your space!

In this blog post on how to make a tree gnome, we’ll take you step-by-step through the process of creating your very own tree gnome. We’ll cover everything from assembling the materials needed and crafting the body parts, all the way up through adding his defining features like that iconic hat and whimsical smile! So if you’re ready to venture into gnome territory with us, let’s get started!
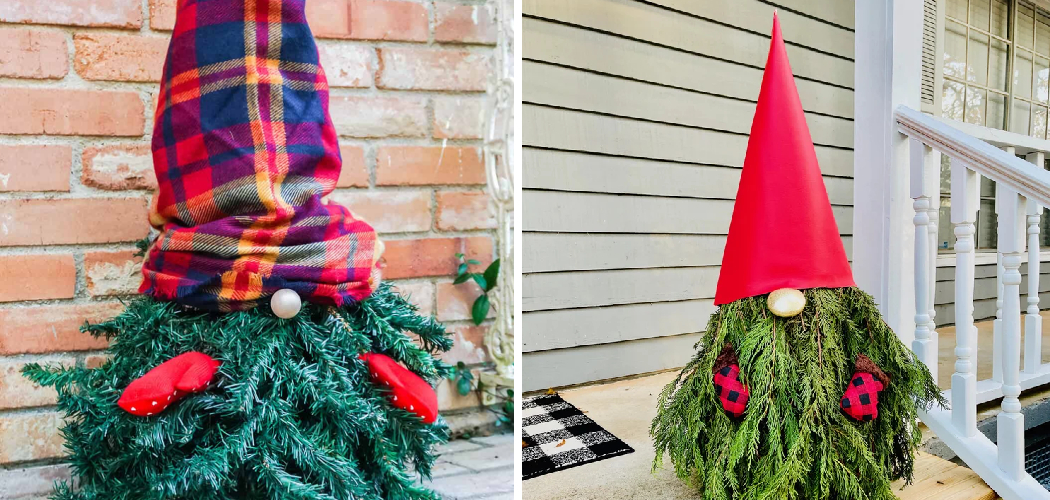
10 Step-by-step Guidelines on How to Make a Tree Gnome
Step 1: Gather Your Materials
Before starting any project, it’s essential to have all the necessary materials on hand. For this project, you’ll need:
- A Tree Stump or Log (Any Shape and Size)
- Wood Carving Tools (Chisel, Hammer, Etc.)
- Sandpaper
- Paint and Paintbrushes
- Hot Glue Gun
- Fabric Scraps for Clothing
- Scissors
- Cotton or Polyfill Stuffing
Step 2: Choose Your Tree Gnome’s Design
The beauty of making your tree gnome means that you can let your imagination run wild! You can create a traditional garden gnome, a whimsical fairy-like gnome, or even a miniature version of yourself.
Before you start carving and painting, it’s a good idea to have an idea of what you want your gnome to look like. But remember, you can always change your mind along the way! It’s all part of the creative process.
Step 3: Prepare Your Tree Stump

For this project, we recommend How to Make a Tree Gnome as the base for your gnome’s body. It adds to the overall rustic and natural charm of the figure. If you’re using a freshly cut piece of wood, make sure to let it dry out for a few days before starting the project. Once dried, use a sandpaper to smooth any rough areas and prepare a flat surface for your gnome’s body.
Step 4: Carve Your Gnome’s Body
Using your wood carving tools, carefully carve out the shape of your gnome’s body from the tree stump or log. Start with larger tools to remove most of the material, and then use smaller tools for more intricate details.
Be patient and take your time with this step as it is crucial in bringing your gnome to life! It’s also a good idea to refer back to your chosen design often. But don’t worry if it’s not perfect; gnomes are meant to have a whimsical and imperfect look.
Step 5: Sand Down Any Rough Edges
Once you have carved out the basic shape of your gnome’s body, use sandpaper to smooth down any rough edges or areas. This step will help create a more polished and professional look for your figure.
This is also a good time to sand down any areas that may have been accidentally carved too deep. It’s always better to take your time and fix any mistakes before moving on to the next step. It’s all part of the creative process!
Step 6: Paint Your Gnome’s Body
Now that you have the base for your gnome’s body, it’s time to add some color! Use acrylic paint or outdoor-grade paint to cover the entire surface of your gnome’s body. You can choose traditional colors like red, blue, or green for the hat and clothing, or mix it up with unique designs and patterns. This step is where your creativity can shine, so have fun with it! But be sure to let the paint dry completely before moving on to the next step.
Step 7: Create a Hat
No gnome is complete without its iconic pointed hat! To create this piece, use fabric scraps of your choice (wool works great!) and cut out a triangle shape. Fold the fabric in half to create a cone shape and glue the edges together using a hot glue gun.
Once the glue has dried, stuff the cone with cotton or polyfill stuffing and attach it to your gnome’s head. It’s a good idea to use hot glue or strong adhesive for this step as it will need to withstand outdoor elements.
Step 8: Make Clothing
Just like the hat, use fabric scraps to create clothing for your gnome. Cut out a simple shirt or dress shape and glue it onto your gnome’s body using a hot glue gun. You can add extra details like buttons or patches to make it more unique.

This step is where you can let your creativity run wild and have fun with different fabric patterns and textures. It’s also a good idea to glue down any loose fabric edges to ensure it stays in place. You can also use a fabric stiffener to keep your gnome’s clothing in place and waterproof it for outdoor display.
Step 9: Add Details and Personality
This is the step where you can really have fun and let your creativity shine! Use paint, fabric, or other materials to add details like facial features, hair, beard, and any accessories you want your gnome to have. You can also from weather damage if it is displayed outside. It’s all about adding those final touches to give your tree gnome its unique personality and charm.
Step 10: Display Your Tree Gnome
Congratulations, you have now created your very own tree gnome! Find the perfect spot in your garden or backyard to display your creation and enjoy the playful spirit it brings to your space.
You can also make multiple gnomes and create a gnome family or village for added charm. Always remember to have fun and let your imagination run wild when making your tree gnome. After all, gnomes are meant to bring a little magic and whimsy into our lives! So why not start creating yours today?
We hope you enjoyed this step-by-step guide on how to make a tree gnome. Remember, this is just one way of making these whimsical creatures. Feel free to add your own personal touch and make it truly unique. Happy crafting!
Tips

- If you don’t have access to a tree stump or log, you can also use foam blocks or clay as the base for your gnome’s body.
- Make sure to use outdoor-grade paint and sealant if you plan on displaying your gnome outside. This will help protect it from weather damage.
- Use different fabric textures and patterns to add dimension and character to your gnome’s clothing.
- Don’t be afraid to make mistakes and have fun with the process! Imperfections add to the charm of your gnome. So let your creativity flow and enjoy the journey of making your very own tree gnome.
Frequently Asked Questions
Q1: Can I Use a Different Material Instead of a Tree Stump or Log for the Gnome’s Body?
A1: Absolutely! While using wood adds to the rustic charm, you can also use materials like clay, paper mache, or even repurpose an old plastic figurine. It’s all about being creative and making it your own.
Q2: Do I Need to Be an Artist to Make a Tree Gnome?
A2: Not at all! This project is suitable for crafters of any skill level. Plus, it’s all about having fun and creating something unique for your space. So don’t be afraid to try it out!
Q3: Can I Make a Giant Tree Gnome?

A3: Of course! Depending on the size of your chosen material, you can adjust the scale of your gnome accordingly. Just make sure to have enough materials and space to work with.
Q4: Can I Make Multiple Gnomes Using the Same Tree Stump?
A4: Yes, you can! You can create a gnome family or village by using different-sized tree stumps and placing them together to create a charming display.
Conclusion
Crafting tree gnomes can be a rewarding experience, whether you do it yourself or take a DIY class. The beauty of crafting your own tree gnome is that you can customize it any way you’d like! Be sure to seek out sustainable and eco-friendly materials, so your creation has less of an environmental impact.
With a bit of practice and patience, soon you too will be crafting unique tree gnomes to bring life and whimsy to your favorite outdoor locations. So why not get started today? Collect some supplies from the local craft store and experiment with different shapes and designs. Who knows what fun creations you could make in just a few hours? Thanks for reading this article on how to make a tree gnome.