
Crafting unique and imaginative DIY projects is a delightful way to express your creativity and ingenuity. If you’re up for a fun and quirky challenge, consider making a toilet out of cardboard—an unexpected and whimsical addition to your creative repertoire.
While it may not function as an actual toilet, this quirky DIY project allows you to explore unconventional materials and push the boundaries of your crafting skills.

Whether you’re looking to create a standout art installation, a prop for a themed event, or simply indulging in a playful and amusing endeavor, this step-by-step guide will walk you through the process of how to make a toilet out of cardboard. So, gather your materials, embrace the joy of creativity, and let’s embark on this quirky journey of toilet-making with cardboard!
Purpose and Benefits of a Cardboard Toilet
Making a toilet out of cardboard can be useful for emergency situations, when plumbing is not available or if you’re looking for a creative and cost-effective alternative. Building a cardboard toilet can be done in no time with minimal tools and effort while providing a safe and hygienic place to go.
It’s also easy to assemble, disassemble, and store, so if you don’t plan on using it for the long term, cardboard is a great material to have.
Cardboard can also be recycled or reused after use. This means that you won’t need to worry about disposing of your toilet once it has served its purpose; instead, you can simply break down the pieces and reuse them for something else or recycle them.
Finally, it’s also important to note that cardboard toilets can help conserve water and other resources when compared with traditional flushing toilets. By using recycled material, you don’t have to worry about having the necessary plumbing infrastructure in place to use a regular toilet.
Additionally, by not needing to flush the toilet each time, you can save a significant amount of water that would otherwise be used. All in all, making a toilet out of cardboard can be an economical and eco-friendly solution for many households.
Materials You’ll Need
Before diving into the creative process, gather the following materials to create your cardboard toilet:

- Sturdy cardboard sheets: Choose thick and durable cardboard for better stability and longevity in your project.
- Craft knife or scissors: For cutting and shaping the cardboard pieces.
- Pencil or marker: To sketch the toilet design on the cardboard before cutting.
- Ruler or measuring tape: For precise measurements and alignment of the various parts.
- Hot glue gun and glue sticks: To securely attach the cardboard pieces together.
- Toilet seat (optional): A real toilet seat can add a more authentic touch to your creation.
- Cardboard tubes or cylindrical objects: These will be used for creating the flush tank and pipes of your cardboard toilet.
- Paint and paintbrushes: To add color and detailing to your cardboard creation.
- Decorative elements (optional): Consider adding embellishments like faux buttons, knobs, or even a holder for a cardboard toilet paper roll to enhance the overall appearance of your cardboard toilet.
10 Methods How to Make a Toilet Out of Cardboard
Method 1: Design Your Cardboard Toilet
To begin this whimsical DIY project, allow your imagination to run wild and envision the design of your cardboard toilet. Consider the size and shape you want for the bowl, seat, flush tank, and pipes.
A pencil or marker will come in handy to sketch the outlines of these components on the cardboard sheets. Pay attention to proportions and details to achieve a visually appealing and whimsical toilet design.
Method 2: Cut Out the Cardboard Pieces
Once you have finalized the design, carefully cut out the cardboard pieces following the outlines you sketched. Use a craft knife for more precise cuts and scissors for larger pieces. It’s essential to take your time during this step to ensure clean edges and smooth surfaces. Proper cutting will significantly enhance the overall appearance of your cardboard toilet.

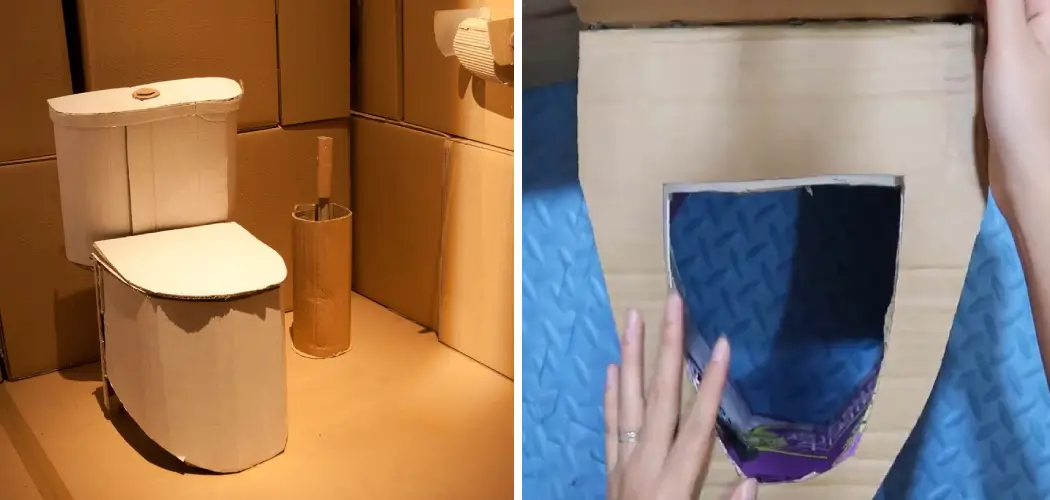
Method 3: Assemble the Toilet Bowl
With all the necessary cardboard pieces cut out, it’s time to start assembling your cardboard toilet. Begin by creating the bowl. Gently fold the cardboard to form the shape of a toilet bowl, using a hot glue gun to secure the edges in place. If required, add additional layers of cardboard to reinforce the structure and ensure sturdiness.
Method 4: Create the Flush Tank
Moving on, focus on creating the flush tank of your cardboard toilet. Use cylindrical objects like cardboard tubes or rolled-up cardboard to fashion the flush tank. Attach it securely to the back of the toilet bowl using a hot glue gun. Be meticulous during this step to ensure that the flush tank aligns properly with the bowl and stands firmly in place.
Method 5: Design the Toilet Seat
The next step involves crafting the toilet seat. Use cardboard pieces shaped like an elongated oval to create the seat. Depending on your creative vision, you may also want to add details like the lid and seat cover to make it look more realistic.
Attach the toilet seat to the top of the toilet bowl using hinges made from strips of cardboard or fabric. Properly secured hinges will enable the toilet seat to move up and down, adding to the authenticity of your creation.
Method 6: Craft the Pipes
To create the illusion of pipes connecting the toilet bowl to the flush tank, use cardboard tubes or rolled-up cardboard. Carefully attach them to the back of the toilet bowl and the flush tank, ensuring they are securely in place. Once attached, consider painting the pipes to resemble real plumbing fixtures, further enhancing the authenticity of your cardboard toilet.
Method 7: Add Decorative Details
With the main structure of your cardboard toilet in place, it’s time to let your creativity shine through. Consider adding decorative elements like faux buttons, knobs, or a holder for a cardboard toilet paper roll.

These thoughtful additions will not only provide weight but also contribute to the overall charm and attractiveness of your fall decorations. Feel free to experiment with various decorative elements to achieve the desired effect.
Method 8: Paint and Finish
Once you’re satisfied with the structure and design of your cardboard toilet, it’s time to bring it to life with color. Use acrylic paint to add color and depth to your creation.
You can choose to paint the toilet bowl and seat in a classic white color, just like a real toilet, and add details like flush buttons and pipe fixtures in contrasting colors. Be patient while painting, allowing each layer to dry before applying the next to achieve a polished finish.
Method 9: Optional: Install a Toilet Seat
For an added touch of authenticity, consider using a real toilet seat for your cardboard creation. If you have a spare toilet seat, install it on top of the cardboard seat. Secure the seat to the cardboard using screws or adhesive putty, ensuring it is stable and comfortable to sit on. This small detail will make your cardboard toilet even more remarkable and add to the amusement of your DIY project.
Method 10: Showcase Your Cardboard Toilet
Congratulations! You’ve successfully brought a whimsical and playful cardboard toilet to life. Now is the time to showcase your creation proudly. Use it as a quirky art installation, an attention-grabbing photo booth prop, or even a centerpiece for themed events. Your cardboard toilet is sure to be a conversation starter and a source of laughter and amusement for all who encounter it.
Some Common Mistakes When Making a Toilet Out of Cardboard
When attempting to make a toilet out of cardboard, there are several common mistakes that can be easily avoided if taken into consideration.
One mistake is not using enough glue or tape when attaching the various pieces together. It is important to make sure that all edges are securely glued so that the structure does not break apart easily. Also, be careful not to overlook any small gaps where the pieces meet.

Another mistake is using too much glue, which can cause the cardboard to warp and weaken the structure of the toilet. It is important to use just enough glue so that all of the pieces are connected securely without warping or weakening them.
Lastly, when cutting out the various shapes for your toilet, be sure not to cut too close to the edges or your structure could become unstable. Make sure to leave a few extra centimeters of cardboard around each corner and at all angles that will be connected together. This will help ensure that the toilet is secure and able to withstand any pressure placed upon it.
Conclusion
Making a cardboard toilet is an innovative, cost-effective solution to providing sanitation in areas with limited resources. With the right materials and some imagination, it can be done on a budget. Whether you’re making this store-bought product in your own home or assembling the components yourself out of cardboard, it’s a great way to help those who don’t have access to traditional toilets.
The design can be adapted and improved depending on the user’s needs. Follow these simple instructions outlined in this blog post about how to make a toilet out of cardboard, and you’ll be able to get the job done with ease.