
Are you looking to add an extra special touch to your next event? Whether it’s a wedding, birthday party, or holiday gathering, having a photo booth is guaranteed to create lasting memories and entertain your guests. But why settle for a generic, boring photo booth when you can make your customized photo booth frame? Not only will it elevate the overall experience, but it will also serve as a fun and interactive prop for pictures.

In this blog post, we will guide you step by step on how to make a photo booth frame that will impress your guests and become the star of the show. So, grab your tools and let your creativity shine as we delve into this exciting DIY project that will take your event to the next level!
Necessary Items
Before we get started, here are the necessary items you will need to make your photo booth frame:
- A large wooden or cardboard frame
- Spray paint in your desired color(s)
- Decorative materials such as glitter, stickers, ribbons, and flowers
- Scissors
- Glue gun/glue sticks
- Clear tape
- Cardboard letters or stencils
- A printed template of your desired frame shape or design
10 Steps on How to Make a Photo Booth Frame
Step 1: Choose Your Frame
The first step to making a photo booth frame is to choose a suitable base. You can find wooden frames at any craft store or make one using cardboard. Ensure the frame is large enough for people to pose behind and sturdy enough to hold up the decorations.

Step 2: Pick Your Color Scheme
Decide on a color scheme that matches your event theme or personal preference. Popular colors for photo booth frames include metallics, pastels, and bright colors. Consider using multiple colors for added dimension.
Step 3: Spray Paint the Frame
Using your chosen spray paint, evenly coat the frame on both sides. Allow it to dry completely before moving on to the next step.
Step 4: Gather Decorative Materials
While waiting for the frame to dry, gather your decorative materials, such as glitter, stickers, ribbons, and flowers. You can also include props like fake mustaches or glasses for added fun.
Step 5: Cut Out Your Design
Using a printed template of your desired frame shape or design, cut it out and trace it onto the frame using a pencil. This will serve as your guideline for decorating.
Step 6: Add Decorations
Now comes the fun part! Use your decorative materials to fill in the traced outline on the frame. Get creative with different textures, colors, and patterns. You can also use a glue gun to secure the decorations in place.
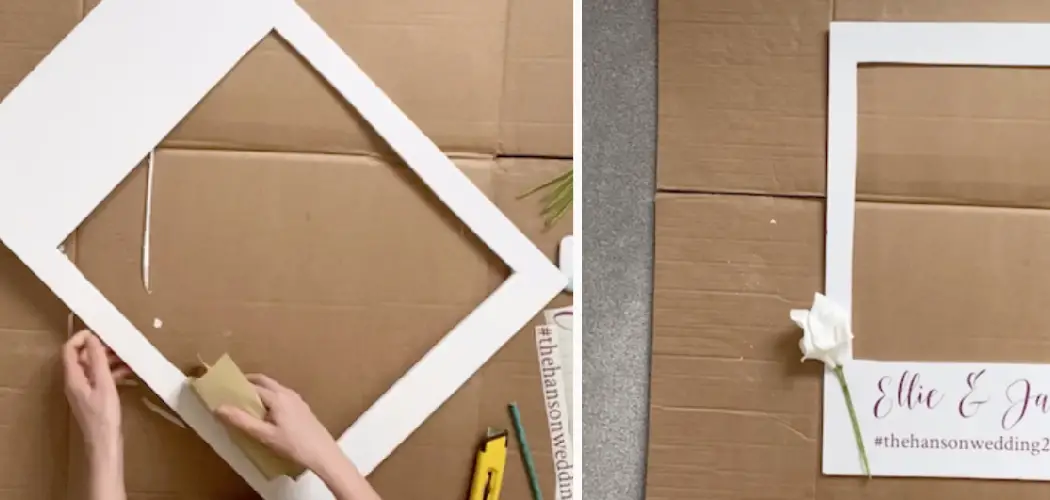
Step 7: Personalize with Cardboard Letters
Add personalized messages or names using cardboard letters or stencils to make your photo booth frame even more unique. This is a great way to customize the frame for different events.
Step 8: Glue on Props
You can glue props like fake mustaches or glasses onto the frame for added fun and dimension. This will give your guests something extra to play with when taking pictures.

Step 9: Reinforce with Clear Tape
To ensure all decorations are secured, reinforce them with clear tape. This will also help prevent any accidents or damage during the event.
Step 10: Test It Out!
Before the big event, do a test run with friends or family to ensure the frame is sturdy and all decorations are secure. This will allow you to fix any last-minute details before the photo booth fun begins!
You have successfully made your very own photo booth frame. Now, all that’s left is to set it up at your event and watch as everyone enjoys posing and taking pictures. Remember to have fun, get creative, and add your touch to make the frame truly one of a kind.
8 Things to Avoid
1. Using a Flimsy Frame
Make sure to use a sturdy frame that can withstand the weight of decorations and people posing behind it. A flimsy frame can easily collapse or break, causing accidents and disappointment.
2. Skipping the Test Run
Doing a test run with friends or family is crucial to ensure everything works correctly before the event. Take advantage of this step!
3. Neglecting Safety Measures
When using tools like scissors and glue guns, follow safety precautions and keep them away from children. Also, make sure all decorations are securely attached to avoid any accidents.
4. Using Too Much Glue
While it’s essential to secure decorations in place, using too much glue can ruin the overall look of the frame. Use just enough to hold everything in place without making a mess.
5. Forgetting to Cover Surfaces
Always cover surfaces with newspapers or plastic sheets when spray painting or using glue to avoid making a mess.
6. Not Adding Personal Touches
The whole point of making your photo booth frame is to add your personal touch and make it unique. Feel free to get creative and add your special details.
7. Using Sharp or Pointy Decorations
To avoid accidents or injuries, avoid using sharp or pointy decorations that can harm people posing behind the frame.
8. Overcrowding with Too Many Decorations
While adding as many decorations as possible is tempting, overcrowding can make the frame look messy and overwhelming. Stick to a few well-placed decorations for a cleaner and more visually appealing frame.
Making a photo booth frame is a fun and easy DIY project that will add extra fun to any event. Just remember to choose the right frame, get creative with decorations, and remember to test it out before the big day.

8 Additional Tips for a Successful Photo Booth
1. Have a Designated Area for the Photo Booth Frame
Make sure to have a designated area for the photo booth frame that is easily accessible and has enough space for people to pose and take pictures.
2. Provide Props and Costumes
To make the photo booth experience even more fun, provide props and costumes for guests to use in their pictures. This will add variety and entertainment to the photos.
3. Use a High-Quality Camera
Invest in a high-quality camera or hire a professional photographer to capture the best moments at the photo booth. This will ensure that the pictures turn out clear and high-resolution.
4. Have a Variety of Backdrops
Switch up the backdrops behind the photo booth frame to provide guests with different photo options. You can use colored fabric patterned paper or create a DIY backdrop using balloons or streamers.
5. Include a Guest Book
Set up a guest book next to the photo booth frame for guests to leave messages or attach their photos. This will serve as a fun keepsake and memory of the event.
6. Add Lighting
Good lighting is crucial for great photos, so ensure enough light near the photo booth area. You can use string lights or portable studio lights for a well-lit backdrop.
7. Consider a Props Table
To make it easier for guests to choose and use props, set up a table next to the photo booth frame with all the props neatly displayed.
8. Share Photos Online
After the event, share the photos taken at the photo booth on social media or through email. This will allow guests to access and download their pictures and be a fun way to remember the event.
Have fun with your photo booth frame, and don’t stress too much about it being perfect. The most important thing is to enjoy the process and create memories that will last a lifetime.

Frequently Asked Questions
How Much Time Does It Take to Make a Photo Booth Frame?
It can take anywhere from 1-2 hours, depending on the complexity of the design and decorations. It’s always best to give yourself enough time to complete the project without feeling rushed.
What Tools and Materials Do I Need?
You will need a sturdy frame, decorations of your choice, a glue gun, scissors, clear tape, and any other materials you want to use for personalizing the frame.
Can I Reuse the Photo Booth Frame?
If it’s well-constructed and stored correctly, you can reuse the photo booth frame for future events. Just check and fix any damages or wear before using it again. The possibilities for making a DIY photo booth frame are endless. With these tips and ideas, you can create a fun and memorable experience for your guests at any event.
Final Thoughts
In conclusion, making your own DIY photo booth frame is an easy and affordable way to add a touch of creativity and fun to any event. From selecting the suitable material for you, customizing it with cutouts and designs, to finally creating a backdrop that adds character to the frame – it’s all essential when assembling the perfect photo booth frame.
With the resources and instructions provided on how to make a photo booth frame, you are now prepared to make one of the most sought-after event decorations! Gather your supplies today and enjoy hours of entertainment as you create your own unique photo booth frame. After all, what better way to commemorate life’s special moments in style than pulling out all the stops for a beautiful photo booth? Just remember—the possibilities are endless!