
Are you a fan of the Minion movies? Do you know someone who loves them just as much as you do? Do you have a child who’s obsessed with Minions? If so, why not show your love by making your very own minion shirt? With a few simple supplies and some creativity, it’s easy to make an awesome shirt that will be sure to impress any Minion fan.
In this blog post, we’ll walk you through how to make a minion shirt from start to finish. Whether you’re looking for something fun and unique for yourself or a creative gift idea for someone else, this tutorial can help turn even the least artsy person into an expert craftsman in no time. With just some basic supplies like an old t-shirt and fabric paint, you can turn any t-shirt into your own personalized Minion masterpiece.
What is Minion Shirt?
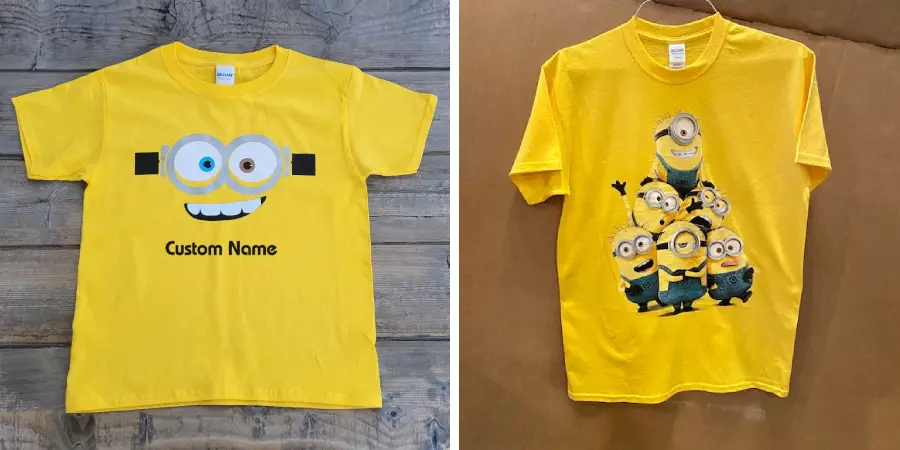
A Minion shirt is a fun and creative way to express your love for the popular Despicable Me movies. The minions are small yellow creatures with one eye who provide comic relief in the films. You can easily make your own Minion shirt by using a few basic supplies such as an old t-shirt, fabric paint, and some creativity!
Materials Needed
- Old t-shirt in your desired size
- Fabric paint (yellow, blue, and black)
- Paintbrush
- Pencil or fabric marker
- Newspaper or other sheets of paper for covering the surface you’re working on
10 Ways How to Make a Minion Shirt
1. Wash and Dry
Wash and dry the shirt before starting. While washing, make sure the shirt is inside out to avoid any damage or fading. Also, make sure to use a mild detergent and cold water to protect the fabric.
2. Trace the Design
Once your shirt is clean and dry, trace out the design of your Minion onto the shirt with a pencil or fabric marker. You can either draw it freehand or use a stencil for more accuracy. Make sure to keep all lines light so they don’t show up too much after you’re done painting.
3. Paint the Yellow Parts

Using a paintbrush and yellow fabric paint, start filling in the parts of your Minion that should be yellow. Allow each coat to dry before continuing to the next step. Painting on fabric can be tricky, so make sure to take your time.
4. Paint the Blue Parts
Repeat the same steps for painting yellow but this time using blue paint instead. Allow each coat of paint to dry before continuing. Painting in thin layers is recommended for best results.
5. Paint the Black Parts
Using black fabric paint, fill in any remaining parts that need to be black. Allow each coat of paint to dry before continuing. Again, painting in thin layers is recommended for best results. Also, make sure to use a light touch when painting near the other colors.
6. Let it Dry
Once all of the colors are painted on, let your shirt sit for at least 24 hours to allow the paint to fully dry and set. This is an important step as it will help ensure that your design doesn’t fade or bleed over time.
7. Heat-Set the Paint
After your shirt has had time to dry, you can now heat-set the paint to help it last longer. To do this, simply turn your garment inside out and put it in the dryer on a low setting for about 10 minutes or until all of the fabric paint is set.

8. Iron On Design
If you’d like your Minion shirt to have a more professional look, you can iron on a design. You can use any fabric iron-on transfers of Minions or other fun designs. Just make sure to follow the instructions on the packaging for the best results.
9. Wear with Pride
Once you’ve finished your DIY Minion shirt, it’s now time to wear it proudly! Show off your creative skills and make all of your friends jealous with your one-of-a-kind design. Wearing your shirt will be the perfect way to show off your love for the Minions.
10. Make More!
Making a Minion shirt is so much fun, you may want to make more! Using this same tutorial, you can easily customize different colors and designs for any of your favorite characters from the Despicable Me movies. With just a few supplies and some creativity, you’ll have an entire wardrobe of cute Minion shirts in no time!
And there you have it! Now that you know how to make a Minion shirt, the possibilities are endless. Go ahead and get creative and show your love for the Minions with this fun DIY project!
8 Maintenance Tips
1. Make sure to store your Minion shirt in a cool and dry place since most fabric can be ruined if stored in direct sunlight or high humidity. Storing your shirt in a box or drawer can help to ensure its longevity.
2. Regularly spot-clean your Minion shirt with mild detergents and cold water. This will help maintain the color of the fabric and prevent it from fading or becoming discolored over time. Also, avoid using bleach on your shirt, as it can cause damage.
3. Wash the Minion shirt with like colors in cold water to prevent fading and shrinking. It is also important to turn the shirt inside out before washing it in order to preserve its color and shape. Washing your shirt this way will also help prevent the fabric from becoming discolored by other garments.
4. Hang to dry or lay flat to ensure that the shape of the shirt is kept intact and that it continues to fit properly. This will prevent any stretching or shrinkage that may occur if the Minion shirt is machine-dried.

5. Make sure to iron your Minion shirt in a low-heat setting. This will help keep the fabric from becoming scorched or discolored due to an overly high-temperature setting. Heat can also damage the fabric and cause it to become brittle over time.
6. Avoid using harsh chemicals on your Minion shirt, as they can degrade the material and cause fading or discoloration. It is best to stick with mild detergents and cold water when cleaning your shirt.
7. If you do not intend to wear your Minion shirt for an extended period of time, you should consider storing it in a garment bag. This will help prevent dust and dirt from collecting on the fabric, which can cause damage over time.
8. If your Minion shirt has any stains or marks, contact a professional dry cleaner as soon as possible to ensure the best results. A dry cleaner will be able to remove most stains without damaging the fabric.
By following these tips, you can help ensure that your Minion shirt will look its best and last for many years to come. Whether you are going for a costume party or just wearing it as a fun statement piece, taking care of your Minion shirt is important in order to keep it looking great.
Frequently Asked Question
How Long Will It Take to Finish the Project?
The amount of time it takes to finish the project will depend on your skill level and how much detail you want to add. Generally, a beginner should allow for at least one hour. An experienced sewist or crafter may be able to complete the project in as little as 30 minutes. If you’re just starting out, it’s best to set aside more time and not rush the project.
What Supplies Do I Need?
The supplies you’ll need to make a minion shirt are relatively simple. You’ll need fabric for the shirt and felt or craft foam for the design pieces (eyes, mouth, etc.). Other materials like thread, buttons, and scissors are also helpful.
What Is the Best Way to Attach the Design Pieces?
The best way to attach the design pieces is to use a fabric glue or craft adhesive that is safe for fabrics. Be sure to read the manufacturer’s instructions carefully before using and follow all safety guidelines. Another option is to sew the pieces in place, but this requires more time and skill.
What Are Some Tips for Making a Minion Shirt?
When making your minion shirt, be sure to double-check measurements before cutting the fabric. Additionally, pin pieces in place before sewing to ensure proper placement. If you’re using fabric glue or craft adhesive, be sure to let each piece dry completely before moving on to the next one. Finally, make sure to press any seams with an iron to ensure a professional finish.

Conclusion
Utilizing your creative side to make a minion shirt can be a fun and enjoyable afternoon. Whether this is a one-time project or something you want to do regularly, it can be done with minimal supplies and time. To ensure you have the best results possible, use quality material, clean surfaces, and always double-check measurements before cutting fabric.
It may sound daunting at first, but once you start doing it more often, the process gets easier each time, and soon, making these shirts will become second nature. So go ahead and use your imagination to create something unique and special for yourself or for those you love. With these simple steps on how to make a minion shirt, anyone can easily DIY their own customized minion shirt!
You Can Check It Out To- Make Terrazzo Pots