
Elevate the charm and allure of your outdoor space by delving into the captivating realm of creating garden mirrors. With a touch of creativity and a dash of DIY spirit, you can transform your garden into a visually captivating oasis. Garden mirrors are not only an artful addition but also a clever way to enhance the sense of space, light, and depth within your outdoor haven.
Whether you’re working with a cozy corner or an expansive landscape, crafting a garden mirror offers a chance to infuse your personal style while adding a touch of whimsy and elegance. In this guide, we’ll explore the step-by-step process of how to make a garden mirror, from selecting the ideal mirror and frame to strategically placing it to maximize its visual impact.

Whether your outdoor space craves a vintage touch, a contemporary edge, or a dash of rustic allure, a well-placed garden mirror can be the key to unlocking a whole new dimension of outdoor aesthetics.
What Garden Mirrors Are and Their Purpose
Garden mirrors can be a great way to add depth and visual interest to your garden. By reflecting light, they can create the illusion of a larger space and bring the outdoors into your home. Mirrors are also used to highlight plants or focal points in the garden, while providing an unexpected surprise for visitors when they come around the corner and see their reflection gazing back at them.
Typically, garden mirrors are made of either plastic or metal and come in various shapes and sizes. When choosing a mirror for your garden, consider the size of the area you want to fill and the amount of light it will be exposed to. A larger mirror may reflect more light, but can also overpower a space if it’s not properly placed.
Once you’ve chosen a garden mirror, it’s time to get creative! You can hang the mirror in a variety of ways, depending on your space and the look you are going for. Mirrors can be hung directly onto walls with clips or hangers, or suspended from above with wires or chains. If you’re lucky enough to have a tree in your garden, you can hang the mirror from one of its branches.
You can also use mirrors to create optical illusions and draw attention to certain areas. Hang multiple mirrors side by side or at angles to create an eye-catching feature wall or backdrop for a seating area.
Benefits of Using Mirrors in Outdoor Spaces for Decoration
Decorative mirrors are a great addition to any outdoor space. Mirrors can create the illusion of extra space and light, adding dimension to your garden or patio area while also reflecting natural beauty from its surrounding environment.
They can be used to draw attention to particular areas or plants in your garden, with the added bonus of bouncing sunlight along walls and pathways for added brightness. This can help create a cozy and inviting atmosphere for your outdoor space. Once you’ve chosen the right mirror for your garden, you can start to be creative with how and where to place it.

Materials and Tools
List of Required Materials
- Garden mirror
- Wooden frame (if necessary)
- Mirror adhesive or clips
- Sandpaper
- Outdoor paint or finish
- Mounting hardware
Necessary Tools
- Measuring tape
- Level
- Screwdriver
- Paintbrushes
- Safety goggles and gloves
10 Methods How to Make a Garden Mirror
Method 1: Choose the Right Mirror
At the heart of this artistic venture lies the pivotal decision of selecting the perfect mirror. Opting for a mirror with a weather-resistant backing ensures its longevity against outdoor elements. Antique or vintage mirrors evoke a sense of nostalgia and character, while frameless options lend a modern touch.
Keep in mind the mirror’s size and shape in relation to your garden’s dimensions, as this influences its impact on the overall aesthetic.
Method 2: Pick a Suitable Frame
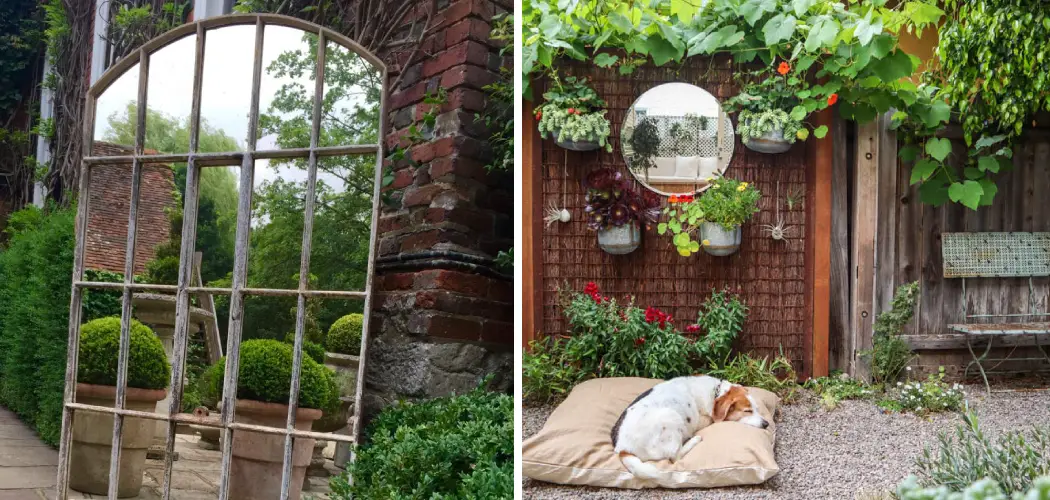
The frame you choose isn’t just a protective barrier; it’s an integral part of the mirror’s visual identity. Wooden frames radiate rustic charm, while metal frames add an industrial allure. Ornate frames infuse a touch of elegance, and salvaged materials like old windows or doors create an eclectic focal point. Your frame selection not only complements your garden’s style but also contributes to its narrative.

Method 3: Gather the Necessary Materials
Embarking on this artistic journey requires a toolkit designed for precision and safety. Equipped with gloves, safety goggles, a tape measure, a level, screws, and a drill, you’re poised for success. Depending on your chosen approach, you might also need paint, sealant, or adhesive suitable for outdoor use. Prioritize safety, ensuring proper ventilation when working with paints and sealants.
Method 4: Plan the Mirror’s Placement
Strategizing the mirror’s placement is a subtle yet crucial art. The mirror’s reflective surface can capture the splendor of your garden, magnifying its beauty. Reflect blooming florals or verdant greenery to create an illusion of expanded space. Moreover, consider positioning the mirror to capture natural sunlight and extend the perception of your garden’s depth.
Method 5: Prepare the Frame
If your selected mirror lacks a frame, this is your opportunity to embrace creativity. Begin by preparing the frame – sand it to ensure a smooth surface and clean it to remove any debris.
Applying a weather-resistant paint or finish is essential, not only for aesthetic reasons but also to shield the frame from outdoor conditions. Distressing or aging techniques can evoke a vintage charm, while vibrant colors infuse a modern energy.
Method 6: Secure the Mirror
Ensuring your mirror is securely fixed to the frame is a crucial step. Prior to attachment, verify the frame’s stability and levelness. Utilize a measuring tape and level to guide your placement.

Based on the mirror’s weight and frame material, employ appropriate screws, anchors, or adhesive for a secure attachment. Precision is paramount to achieving a balanced and visually pleasing result.
Method 7: Weatherproof the Mirror
To safeguard your garden mirror against the elements, apply a clear outdoor sealant over the mirror’s back and edges. This protective layer shields the mirror from moisture infiltration, reducing the risk of damage over time. Additionally, consider applying a waterproof sealant to the frame to combat wood decay and metal corrosion, ensuring your creation withstands the tests of time.
Method 8: Enhance with Decorative Elements
An essential aspect of this artistic endeavor lies in the personal touches you infuse into your garden mirror. Embellishing the frame with decorative elements such as mosaic tiles, sea glass, shells, or even a trellis with climbing plants adds character and uniqueness. These embellishments create a harmonious blend between the mirror’s allure and the surrounding landscape.
Method 9: Conceal the Backing
Incorporating your garden mirror into the landscape is an artistry in itself. Conceal the mirror’s backing using natural materials such as vines, trellises, or wooden panels. This meticulous step seamlessly integrates the mirror into the environment, making it appear as if it’s a natural extension of your garden.
Method 10: Maintenance and Care
A beautiful creation deserves proper care to preserve its allure. Regular maintenance involves cleaning the mirror’s surface with a non-abrasive cloth and a gentle cleaner to maintain its reflective quality. Regularly inspect the frame for signs of wear, such as chipping paint or rust, and touch up as needed.

Additionally, periodically check the mirror’s attachment to the frame, making necessary adjustments to ensure stability and longevity.
Safety Precautions for Making a Garden Mirror
When you are making a garden mirror, it is important to take safety precautions. Make sure that the area you will be working in is well-ventilated and that there are no flammable materials nearby.
Wear protective clothing such as gloves, goggles, and a face mask when handling any sharp objects or tools. Be aware of potential electrocution hazards by avoiding contact with power lines and unplugging any electrical sources in the area.
Additionally, use caution when using power tools and make sure that all of your tools are properly maintained. Finally, keep children and pets away from the work area as they could pose a danger to themselves or damage the finished product. Following these safety steps will help ensure that your garden mirror is safe and secure once it is finished.
When you are ready to begin work on your garden mirror, make sure that you have all the necessary supplies. You will need materials such as mirror glass, wood or metal framing, a saw, screws and nails, and glue. Depending on the design of your mirror, you may also need additional tools like a drill, sandpaper or paint brushes.

Once you have collected all the necessary supplies, it’s time to start building your mirror frame. Measure and cut the wood to size, making sure that each piece fits together perfectly. Secure the pieces together with screws and nails and then use glue along any exposed edges of wood or metal for extra strength.
Conclusion
Now that you have all the essential steps for making a garden mirror, you’re ready to get started. Keep in mind that the process might feel daunting at first; however, the end result is worth the trouble.
Many DIYers across the country have been adding mirror art to their gardens and finding creative ways to enjoy outdoor living space enhancements without spending a fortune on pre-manufactured décor. With this easy five-step guide, you can make your own garden mirror that will bring beauty and texture to your outdoor space.
Once you’ve accepted the challenge of creating your own garden mirror, there are no limits to what you can achieve! Spend some time exploring different materials and styles so you can come up with something truly unique.
We hope that this guide has provided enough details and insights on how to make a garden mirror – now it’s up to you to take action and create something that will truly reflect your tastes and style preferences!