
Do you love throwing parties or special events but feel like something is missing? A festive, yet simple way to put the finishing touches on any event is by adding a fringe backdrop. This fun accent will become the perfect backdrop for photos and create an added bit of pizzazz your guests will appreciate.

From birthdays and weddings to corporate gatherings, follow these step-by-step instructions on how to make a fringe backdrop so that your next event makes all heads turn!
Supplies You Will Need to Make a Fringe Backdrop
- Fringe Garland
- Command Hooks
- String or lightweight rope
- Scissors
- Measuring tape (optional)
Step-by-Step Guidelines on How to Make a Fringe Backdrop
Step 1: Measure and Hang the String or Rope
Start by measuring the wall or area you want to hang your fringe backdrop. Use a measuring tape if necessary to make sure the string is even on both sides or just eyeball it! Once you have measured out your desired length of string, use command hooks to hang it along the top of your wall. Make sure the string is taut and secure when hanging it on the command hooks.
Step 2: Cut Your Fringe Garland
Determine how much fringe garland you need to cover your backdrop area. You may want to measure out the length of the fringe with a tape measure or use string to mark off the desired length before cutting it with scissors. While cutting the fringe, make sure to leave some extra length so it can be secured to the string or rope.

Step 3: Hang Your Fringe Garland
Start by draping one end of the fringe garland across the string or rope at the top of your wall. Use a piece of tape to secure it in place so that it hangs down evenly and doesn’t move around too much. Continue to hang the rest of your fringe garland across the top of the wall and secure it with tape every few feet.
Step 4: Final Touches
When you have finished hanging your fringe garland, give it a final once over to make sure everything is even and secure. If needed, adjust any pieces that are crooked or not completely secured. Once all the pieces are in place, your fringe backdrop is ready for use!
Creating a fringe backdrop can be an easy way to make any event more festive and enjoyable. Using simple supplies you can find around the house or at your local store, it won’t take much time to create a beautiful piece of decor that will take your event from ordinary to extraordinary!
So when planning your next gathering or event, don’t forget to make a fringe backdrop for the perfect touch of pizzazz and decoration.
Additional Tips and Tricks to Make a Fringe Backdrop
1. To make the backdrop extra special and eye-catching, add a bit of sparkle or shine. Glittery fabric strips or pieces of metallic ribbon can be used to create an eye-catching border along the top or bottom of the fringe. You could also hang up small string lights around your backdrop for a subtle but gorgeous glow.

2. If you’re looking for a way to customize your backdrop, consider using a variety of colors and textures. Mix and match different types of fabric and colors to create an interesting color scheme that will fit with the event’s theme or atmosphere.
3. If you’d like to add some height to your fringe backdrop, consider using wooden dowels or poles. This will give you an elevated look and can be decorated with ribbons, flowers, and other decorations.
4. To hang up the finished product, use command strips to ensure that your backdrop is secure and won’t fall down during your event. This will also make it easier to take down afterward if needed!
5. Consider using a backdrop stand to make the process easier and more efficient. This way, you won’t have to worry about hanging up your backdrop manually and can focus on creating the perfect fringe design.
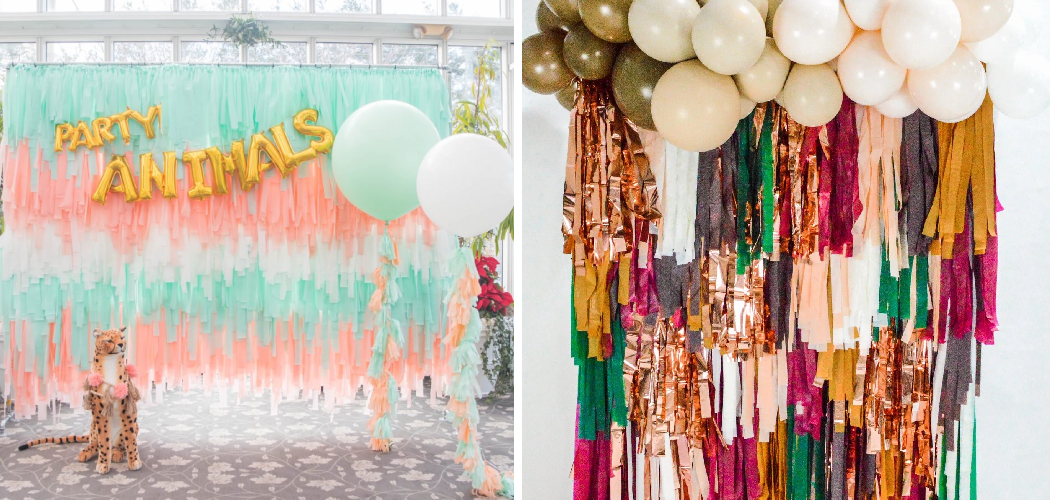
6. Finally, if you want to kick things up a notch, consider adding some extra decorations or props in front of your backdrop for an added wow factor. This could include balloons, a photo booth stand, or greenery to create an eye-catching display that your guests won’t soon forget!
By following these tips and tricks, you can easily make a stunning fringe backdrop for your next event that will surely impress all of your guests. With just a few materials and a bit of patience, you’ll have a beautiful backdrop that will make your event unforgettable.
Things You Should Consider to Make a Fringe Backdrop

1. Choose a material for the backdrop that will easily accept the fringe. Vinyl, cotton, and muslin offer excellent options that are easy to work with and can produce great results.
2. Measure the area where you are going to hang your backdrop and cut your fabric according to those measurements. Make sure to add a few extra inches in length so that you can hem the edges and add trim if desired.
3. Decide on a style for your fringe. You can opt to have all of the same type of fringe, or you can mix it up with different colors, sizes, and shapes of fringe. If you are making multiple backdrops with varying themes or colors, consider using contrasting fringes to create visual interest.
4. Prepare the fabric for fringing. If necessary, hem the edges of your backdrop and add any trim or accents you desire before starting to apply the fringe. This will ensure that all of your material is in place before permanently attaching the fringe.
5. Attach the fringe to your backdrop using a heavy-duty adhesive like industrial glue or a fabric glue gun. You can make your fringe as close or as far apart as you desire to create the look you are striving for.
6. Hang your finished backdrop and enjoy the results! With careful consideration, planning, and execution, you can make a beautiful fringe backdrop that will last for years to come.
7. To keep your fringe in great condition, you’ll want to take care when cleaning the backdrop. Spot clean with a mild detergent and cool water or vacuum as needed. Avoid scrubbing or rubbing too harshly so that the fringe does not become matted or tangled over time. With proper care, your fringe backdrop will remain beautiful for many years!
8. If you plan on using your backdrop frequently, consider investing in a few different styles of fringe to change up the look when necessary. Different colors and sizes can create totally different visuals for each event that you host with your backdrop. Having a variety of fringes available will allow you to customize your backdrop and make it look completely unique every time!
9. Finally, don’t forget to have fun with your fringe backdrop! There are many creative ways to use a fringe backdrop, from weddings and parties to photoshoots and retail displays. Use this opportunity to get crafty and make your event stand out in the crowd!
Following these considerations will help you create a beautiful and long-lasting fringe backdrop that you can be proud of. With a little bit of preparation and planning, you can make a stunning backdrop that will wow your guests at any event!

Frequently Asked Questions
What Materials Are Required for Making a Fringe Backdrop?
You will need scissors, tape or glue, and fabric or plastic strips for the fringe. Depending on personal preference, you can also add string lights, tassels, or other decorations to enhance your backdrop.
How Long Does It Take to Make a Fringe Backdrop?
The time it takes to make a fringe backdrop depends on the size of the backdrop and how much decoration you want to add. On average, it can take anywhere between 1-2 hours.
What Is the Best Way to Hang A Fringe Backdrop?
The best way to hang a fringe backdrop is by using mounting hooks and string. Make sure the hooks are securely fastened into the wall before hanging the backdrop, to ensure it doesn’t slip or fall.
Can I Use a Fringe Backdrop Outside?
Yes, you can use a fringe backdrop outside as long as you take proper care of it. If you’re using fabric strips, make sure to keep them away from any water sources and use a waterproof sealant if necessary. If you’re using plastic strips, check the weather conditions before placing your backdrop outside.
Conclusion
With the above outlined you will easily understand how to make a fringe backdrop for your next event. You will also have a better understanding of the materials you need, how long it takes to make one, and how to hang and care for it properly.
With these considerations in mind, you can easily create a stunning backdrop that your guests won’t soon forget! Good luck with making the perfect fringe backdrop for your next occasion!