
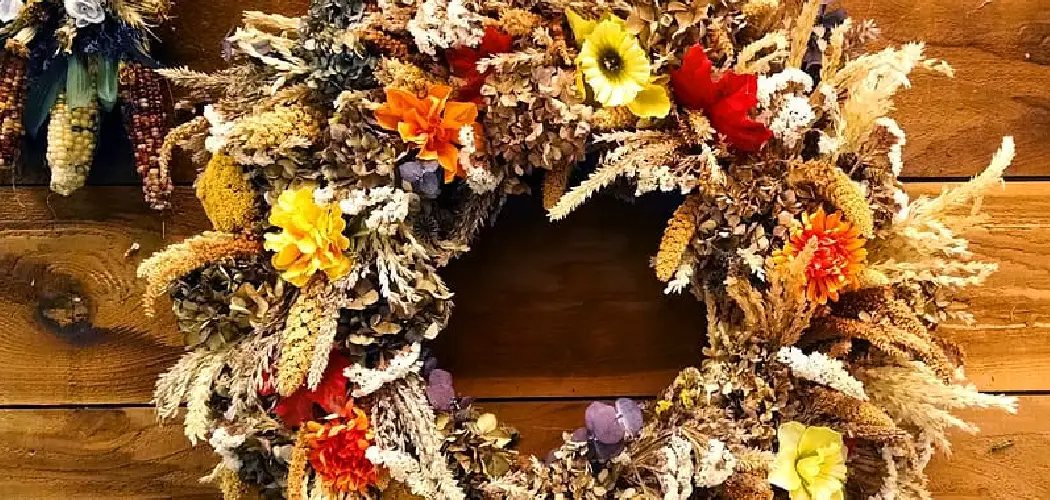
As the weather starts to cool and the leaves turn vibrant shades of red, orange, and yellow, fall is well and truly upon us. Nothing says ‘fall’ quite like piles of rustic oranges, yellows, and reds scattered across the lawn. While pumpkins, mums, and gourds are seasonal staples you’ll find decorating front porches and gardens everywhere, nothing quite captures the rustic charm of autumn like a simple yet stunning burlap wreath.

Adorning your front door with a homemade burlap wreath is the perfect way to greet friends and neighbors as the holidays approach. In this blog post, I’ll share some easy step-by-step instructions on how to make a fall burlap wreath for crafting the beautiful burlap wreath that you can proudly display throughout the cozy fall season.
Necessary Items
Before we get started, here are some necessary items you’ll need to make your fall burlap wreath:
- One wire wreath form (12 or 14 inches)
- Approximately 6 yards of burlap ribbon (2.5 inches wide)
- Scissors
- Floral wire or pipe cleaners
- Decorative elements like faux flowers, leaves, or small pumpkins (optional)
You can find these items at your local craft store or online.
10 Steps on How to Make a Fall Burlap Wreath
Step 1: Cutting the Burlap Ribbon
Start by cutting your burlap ribbon into approximately 8-inch strips. You’ll need around 25-30 strips, depending on the size of your wreath form. Don’t worry about being precise with the length of each strip – a slight variation will add to the rustic charm of your wreath.

Step 2: Preparing the Wreath Form
Take your wire wreath form and separate the wires so that there are four sections. This will help you secure the burlap ribbons in place later on.
Step 3: Wrapping the Burlap Ribbon
Take one strip of burlap ribbon and fold it in half. Place the folded end onto the wreath form, with the loop on top. Pull the tail ends through the loop and pull tightly to secure it in place. Repeat this process, alternating between sections on the wreath form until you have covered the entire form.
Step 4: Fluffing the Burlap
Once you have wrapped and secured all of the burlap strips, it’s time to fluff them up a bit. Gently pull and manipulate each strip, separating them to create a complete and textured look.
Step 5: Adding Decorative Elements (optional)
If you want to add flair to your wreath, now is the time. Floral wire or hot glue can attach faux flowers, leaves, or small pumpkins to your garland.

Step 6: Cutting and Attaching a Bow (optional)
To finish your wreath with a bow, cut two long strips of burlap ribbon an equal length and tie them into a bow. Attach the bow to the bottom of your wreath using floral wire or hot glue.
Step 7: Hanging Your Wreath
You can use a burlap ribbon or any other type of sturdy string or ribbon to hang your wreath. Loop it around the top of the wreath form and tie it in a knot. You can then turn your wreath on a hook or over your door.
Step 8: Final Touches
Take a step back and admire your beautiful fall burlap wreath! If desired, you can make any final adjustments or add any additional decorative elements.
Step 9: Care and Maintenance
Avoid exposure to harsh weather conditions or direct sunlight to keep your wreath looking its best. You can also use a hair dryer in a relaxed setting to remove any accumulated dust over time.
Step 10: Changing It Up for Other Seasons
Once fall is over, you can easily swap out the decorations on your wreath for each new season. This will allow you to use the same wreath form and burlap base, making it a versatile and sustainable decoration option.
Creating a fall burlap wreath is an enjoyable and straightforward DIY project that adds rustic charm to your home decor. With just a few materials and easy-to-follow steps, you can make a beautiful and personalized wreath that lasts throughout the fall season. So go ahead and give it a try – your front door will thank you!
8 Things to Avoid When Making a Fall Burlap Wreath
1. Using Low-quality Burlap Ribbon That Easily Frays
To ensure the longevity and durability of your wreath, it’s essential to invest in high-quality burlap ribbon. Lower-quality ribbons tend to fray easily, making them difficult to work with and causing your wreath to look messy over time.
2. Making Too Many Overlapping Layers of Burlap Ribbon
While you want your wreath to look full and textured, be careful not to add too many overlapping layers of burlap. This can make it challenging to manipulate the ribbon and create a clean and neat look.
3. Cutting the Burlap Strips Too Short or Unevenly
Having strips of uneven lengths or cutting them too short can result in an imbalanced and lopsided wreath. Take your time and try to cut the strips as evenly as possible.
4. Using Too Many or Heavy Decorative Elements
Adding too many heavy decorative elements to your wreath can weigh it down and prevent it from losing shape over time. Stick to a few lightweight and seasonal accents for the best results.
5. Not Fluffing the Burlap Strips Enough
Fluffing and manipulating the burlap strips is crucial in creating a complete, textured wreath. Be sure to take your time and give each strip some love to achieve that beautiful fall look.
6. Skipping the Bow or Other Finishing Touches
While unnecessary, adding a bow or other finishing touches can elevate your wreath and make it stand out. Feel free to get creative and add some personal touches.

7. Hanging Your Wreath in Direct Sunlight
Direct sunlight can cause the colors in your burlap ribbon to fade over time, so it’s best to avoid hanging your wreath in a spot that receives direct sunlight for extended periods.
8. Not Switching Up Your Decorations for Different Seasons
As mentioned earlier, swapping out the decorations on your wreath for different seasons is an easy way to keep it looking fresh and relevant year-round. Don’t be afraid to change things; get creative with your designs! Overall, making a fall burlap wreath is fun and straightforward, but avoiding these common mistakes is vital to ensure a beautiful and long-lasting result.
6 Additional Tips for Creating the Perfect Fall Burlap Wreath
1. Use a Wired Burlap Ribbon for Easier Manipulation
A woven burlap ribbon is much easier to work with and will hold its shape better than a non-wired ribbon. This can save you time and frustration when shaping and fluffing your wreath.
2. Experiment with Different Colors and Patterns
While traditional fall colors like orange, red, and brown are popular for a burlap wreath, don’t be afraid to try out different colors and patterns for a unique and personalized look.

3. Use Floral Wire to Secure Decorative Elements
Floral wire is excellent for attaching decorative elements like flowers or leaves to your wreath. It’s sturdy and easy to work with, giving you more control over the placement of your decorations.
4. Add a Layer of Clear Coat for Extra Protection
If you plan on hanging your wreath outdoors, consider adding a coat of clear acrylic spray to protect it from the elements and prolong its lifespan.
5. Use Different Sizes of Burlap Strips for Variety
Mixing up the sizes of your burlap strips can add depth and variety to your wreath, giving it a more natural and textured look.
6. Avoid Overcrowding Your Wreath with Decorations
Less is often more when it comes to decorating a burlap wreath. Avoid overcrowding it with too many decorations, as this can make the wreath look cluttered and take away from the overall design.
Frequently Asked Questions
Is burlap Ribbon the Only Material I Can Use for a Fall Wreath?
No, you can also use other types of ribbon or fabric to create a similar look. However, burlap is a popular choice for its rustic and durable qualities.
Can I Use a Different Shape for My Wreath Form?
You can experiment with different shapes and sizes of wreath forms to create a unique look. Just be sure to adjust the amount of burlap ribbon and other materials accordingly.
How Can I Make My Wreath Last Longer?
To keep your wreath in good condition, avoiding exposure to harsh elements like extreme weather or direct sunlight is best. You can also use a hair dryer in a relaxed setting to remove any accumulated dust over time.
Can I Customize My Wreath Further?
Absolutely! You can add personal touches, such as adding decorative elements or incorporating other materials like faux leaves or twigs. The possibilities are endless! So go ahead and get creative with your fall burlap wreath.
Conclusion
Creating a fall burlap wreath is a fun and easy DIY project that can add a touch of warmth and charm to your home decor. By following these step-by-step instructions on how to make a fall burlap wreath and avoiding common mistakes, you can make a beautiful and personalized wreath that will last throughout the entire season. Autumn is a particular time of the year, and creating your custom-made burlap fall wreath with friends or family is a fun activity to start the season!
The process is straightforward and sure to add a unique and inviting touch to any front door. Whether you prefer muted tones or vibrant colors, this wreath will set the tone for what’s sure to be a wonderful autumn. So come ready with supplies, invite your crew, and start crafting the perfect piece for your entrance! You can make an unforgettable impression on visitors by incorporating creativity into your design. After all, everyone loves a super cute fall wreath – how could you resist?