
Crafting a fairy door is a whimsical and enchanting DIY project that can spark the imagination and add a touch of magic to your surroundings. These miniature doors, often placed at the base of trees or nestled in a garden, are believed to provide an entry point for fairies and other magical creatures into our world. Creating a fairy door allows you to tap into your creativity and transport yourself to a world of fantasy and wonder.

Whether you’re a seasoned crafter or a beginner looking for a fun and imaginative endeavor, making a fairy door is a delightful way to add a touch of charm to your home or garden.
In this article, we’ll guide you through the essential steps to craft a fairy door, from choosing the right materials and design elements to adding enchanting details that will make your miniature portal truly magical. So, let’s embark on this whimsical journey and learn how to make a fairy door that will captivate hearts and imaginations alike.
The Potential Uses and Locations for Fairy Doors
You may have noticed the recent trend of fairy doors popping up in various locations around town. These tiny, whimsical portals are not just for decoration, but can serve a variety of purposes and be placed in many different spots. Here are some ideas for using and placing fairy doors:
In Your Garden
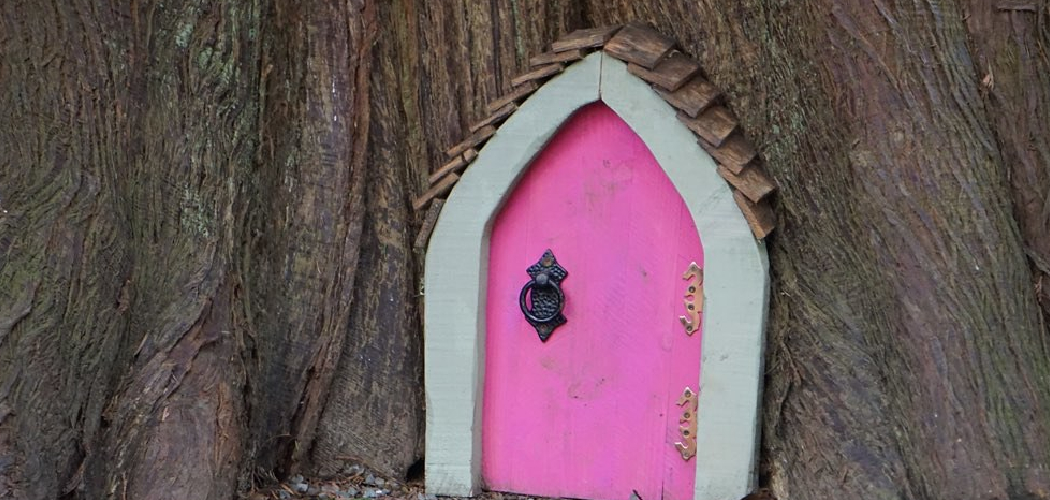
One popular location for a fairy door is in your garden or backyard. This allows you to create a little fairyland right in your own outdoor space.
You can place the door at the base of a tree, nestled among plants and flowers, or even attached to a fence or wall. Not only will this add some charm to your garden, but it also serves as an invitation for fairies to come visit and make their home there. You can even add other miniature accessories, such as a tiny table and chairs, to complete the magical scene.

In Your Home
Fairy doors don’t have to be limited to outdoor spaces. They can also be placed inside your home, serving as a special entrance for the fairies who may be living there. This could be in a child’s bedroom or playroom, in a hallway or even on a bookshelf. It adds an element of fantasy and imagination to your home decor, and can also serve as a fun surprise for children to discover.
In Public Spaces
Some cities and towns have caught onto the fairy door trend, and have started placing them in public spaces such as parks, libraries, and even storefronts. This not only adds some magical charm to the community, but also creates a sense of wonder and curiosity for both children and adults alike. You can even take part in this trend by creating and placing your own fairy door in a public location with permission from local authorities.
10 Methods How to Make a Fairy Door
1. Gather Supplies
The first step in making a fairy door is to gather all of the necessary supplies. These will include things like wood, glue, paint, tools, and any other materials you may need to complete the project. Make sure to have everything you need before starting so that you don’t have to make multiple trips to the store or hardware store while in the middle of building your door.
2. Cut Wood
Once you have all of your supplies gathered, it’s time to start cutting the wood for your door. You can use either a saw or jigsaw, depending on what type of wood you are using and how intricate your design is. If you are using a more intricate design, it might be wise to invest in an electric jigsaw as this will make cutting much easier and faster.
3. Assemble Pieces
Once all of the pieces are cut out, it’s time to start assembling them together into the shape of your door. Use wood glue and clamps to secure each piece together until dry. Make sure that all pieces fit snugly together so that there aren’t any gaps or loose joints when finished assembling.

4. Sand Edges
Once all of the pieces are assembled together, it’s time to sand down any rough edges or imperfections in order to get a smooth finish on your door. This step is important for both aesthetic purposes as well as safety purposes since sharp edges can cause injury if not properly sanded down beforehand. Use either sandpaper or an electric sander, depending on what type of wood you are using and how much work needs to be done on each edge.
5. Paint Door
Now comes the fun part – painting! Choose whatever colors you want for your fairy door, and get creative with designs if desired! You can use either spray paint or regular paint depending on what kind of look you are going for with your design – just make sure that whatever type of paint you use is suitable for outdoor use since this will ensure that it lasts longer without fading or chipping away over time due to weather conditions outside.
6. Add Accessories
Once the paint has dried completely, it’s time to add some accessories! This could include things like tiny windows, door knobs, hinges, handles, etc., which will help give your fairy door an even more whimsical look! You can find these items at most craft stores or online if needed – just make sure they fit with whatever size and style of door you have created beforehand so that everything looks cohesive when finished.
7. Drill Holes
Before adding any actual hardware such as hinges and handles onto your fairy door, drill holes into each side where they will go so that they fit securely once attached. This step is important because if done incorrectly, then there could be problems with stability when opening/closing the door later on.
8. Attach Hardware
Now comes attaching all of the hardware to your fairy door! Use screws and bolts (depending on what size hardware pieces were purchased) in order to attach each piece securely into place. Make sure not to overtighten them, though as this could lead to splitting/cracking in certain areas due to too much pressure being applied.
9. Seal Door
To protect against moisture damage from rain/snow etc., apply a sealant onto both sides of your fairy door once everything has been attached properly. This should help keep everything looking new for longer periods of time without having to worry about rusting or warping due to extreme weather conditions outside.

10. Hang Door
The final step is hanging up your beautiful new creation! Depending on where you plan on placing it (i.e. inside/outside) choose an appropriate method such as nails/screws etc., which won’t damage surface areas around it too much but still provide enough support for its weight when opened/closed regularly. Once hung up enjoy admiring all of the hard work put into making this unique piece!
Things to Consider When Making a Fairy Door
Making a fairy door can be an incredibly fun and creative project. Whether you want to make one for your child’s fairy garden or as a decoration for your own home, there are a few things to consider before diving into the project. Here are some tips that will ensure your fairy door turns out perfectly.
Materials
The first thing to think about before making a fairy door is the materials you will need. The most common materials used for fairy doors include wood, clay, and paper mache. Each material has its own unique qualities, so it’s important to choose one that best fits your vision for the door.
Design
Next, you will need to decide on a design for your fairy door. The possibilities are endless when it comes to designing a fairy door – from simple and rustic to whimsical and decorative. You can draw inspiration from fairy tale books or even create your own unique design.
Size
Another important factor to consider is the size of your fairy door. Will it be small and delicate or larger and more prominent? The size will also depend on where you plan to place the fairy door. If it’s for a child’s fairy garden, you may want a smaller door that fits in with the miniature scale of the garden.

Conclusion
Create your own magical portal to a world of wonder by crafting a fairy door. So go ahead and pick up the materials, use your creativity, and get to work! You will be delighted by the results; not only will you have a whimsical decoration for your home or garden, but maybe some tiny fairies just might find their way in too.
Furthermore, this easy project requires nothing more than basic tools and supplies, making it an ideal activity for the whole family or even just a quiet afternoon of creative exploration all on your own.
Whether you choose to make one using sticks from the yard or crafty items from the craft store, make sure to take pictures along the way to capture and share your amazing experience. So why wait? Get started today on how to make a fairy door!