
Are you looking for a fun and creative way to utilize scrap fabric? Making fabric balls can be a delightful project that not only allows you to repurpose materials but also results in charming decorative items. Whether you want to add a touch of whimsy to your home decor or create a soft toy for children, fabric balls are versatile and easy to make.

With a few simple materials and basic sewing skills, you can craft colorful and textured balls that are perfect for various purposes. In this article, we will guide you through the process of how to make a fabric ball, providing step-by-step instructions to help you create your own unique and beautiful creations.
So, gather your fabric scraps, thread, and needle, and let’s dive into the world of fabric ball making.
The Appeal of Fabric Balls as Decorative Items
Fabric balls have a wonderful, unique look that is both stylish and inviting. They are great for adding a touch of color to any room or space, making them perfect decorations for home décor. Fabric balls can be made in various sizes, shapes, and colors, allowing you to tailor the look of your space to match your design preferences. These decorative items are also great for crafting and DIY projects.
They can be used to add texture, color, and interest to a variety of items, such as wreaths, pillows, garlands, curtains, and more. Not only do fabric balls look beautiful when finished but they are also easy to make.
With the right materials and tools, anyone can create their own custom fabric ball in a matter of minutes. So if you’re looking for an interesting way to spruce up your home décor or try out a new craft project, fabric balls are definitely worth considering!
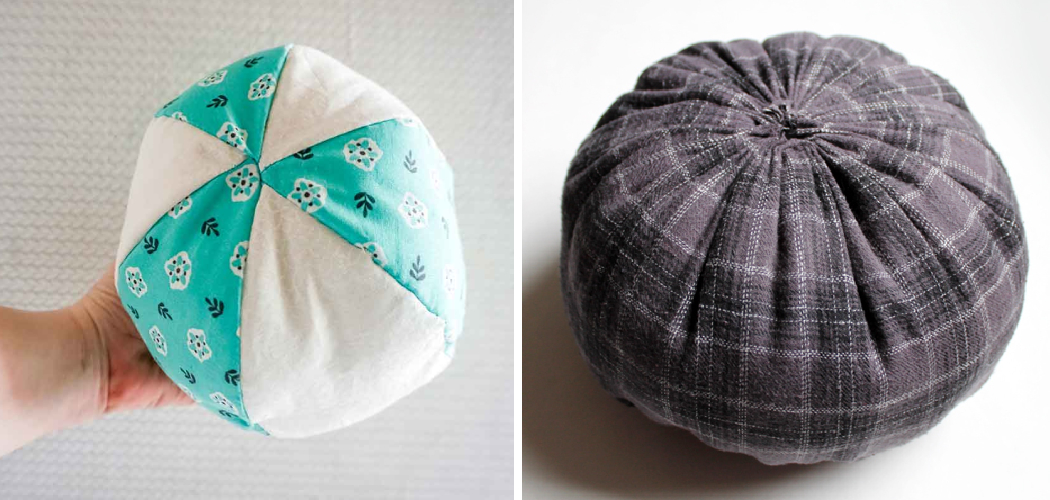
Once you have all of the necessary materials and tools on hand (see section below), making your own fabric ball is very straightforward. You will need to cut circles from the fabric of your choice, sew them together, and stuff the resulting form with batting or stuffing.
Once finished, you can adorn your fabric ball with buttons, ribbons, or other embellishments for extra decorative flair! With a few simple steps and some creativity you will have a beautiful homemade fabric ball perfect for adding a unique touch to any space.

Benefits of Making Fabric Balls
Fabric balls provide a fun and creative way to make decorations for any home. They are easy to make, come in a variety of colors and fabrics, and can be used in a variety of ways. Here are some of the benefits of making fabric balls:
1. Versatile
Fabric balls are versatile decorative pieces that can be used in any room or space, from the living room to the bedroom. They also come in different sizes, so you can make small ones for accent pieces or larger ones as focal points.
2. Long-Lasting
The quality materials used to make fabric balls ensures that they will last for years with proper care and handling. This makes them an ideal craft item to give as gifts or use as decorations around your home.
3. Inexpensive
Making fabric balls is much more cost effective than buying premade decorative items. You can use scrap fabric that you may already have or purchase inexpensive fabric from a craft store for an even more affordable option.
4. Fun
Making fabric balls is a fun project that anyone can do, regardless of skill level. With some creativity and imagination, you can create unique and beautiful decorations that suit your own style and preferences.
Fabric balls are an easy and enjoyable way to add personality and charm to any space in your home. Whether you’re looking for something simple or something extravagant, these fabric balls will make beautiful additions to any room!
10 Steps How to Make a Fabric Ball
Step 1: Gather Materials
To make a fabric ball, you will need the following materials: fabric scraps of various colors and patterns, scissors, a sewing needle, sewing thread, stuffing material (such as polyester fiberfill or cotton), a marking tool (e.g., fabric chalk or a disappearing ink pen), and a sewing machine (optional).

Step 2: Choose Fabric and Cut Templates
Select a variety of fabric scraps that coordinate well together. Consider using different textures, prints, and colors to add visual interest to your fabric ball. Using a template (such as a circular shape), trace and cut out fabric circles in various sizes, depending on the desired size of your fabric balls. You can make templates by tracing round objects of different diameters onto cardboard or sturdy paper.
Step 3: Prepare Needle and Thread
Thread your needle with a matching or contrasting thread, depending on the desired effect. Double-thread the needle and knot the end to secure it. This will provide extra strength and prevent the thread from slipping out while sewing.
Step 4: Stitch the Fabric Circles
Take two fabric circles of the same size and place them together, right sides facing. Starting at one edge, sew a straight stitch along the curved edge, leaving a small opening for turning and stuffing. Repeat this step for all the fabric circle pairs, ensuring consistent seam allowances.
Step 5: Trim and Clip Seams
Trim the seam allowance with scissors, leaving about ¼ inch (6 mm) of fabric. To reduce bulkiness and allow the fabric to lie flat, make small snips along the curved edges, being careful not to cut through the stitches. This process is known as clipping.
Step 6: Turn and Stuff the Fabric Circles
Turn each fabric circle right side out through the small opening. Gently push out the curved edges using a blunt tool, such as a knitting needle or chopstick. Once turned, stuff each fabric circle firmly with the stuffing material, ensuring the ball feels firm but not overly stuffed. Use small amounts of stuffing at a time to achieve a smooth and rounded shape.
Step 7: Close the Opening
With the fabric circle fully stuffed, carefully hand stitch the opening closed using small, discreet stitches. Ensure the stitches are secure and tight to prevent any stuffing from escaping. Take your time to create an invisible closure for a neat finish.
Step 8: Repeat and Vary Sizes
Continue making fabric balls using the remaining fabric circles, repeating Steps 4 to 7. Experiment with different sizes by using circles of varying diameters. This will add visual interest and create a set of fabric balls with different dimensions.

Step 9: Embellish and Personalize
Once you have completed the basic fabric balls, you can add embellishments and personalize them according to your taste. Consider attaching buttons, ribbons, embroidery, or decorative stitches to enhance their appearance. Let your imagination guide you to create unique and eye-catching designs.
Step 10: Display and Enjoy
Now that your fabric balls are complete, find the perfect spot to display them. Arrange them in a decorative bowl, hang them as ornaments, or use them as soft toys for children. These handmade fabric balls make delightful gifts or charming accents for any room.
Things to Consider When Making a Fabric Ball
1. Choose the Right Fabric:
Select a fabric that can easily be bunched and gathered, such as felt or fleece. Thicker fabrics are best for creating a firm ball shape. You can also use multiple fabrics to create a unique design.
2. Cut the Fabric:
Start by cutting the fabric into strips of various sizes and widths. The longer the strips, the bigger the final product will be. This is an ideal project for making use of leftover scraps from other sewing projects.
3. Begin Wrapping:
Gather one strip of fabric in your hand and start wrapping it around itself until you’ve formed a small circle or ball shape with the fabric strip. Secure this first layer with glue or hot glue gun if needed. Then move on to adding additional layers, using wider strips each time for extra support and durability.
Continue layering this way until you have reached the desired size and weight of your fabric ball.
4. Finish:
Once you’ve made your fabric ball, you can customize it by adding additional details such as ribbon or buttons. You can also sew a loop into the top to hang the finished product, or attach handles to make for easier carrying. With some creativity and the right materials, you can create beautiful fabric balls that will last for years to come!

Conclusion
In conclusion, with just a few easy steps you can make a beautiful fabric ball to add texture and interest to any room of your house. Fabric balls provide an incredibly unique pop of color that can become the focal point of any piece of decor you are looking to highlight.
Though the steps are simple enough, making fabric balls does take some patience and lots of practice! So try it out and let your crafting skills really shine through: have fun with it!
Choose bold colors, mix textures, create intricate patterns – let your imagination take over as you craft something special. Who knows, you might even develop a true passion for this project in no time! Hopefully, this article gave you some helpful tips about how to make a fabric ball successfully, so now that you have the proper knowledge on how to get the job done, why not give it a try today?