
Delving into the art of crafting your own coil basket opens up a world of tactile satisfaction and creative expression. A time-honored technique that transcends cultures, making coil baskets combines functionality with aesthetic appeal, transforming basic materials into beautiful and purposeful creations. In this guide, we embark on a journey through the steps of how to make a coil basket, from selecting materials that suit your vision to mastering the coiling method that forms the foundation of this ancient art.

Whether you’re a novice looking for an engaging introduction to basket weaving or an experienced crafter seeking a new project, the process of making a coil basket offers endless opportunities for personalization and experimentation. Join us as we explore the fusion of tradition and innovation, weaving together strands of creativity to produce a unique and functional piece that reflects your individual style and artistic flair.
Historical and Cultural Significance of Coil Baskets
Coil baskets are among the oldest forms of basketry, with evidence of their use dating back to ancient times. These baskets have been used by various cultures around the world for a variety of purposes, from carrying and storing goods to being used as decorative items.
In Native American cultures, coil baskets were an important part of daily life. For many tribes, including the Pueblo, Hopi, and Navajo, baskets were used for practical purposes such as storing food, water, and other items. However, they also held deep cultural significance and were often used in ceremonies and rituals.
In Africa, coil baskets have a long history dating back thousands of years. They were used by various tribes for carrying goods, collecting food, and even for hunting and fishing. In some cultures, coil baskets were also symbols of wealth and status, with intricate designs and patterns being highly valued.
In Asia, coil baskets have been used for centuries in countries such as China, Japan, and Indonesia. They were primarily used for storage and transportation of goods, but also had cultural significance as they were often passed down through generations.
Coil baskets have also played a significant role in the history of basketry in Europe. In countries such as Germany, Switzerland, and France, they were used for practical purposes but also had great cultural importance. Some European cultures also believed that coil baskets had magical qualities and could ward off evil spirits.
Today, coil baskets can still be found being made and used by various indigenous cultures around the world, preserving the traditional techniques and cultural significance. They have also gained popularity in modern times as decorative items or for practical use such as storage.
Materials and Tools Required for Making Coil Basket
To make a coil basket, you will need some basic materials and tools. These include:
- Raffia or other strong natural fiber
- Scissors
- Tapestry needle
- Binder clips or clothespins
- Water (optional)
- Drying rack (optional)
10 Methods How to Make a Coil Basket
1. Gather Materials
The first step in making a coil basket is to gather all the necessary materials. You will need a flexible material for the coils, such as rope or long grass, and a sturdy base material, such as cardboard or a wooden hoop. Other materials you may want to include are scissors, needles, thread, and decorative elements like beads or feathers.

2. Prepare the Base
If using cardboard or a wooden hoop as your base material, cut it into the desired size and shape for your basket. Make sure the edges are smooth and free from any sharp points that could poke through the coils. If you are using a hoop, wrap it with tape to cover any rough areas.
To create a more natural and rustic look, you can also use materials like twigs or vines as your base. Simply gather them into the desired shape and tie them together securely with string or wire.
3. Start Coiling
Take your flexible material and start coiling it around the base, securing it with small stitches or glue as you go. Keep the coils tight and close together to create a sturdy basket. You can also add different materials, such as colorful yarn or ribbon, to create unique patterns and designs.
4. Add New Material
As you run out of one piece of material, add in a new one by overlapping the ends and stitching them together. This will create a continuous coil without any gaps. You can continue adding new material as needed for your desired basket size.

5. Experiment with Different Stitches
While basic stitches like running stitch or whip stitch are commonly used in coil basket making, don’t be afraid to experiment with different stitches to create unique patterns and textures. One option is to use a blanket stitch, where the needle goes through the loop created by the previous stitch. This can create a raised and decorative pattern on the outside of your basket.
6. Shape Your Basket
As you continue coiling, use your hands to shape the basket into your desired form. You can make it tall and narrow or short and wide depending on how you want to use it. You can also add a handle to make it easier to carry. Experiment with different shapes and sizes until you find the perfect basket for your needs.
Some common shapes include round, oval and rectangular baskets. Round baskets are generally used for storing small items while oval or rectangular ones are better suited for larger objects.
7. Add Embellishments
Once you have reached your desired size for the basket, you can add decorative elements like beads or feathers by stitching them onto the coils. You can also add a handle by creating two extra coils and attaching them to the sides of the basket.
8. Finish off the Top Edge
To finish off the top edge of your basket, fold over the last few rows of coils and secure them with stitches or glue. You can also add a decorative edge by threading colorful ribbons or yarn through the coils and tying them in a bow.

9. Let It Dry
If using glue in your basket making process, allow ample time for it to dry before handling or using your basket. If the basket is wet when handling, it can cause the coils to shift or come undone. Additionally, if you’re using any dyes or paints on your basket, make sure those are dry before handling as well.
10. Enjoy Your Handmade Creation
Congratulations, you have successfully made a coil basket! Use it to store items or as a decorative piece in your home. You can also experiment with different materials and techniques to create even more unique and beautiful baskets.
Things to Consider When Making a Coil Basket
When deciding to make a coil basket, there are several things that you should consider before getting started. These considerations will help ensure that your basket turns out beautiful and functional.
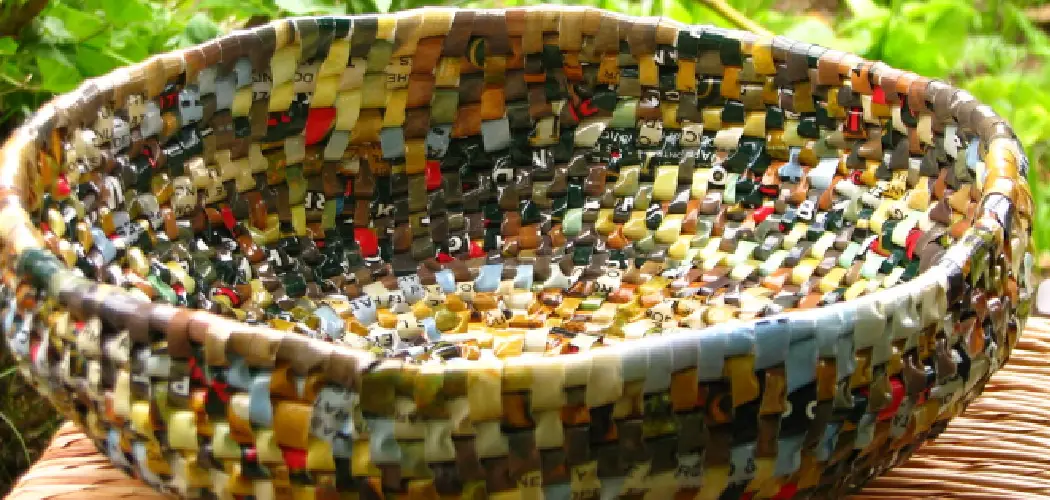
- Materials: The first thing to consider is the materials you will use for your basket. Traditionally, coil baskets were made from natural materials such as grasses, reeds, and vines. However, you can also use modern materials such as yarn, fabric strips, or plastic tubing. When choosing your materials, make sure they are pliable enough to be easily coiled but also sturdy enough to hold the shape of your basket.
- Size: The size of your coil basket will depend on its intended purpose. If you plan on using it to hold small items, then a smaller basket will suffice. However, if you want to use it as a decorative piece, you may opt for a larger size. Keep in mind that the bigger the basket, the longer it will take to complete.
- Design: Coil baskets can be made in various designs and patterns using different coiling techniques. You can create a simple spiral pattern or experiment with more complex designs. Before starting, decide on the design you want to achieve and make sure you have the necessary skills and techniques to execute it.
- Tools: While traditional coil baskets were made using only hands and basic tools, modern methods may require additional tools such as needles, pliers, or a sewing machine. Make sure you have all the necessary tools before starting your project to avoid any disruptions.
- Time and Patience: Making a coil basket is a time-consuming process that requires patience and attention to detail. It may take several hours or even days to complete, depending on the size and complexity of your design.

Conclusion
In conclusion, learning how to make a coil basket is not just about creating a simple craft, it’s about embracing the art of traditional weaving and connecting with our roots. By using natural materials and implementing ancient techniques, we can create one-of-a-kind pieces that not only serve as beautiful decorations, but also tell a story of our heritage.
Whether you choose to use this skill for personal enjoyment or to teach others, the possibilities are endless. So why not give it a try? Gather your supplies and let your creativity flow as you weave together something truly unique and meaningful. And remember, practice makes perfect – don’t be afraid to experiment and try new patterns and designs!
Expertise:
Crafting expert with a focus on innovative techniques and diverse materials.
Specialization:
- Textile arts (weaving, embroidery, and fabric dyeing)
- Woodworking and furniture design
- Mixed media and upcycling projects
Recognition:
- Featured in local art exhibits showcasing innovative craft projects
- Collaborated with community organizations to promote crafting workshops
- Received accolades for contributions to sustainable crafting initiatives
Mission:
- To inspire and empower crafters of all levels to discover their creative potential
- Encourages experimentation and self-expression through hands-on projects