
Are you interested in learning how to make a bottle brush tree? Creating a bottle brush tree is an easy and fun project that can bring any holiday celebration or winter wonderland scene to life. Bottlebrush trees are inexpensive and lightweight, and the supplies for making them can be found easily.

You’ll love putting your own personal touch on each of these festive little trees! Not only are they great decorations for the holidays, but they also make wonderful gifts as well! Read on to find out exactly what you need and how you can create beautiful bottle brush trees of your very own.
Bottlebrush trees are the perfect way to spruce up any holiday display. These miniature trees can be made with materials found in most craft stores and are a great project for adults and children alike. In this blog post, we cover all the steps you need to make your own bottle brush tree from scratch, giving you an inexpensive and creative way to ring in the holidays!
Why May You Want to Make a Bottle Brush Tree?
1 . To Decorate Your Home
Bottle brush trees are an easy way to add a festive touch to any room in your home during the holiday season. They come in a variety of shapes and styles, so you can choose one that perfectly complements your existing decor. Bottle brush trees also make great centerpieces for tables or mantles, adding some whimsy and cheer to the holiday season.
2 . To Create a Unique Gift
If you’re looking for a unique gift idea, why not make a bottle brush tree? You can customize the colors and decorations on your tree to create something special that will be sure to be treasured for years to come. It’s also an inexpensive but thoughtful way to show someone you care.
3 . To Enjoy Crafting
Making a bottle brush tree is also just plain fun! You can get creative with the design, choosing colors and decorations that reflect your individual style. This can be a great family activity too, as everyone can join in on the crafting process and create a beautiful tree together. Plus, it’s something that will last year after year, so you can enjoy your creation and its sentimental value for years to come.

4 . To Teach Kids About Crafting
Making bottle brush trees is also an excellent way to teach kids basic crafting skills. They’ll learn how to use hot glue, paint, and other materials to make a one-of-a-kind creation. This is a great way to introduce them to crafting and give them the confidence to try more complex projects as they get older.
Making your own bottle brush tree can be a fun project for the whole family, or something you do alone in order to enjoy some quiet time and indulge your creative side. No matter why you choose to make one, it’s sure to be a festive addition to your home during the holiday season!
How to Make a Bottle Brush Tree in 5 Easy Steps
Step 1: Gather All The Tools You May Need
The very first step is to collect all the items you will need to create a Bottle Brush Tree. You will need a foam board, bottle brushes, glue gun & glue sticks, paintbrush and some acrylic paints in colors of your choice.
Step 2: Prepare Your Foam Board
Lay down your foam board on a flat surface and then trace out the desired shape of your tree. You can use a pencil to mark the outline and then use a knife to cut along the shape you have created for your tree.
Step 3: Begin Attaching Bottle Brushes To Your Foam Board
Once you are done cutting out your foam board, begin attaching bottle brushes of different sizes to it using glue gun & glue sticks. Make sure that you leave some space between each bottle brush so that they look like branches of the tree.

Step 4: Paint The Bottle Brushes To Make Them Look More Realistic
Once all the bottle brushes are attached to the foam board, it’s time to paint them. Take a paintbrush and acrylic paints in colors of your choice and start painting each bottle brush accordingly. You can even mix paints to get different colors and add texture to your tree.
Step 5: Add The Final Touches To Your Bottle Brush Tree
Once you are done painting all the bottle brushes, it’s time to add some final touches. You can use some hot glue or felt letters to create a star for the top of the tree or hang some small ornaments to make it look more festive.
Some Extra Tips to Make a Bottle Brush Tree
1 . Do Not Overpower the Bottle Brush Tree
Too many decorations can take away from the look of your bottle brush tree. You want to make sure that you are not overpowering it with too much tinsel, garland, or other accents. Choose a few select decorations and colors in order to keep the focus on your beautiful bottle brush tree.
2 . Consider Adding Lights
Adding lights to your bottle brush tree can help to create a more festive atmosphere. String lights around the branches of the tree give it an extra special look. You can also add shimmery string light ornaments on the tips of each branch for extra sparkle and shine.

3 . Keep It Clean
Be sure to keep your bottle brush tree clean. Dust can build up quickly on the branches and detract from the beauty of your decoration. Use a soft cloth and a mild detergent to gently remove any dust or dirt that accumulates over time.
4 . Upcycle Your Bottle Brush Tree
Once you are done with your bottle brush tree, don’t throw it away! Reuse it in a different way. You can use the branches to make festive wreaths or wall decorations. The possibilities are endless!
Frequently Asked Questions
What Precautions Should I Take When Making a Bottle Brush Tree?
When creating your bottle brush tree, make sure to wear gloves and safety glasses to protect your hands and eyes from any splinters or sharp edges. Always use a saw or other cutting tool that is designed for cutting wood and never force the blade through the material as this can cause injury.
Before gluing anything together, always make sure the pieces fit properly, as this will help to ensure a tight bond between parts. Additionally, be sure to work in a well-ventilated area and use adequate ventilation when working with paint or varnish. Finally, after sanding down the edges of your bottle brush tree, make sure to clean off any dust particles before adding on any additional decorations or paint.
How Do I Decorate My Bottle Brush Tree?
Once your bottle brush tree is assembled and sanded, you can start to get creative with decorations. Paint or varnish the tree in any color or design of your choosing.

You can also add glitter, sequins, string lights, ornaments, star-shaped foam pieces, or other decorations to bring your tree to life. Alternatively, you can choose to leave the tree plain and simply spray a clear coat of sealant over it for a natural, rustic look.
What Are Some Different Ways I Can Display My Bottle Brush Tree?
Bottlebrush trees are traditionally displayed on mantels or shelves but there are many different creative ways to show off your handiwork. You can place it on a tabletop or hang it from the ceiling, perhaps with some decorative ribbon or twinkle lights.
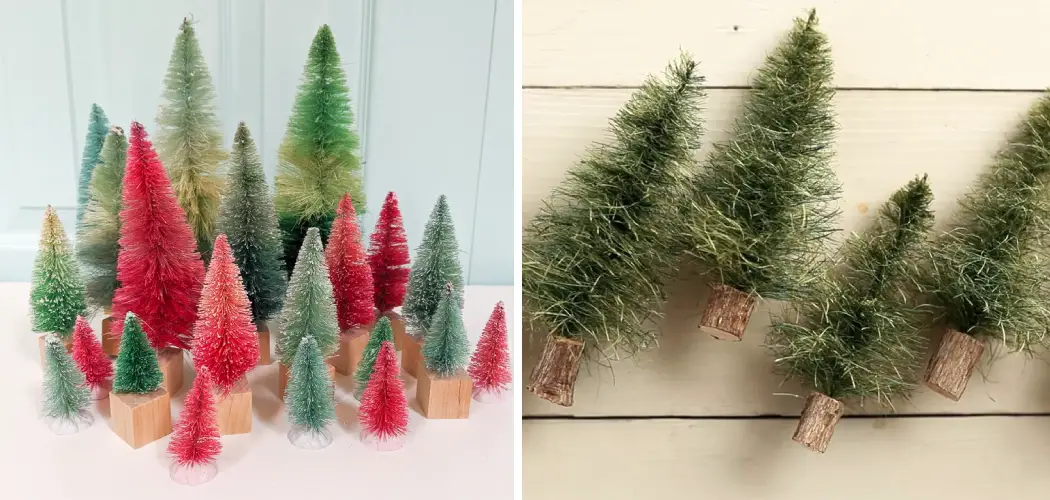
Another fun idea is to display multiple bottle brush trees in varying sizes and colors for an eye-catching centerpiece display. Whatever you choose, your unique bottle brush tree is sure to be admired by all!
What Else Can I Make With Bottle Brush Trees?
In addition to making bottle brush trees, you can also use the same materials and techniques to create other miniature scenes. From holiday-inspired scenes with snowmen and reindeer to woodland creatures or fantasy landscapes, the possibilities are endless.
These pieces make wonderful gifts for friends and family and can be used as decorations throughout your home. With a few simple materials and some imagination, you can create beautiful, one-of-a-kind works of art.
Conclusion
Creating a bottle brush tree is a fun and creative way to decorate the home or to give as a gift. It can be personalized with different colors, sizes, and materials for each unique creation.
With some time and patience, it is possible to make a beautiful and realistic-looking piece of art with simple supplies that are easy to find. Who knew something so pretty could come out of such everyday items? It’s amazing what we can make with a bit of creativity.
Now you know how to make a bottle brush tree! There are lots of different designs that can be made with a bottle brush tree and it’s fun experimenting with new ideas. This craft is great for all ages; even people who don’t consider themselves crafty! So grab your supplies, get creative, and have fun creating your very own bottle brush tree.