
Stepping into the holiday season is always an exciting time of year. Whether you’re a first-time knitter or have plenty of experience, there’s nothing quite like getting cozy and crafting something truly special for Christmas.
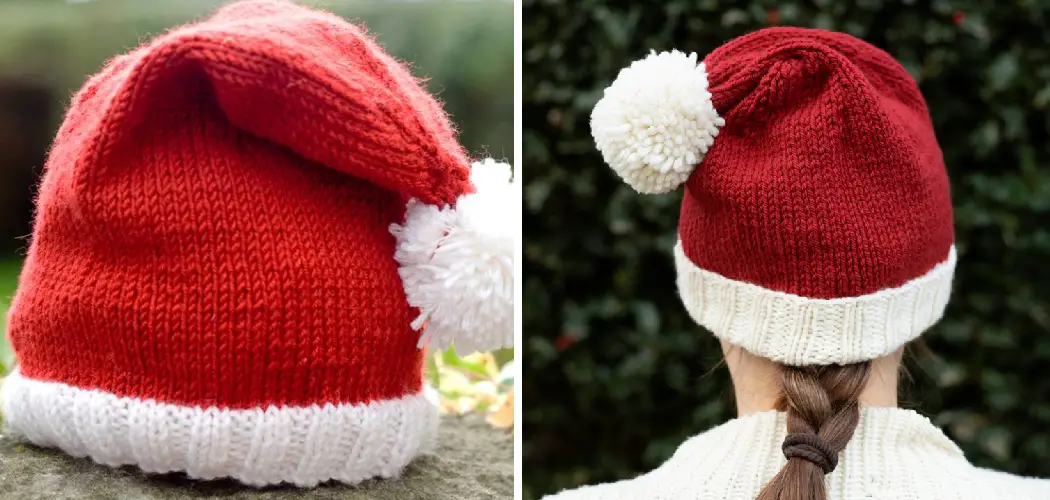
And what could be more festive than knitting Santa hats? With its iconic red and white stripes and jolly pom-pom topper, this whimsical accessory is sure to add some cheer—and warmth—to your winter wardrobe! In this blog post on how to knit santa hat, we’ll show you have to create this classic hat with ease. Let’s get started!

Needed Tools and Materials
Given below are the materials you’ll need to make a Santa hat:
- 100 Grams of Worsted Weight Yarn, Preferably in Red and White Colors.
- A Pair of 4mm Double Pointed Needles, or Size Us 6 Knitting Needles
- Tapestry Needle
- Scissors
- Stitch Holder
- Pom-Pom Maker
- Sewing Thread and Needle.
11 Step-by-step Guidelines on How to Knit Santa Hat
Step 1: Prepare the Yarn
Start by winding the yarn into a ball and cutting off the lengths of the red and white wool to prepare for knitting. You’ll need to cast on stitches with both colors so make sure you have enough yarn ready at hand before starting your project. It’s time to begin! But before you start, it’s important to keep in mind that the two skeins of yarn will be held together throughout this pattern.
Step 2: Cast On Sixty-Four Stitches
Now for the fun part; you’re ready to cast on! Take both strands of yarn (red and white) and cast on 64 stitches using your 4mm needles. Make sure the knot is tight so your stitches don’t slip off later. It’s also important to note that the color order of the yarn does not matter, as we are using both strands together throughout this pattern.
It’s now time to join in the round. You can do this by slipping the first stitch onto the right-hand needle, joining a circular loop and continuing to knit in rounds from here.

Step 3: Knit Two Rounds
Once you’ve cast on, the next step is to knit two rounds. Make sure your stitches are nice and even to ensure the rest of your pattern looks neat. Otherwise, you’ll end up with a bumpy and uneven hat. It’s important to note that the number of stitches should remain constant throughout this step.
If you find an extra stitch, make sure to decrease one so that the total number adds up again. This will ensure your hat looks even.
Step 4: Join in the Round
It’s time to join both ends together and create a round shape. To do this, use the tail end of your yarn to join both ends of the knitting together. This will create a seamless circular shape. It’s also important to note that the edges need to be joined together very tightly or else your hat will not turn out as desired. But don’t overdo it! If you make the stitches too tight, the knitting won’t move and you may run into trouble later on.
Step 5: Start the Striping Pattern
Once your knitting is in a circular shape, start adding stripes by alternating between red and white sections. To begin, work four rounds in red followed by two rounds in white wool. Keep repeating this pattern until you reach your desired length. This is the most important step in creating a traditional Santa hat as it’s what gives the final look its iconic red and white stripes.
Step 6: Decrease the Number of Stitches
When your knitting hat is long enough, it’s time to start decreasing stitches. This will help create a rounded shape for the top of the hat. To do this, knit two stitches together around each round.

Continue decreasing in this way until you have only 8 stitches remaining. It is important to keep decreasing in order to shape the top of the hat. You can also adjust the number of rounds depending on how deep or shallow you want your hat to be.
Step 7: Cut and Secure the Yarn
When you’ve reached your desired length, cut off the yarn leaving a few inches of excess yarn. Thread the end through all eight stitches before pulling tight and securing it in place with a knot. But don’t cut off any extra yarn just yet; this will come in handy later on. You now have the main body of your hat all ready to go! It’s time to move on to the next step.
Step 8: Sew in the End
Now that the top of your hat is secure, use a tapestry needle and yarn to sew at the end of the hat. Make sure to pull it through from one side before weaving it back out and cutting off any excess yarn. This will provide a neat and secure finish to the top of your hat. If done correctly, you shouldn’t be able to see where the yarn was sewn in once the hat is finished.
Step 9: Create the Pom-Pom
Your Santa hat isn’t complete without a pom-pom! To make your own, use the pom-pom maker and wrap the yarn around it between 20 to 30 times. Then cut off the excess yarn and tie it in place with a piece of string before trimming off any excess pieces. But don’t forget to leave a few inches extra so that you can attach the pom-pom to the hat later on.
Step 10: Sew on the Pom-Pom
Once your pom-pom is complete, sew it securely onto the top of the hat using a needle and thread. Make sure you pull it tight so that the pom-pom doesn’t fall off later! However, you can also use a hot glue gun if you prefer. This will provide an extra secure hold and finish to the top of your hat. It’s time to admire your work! You now have a festive and cozy Santa hat all ready to go.

Step 11: Congratulations – You’ve Knit Santa Hat!
You did it—you’ve knitted a Santa Hat! Whether you plan to keep it for yourself or gift it to someone special this holiday season, this festive hat is sure to bring plenty of joy and cheer. Always remember that making mistakes is part of the learning process. It’s also important to keep practicing in order to improve your knitting skills and create beautiful hats with ease.
So grab your knitting needles now and get crafting! We guarantee that you’ll love the finished product—you don’t need to be a pro knitter or have years of experience to make this project. With the steps above, you can easily create your own Santa hat in no time.
Good luck and happy knitting!
Tips For Making Your Santa Hat
Here are some tips that will help you make your Santa hat even better:
- Use a Larger Needle Size if You Want Your Hat to Be Fluffier and Cozier.
- Make Sure the Pom-Pom is Securely Sewn on the Hat, so it Doesn’t Fall Off.
- Use Different Colors to Make Your Santa Hat Stand Out.
- Check Your Gauge Before Starting for an Accurate Fit.
- Pay Close Attention to the Pattern When Decreasing Stitches for a Neat Finish.
Follow these tips on how to knit santa hat to make sure your Santa hat looks great and lasts for years to come! We hope you have a wonderful time knitting this festive accessory. Have fun, get creative and happy holidays!
Do You Need to Use a Professional?
Knitting your own Santa hat is a great way to save money and make something unique. But if you don’t have the time or patience to make one yourself, then hiring a professional knitter is always an option. A professional can help you design and create the perfect Santa Hat for you that will last for years to come.

So if you’re looking for a unique and custom-made Santa hat, then don’t hesitate to reach out to professional knitters near you. We guarantee you won’t be disappointed with the results!
Frequently Asked Questions
Q. What Type of Yarn Should I Use for My Santa Hat?
A. We recommend using worsted weight yarn, preferably in red and white colors for the traditional look. But feel free to experiment with different types and colors to make your own unique-looking Santa hat!
Q. Can I Change the Pattern for My Hat?
A. Absolutely! You can customize your Santa hat by changing up the stripes or adding different details like tassels and sequins. But if you’re a beginner, it’s best to start with the traditional pattern first and then experiment with different techniques once you get comfortable with the basics.
Q. Is This Pattern Suitable for All Skill Levels?
A. Yes, this pattern is suitable for all skill levels and can be easily adapted to suit your own knitting abilities. The instructions are simple enough for beginners to understand but experienced knitters can also get creative and add their own personal touches to make it unique.
Q. How Many Stitches Should I Cast On?
A. For this particular pattern, you’ll need to cast on 64 stitches. Make sure these are evenly divided between the red and white yarns so that the stripes come out nice and even later. It’s also important to use the correct needle size so that your Santa Hat fits correctly.

Conclusion
Now you know the basics of creating your own Santa Hat! This project is perfect for helping you get into the holiday spirit while using up scraps of yarn from previous projects.
The added bonus is that you can save money and have a fun and memorable keepsake that will last for years to come! When your hat is finished, make sure to take a photo of yourself or someone else wearing it and post it on social media.
You’ll be sure to brighten someone’s holiday with this special handmade gift. So get your knitting needles out and create something for the holidays that everyone will love this year! Thanks for reading this article on how to knit santa hat.