
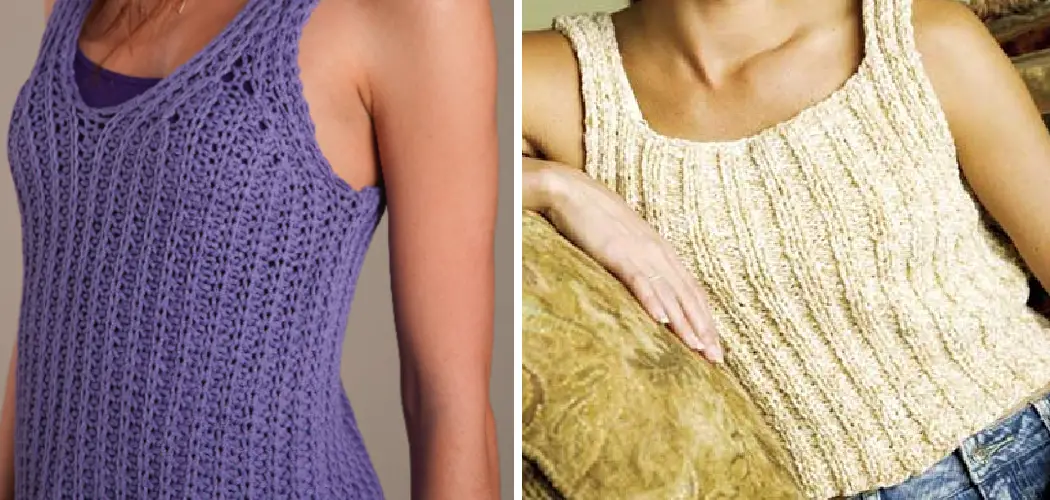
Knitting a tank top opens up a world of stylish versatility, allowing you to create a wardrobe staple that’s perfect for warm weather and layering. Mastering the art of how to knit a tank top not only adds a chic handmade piece to your collection but also enhances your knitting skills.
In this comprehensive guide, we’ll embark on a journey through the process of knitting a tank top, from selecting the right yarn and needles to following intricate stitch patterns and shaping techniques.

Whether you’re a seasoned knitter seeking a new challenge or a beginner eager to dive into garment knitting, we’ll explore step-by-step instructions that cater to all skill levels. Join us as we unravel the world of tank top knitting, offering insights and tips that will empower you to create a fashionable and comfortable garment that reflects your personal style.
Knitting a Tank Top and Its Versatility
A tank top is a versatile clothing article that can easily be made with some knitting skills. Depending on the chosen yarn, knitted tank tops can come in different sizes, colors and textures to suit your needs. With the right materials and instructions, you’ll be able to knit your own stylish tank top in no time!
Benefits of Handmade Tank Tops and Customization Options
When it comes to tank tops, there’s no better way to express your creativity than with a handmade one! Knitting a tank top allows you to customize everything from yarn choice and color, to texture and thickness.
By taking control of the creative process, you can make sure that your tank top is perfect for your style and taste. Plus, knitting your own tank top can be more cost-effective than buying a pre-made one.
When it comes to customization, you have the freedom to choose from a variety of colors and yarns for your tank top. If you’re looking for something unique, consider working with a variegated or hand-dyed yarn. This will give your finished product a one-of-a-kind look.

Additionally, you can also choose from different patterns and textures when knitting your tank top. Depending on the pattern you choose, you could end up with a tank top with intricate detailing or a more basic design.
Finally, knitting a tank top allows you to make sure that it fits perfectly. By adjusting the length, width and shape of your tank top, you can be sure that it’s the perfect fit for you. With a handmade tank top, you can create a piece of clothing that is comfortable and flattering.
So if you’re looking to add some unique pieces to your wardrobe, consider knitting up a custom tank top!
Materials Needed for Knitting a Tank Top
- Yarn
- Needles
- Measuring tape
- Scissors
- Sewing needle and thread (optional)
Choosing Appropriate Yarn Weight and Fiber for a Tank Top
Knitting a tank top requires choosing the right yarn weight and fiber for your project. Start by selecting a lightweight yarn, such as sport or DK (double knit) weight yarn. This will create a fabric that’s light enough to drape nicely while still having enough structure to hold the garment together.
You’ll also need to decide if you want to use a natural fiber like cotton or wool, or a synthetic yarn. Natural fibers tend to be softer and more breathable, while synthetic fibers can provide durability and water resistance. When picking out your yarn for a tank top, consider the climate you live in as well as how often you plan on wearing it.

With the right yarn, you’ll have an airy, comfortable top that’s perfect for the summer season. Keep in mind that you may need to use two or more strands of yarn held together to create a fabric dense enough for a tank top. Be sure to swatch and adjust needle size accordingly when knitting with multiple strands!
Once your yarn is chosen, it’s time to pick out the correct needles for your project. When knitting a tank top, you’ll need two circular needles: one of them should be slightly smaller than the other. The smaller needle size makes it easier to cast on and off as well as create neat edges for the bottom hemline and armholes.
It’s important to keep in mind that the gauge of your fabric needs to match the pattern’s gauge, so choose needles that are closest in size to the recommended one. This will ensure your garment fits properly and looks great when finished!
10 Methods on How to Knit a Tank Top
1. Gather Supplies:
Before you can begin knitting your tank top, you will need to gather the necessary supplies. This includes yarn, knitting needles, a measuring tape, and a crochet hook. Make sure that you have enough yarn to complete the project and that it is the right weight for the type of tank top you are making.
2. Measure Your Chest:
The next step is to measure your chest so that you can determine how wide and long your tank top needs to be. Measure around the fullest part of your chest and then add an inch or two for ease of movement. Write this measurement down so that you can refer back to it later.
3. Calculate Yarn Requirements:
Once you know how wide and long your tank top needs to be, you can calculate how much yarn you will need for the project. Generally speaking, knitwear requires about twice as much yarn as crochet wear does so keep this in mind when calculating how much yarn to purchase.

4. Cast On Stitches:
Now it’s time to begin knitting! Start by casting the number of stitches needed for your tank top based on its width measurement (the number of stitches should equal half the width measurement). For example, if your chest measures 40 inches around, then cast 20 stitches onto one needle.
5. Knit in Stockinette Stitch:
Next, begin knitting in stockinette stitch until the piece measures the desired length from the cast-on edge (the number of rows should equal half the length measurement). To knit in stockinette stitch, simply alternate between knitting one row and purling one row until the desired length is reached.
6. Shape Armholes:
Once the piece has reached its desired length from the cast-on edge, it’s time to shape the armholes by decreasing stitches at each end of every other row until only ten stitches remain on each side (or whatever number was determined by measuring).
7. Divide for Front & Back:
Once armholes are shaped, divide the remaining 10 stitches into two sections – 5 stitches per section – which will form the front & back of the tank top, respectively. Place these two sections onto separate needles or holders so they don’t get mixed up while working on them separately later on in pattern instructions.
8. Knit Front & Back Separately:
With front & back sections now divided onto separate needles/holders, continue knitting each section separately until they measure the same length from armhole shaping (this should match the original length measurements taken earlier).

When finished with both front & back sections, place them onto the same needle/holder once again so they can be worked together again later on in pattern instructions.
9. Join Shoulders Together:
Now it’s time to join shoulders together by using the three-needle bind-off technique (if unfamiliar with this technique, please refer to additional resources below).
To do this simply hold both pieces together with the wrong sides facing outwards and use a third needle to knit the first stitch from each piece together before binding off the second stitch from each piece etc…until all stitches have been bound off.
10 Finish Neckline Edging:
Finally, finish neckline edging using either single crochet stitch or slip stitch depending upon desired look/style of the finished garment (for more information, please refer to additional resources below). When finished with edging, weave in any remaining loose ends and enjoy wearing a new handmade tank top!
Things to Consider When Knitting a Tank Top
Knitting a tank top can be a fun and rewarding experience. Before you start, there are a few things to consider.
First, make sure you have the right materials for your project. You’ll need yarn of the appropriate weight and color, plus the right size of needles and other tools such as stitch holders or markers. Make sure that the yarn is of good quality and that it won’t be too difficult for your current knitting skill level.

You’ll also want to make sure you have the right pattern for the tank top you’d like to knit. Choose a style that fits your body shape best and decide on the size before beginning. When knitting, it’s important to keep track of what stitches you have completed and the pattern’s instructions so that your tank top is finished correctly.
Finally, remember to block your tank top after you finish knitting it. Blocking involves soaking the yarn in water and then stretching it out and shaping it to its intended shape before allowing it to dry. This ensures a neat and even look for your tank top.
Now that you have all the necessary information for knitting your tank top, get ready to start creating! Follow your pattern and enjoy every step of the process. In no time, you’ll have a beautiful new tank top to show off!
Some Common Mistakes to Avoid When Knitting a Tank Top
When knitting a tank top, there are some common mistakes that can be made. The most important thing to do is to measure your gauge correctly. This will ensure that you get the right size and stitch count for your tank top.
Another mistake to avoid is getting the wrong yarn for your pattern. Some yarns may feel different when knitted and can affect the way your tank top looks. It is important to make sure that you use the right type of yarn for your pattern.
It is also important to make sure that you follow the instructions exactly as written. Some patterns may have complex stitch patterns or other techniques involved, so it is essential to follow the instructions closely so that your tank top turns out correctly.
Finally, don’t forget to block your tank top once it is finished. Blocking can help to even out any irregularities in your stitches and ensure that your garment looks its best when completed.
How Easy Is It to Knit a Tank Top?
Let’s start by gathering the supplies you’ll need to knit a tank top. You’ll need a pair of size 7 knitting needles, scissors, yarn in whatever color and weight you desire, measuring tape, stitch markers, tapestry needle, and some basic knowledge of how to knit.

Before you begin knitting your tank top, be sure that you have measured yourself accurately and that you have the correct stitch counts for the size tank top that you want to make. To get your gauge, cast on 20 stitches and knit a 4-inch square in stockinette stitch. Measure your swatch and compare it to the pattern’s gauge instructions. Adjust accordingly if necessary before beginning your project.
Another important step before beginning is to swatch your yarn and pattern. Make sure you know how the stitch looks in your chosen yarn and if it will fit into the design you have in mind for your tank top. This is an essential step that should not be overlooked!
Conclusion
In conclusion, learning how to knit a tank top can be one of the most rewarding experiences you have ever had. Not only will you feel a sense of pride and accomplishment for making something so beautiful but you will also impress your friends with all your new knitting skills!
With this guide, we hope that we have provided you with the information needed to begin this amazing journey of creating your own gorgeous piece of clothing. So don’t waste any more time- get out there and get knitting and make yourself a stunning tank top! No matter how daunting the task may seem, just take it one stitch at a time and before long your friends will be amazed at your craftiness.