
Do you want to learn how to knit a stylish headband? Not sure where to start? Well, look no further! We’ve got just the thing for those who are looking for an interesting twist on the classic cold-weather accessory. In this blog post, we’ll walk you through all of the steps needed to create a unique and fashionable headband that is as simple as it is chic.
You’ll be surprised at how easy it is while still learning a valuable skill! So grab your knitting needles and let’s get started-you’re about to become an expert in headband knitting with this tutorial!

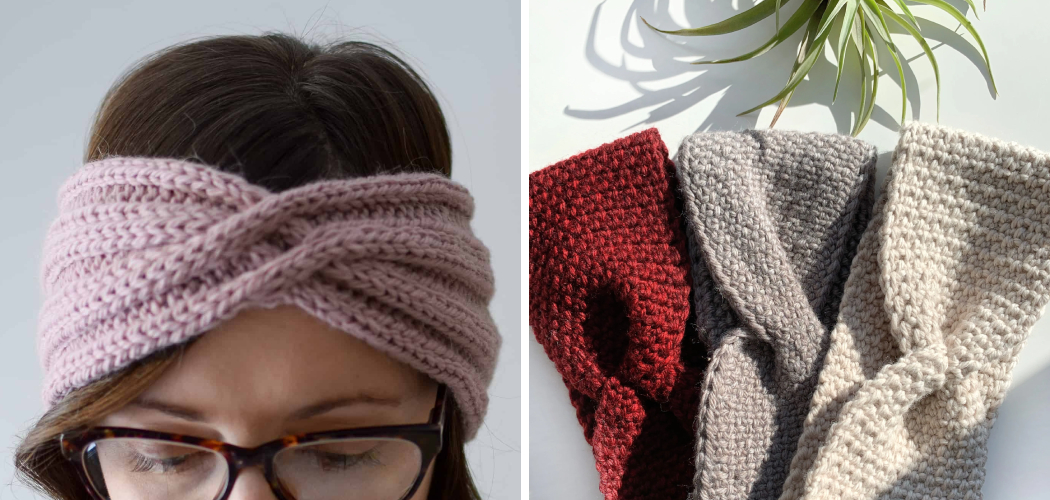
Knitting is a great way to add some style to your wardrobe, and making a headband with a twist is an easy way for beginners to get creative.
Whether you’re just learning how to knit from scratch or already know the basics, this tutorial on how to knit a headband with a twist will walk you through all the steps necessary for creating a cool twisted-knit headband that’s sure to make you stand out!
Why May You Want to Knit a Headband With a Twist?
1 . To Add a Little Flair
Knitting a headband with a twist is the perfect way to add some extra flair and style to your wardrobe. The twist design adds visual interest and can help you make any outfit unique. It also gives you the opportunity to use different colors or textures, so you can really get creative with it!
Plus, when you knit something yourself, you always have the pride of a job well done.
2 . To Try Something New
If you’re an experienced knitter, a headband with a twist is great way to challenge yourself and try something new. It requires different techniques than regular knitting patterns, so it pushes your skills and helps you become even more proficient in the craft. Plus, it gives you a chance to show off your creativity with the finished product.
3 . To Preserve Memories
Knitting a headband with a twist is also an excellent way to preserve memories of special places or people in your life. For example, if you’ve ever been on vacation somewhere special, knitting a headband inspired by that location is a wonderful way to remember it.
You can use different colors or textures that remind you of the place, and then wear the headband as a reminder anytime you want to go back there in your mind.

Whatever reason you have for wanting to knit a headband with a twist, it’s definitely an enjoyable project that combines creativity with skillful craftsmanship. With a few simple materials and some practice, you’ll be able to make your own headband in no time at all.
How to Knit a Headband With a Twist in 6 Easy Steps
Step 1: Gather All The Tools
The very first step is to organize and gather all the necessary tools for knitting a headband with a twist. The essential tools include size 7 knitting needles, yarn in your desired colors, and scissors.
Step 2: Cast On
Once you have all the supplies ready, it’s time to begin! Start by casting 44 stitches onto one needle. This will form the base of your headband.
Step 3: Knit in Pattern
Next, begin to knit in a pattern that will form the twist in your headband. To do this, start by knitting 1 row with 12 stitches on the first needle, 20 stitches on the second needle and then 12 again for the third needle. After completing one row, switch the order of the needles and knit in the reverse pattern. This will create a twist in your headband each time you switch directions.
Step 4: Continue Repeating the Pattern
Continue repeating this same pattern until your headband reaches the desired length. A good rule of thumb is to measure around your head (just above your ears) and then make sure your headband reaches at least that length.
Step 5: Cast Off
Once you have reached the desired length, it’s time to cast off. To do this, simply knit two stitches together until there is only one stitch left on each needle. Cut the yarn and pull tight to secure the last three stitches.
Step 6: Weave in Ends
The last step is to weave in the ends. To do this, carefully thread a tapestry needle with yarn and use it to weave the ends of the yarn into the headband. When you’re done, snip off any excess yarn and your twist headband is complete!

Frequently Asked Questions
What Precautions Should I Take When Knitting a Headband With a Twist?
When knitting a headband with a twist, it is important to be mindful of the tension and direction of your stitches. Make sure you keep the same amount of tension throughout the project and that you’re keeping track of which side is up and down.
Additionally, be sure to pay attention to the pattern and make sure you’re following it correctly. Finally, double check your work often to ensure that everything is in the right place.
What Type of Yarn Should I Use?
When knitting a headband with a twist, it’s important to use a comfortable yarn that has good drape and elasticity. A good yarn choice for this project would be wool or a blend of wool and acrylic. This type of yarn will provide the necessary stretch for your headband while still retaining its shape.
Additionally, if you’re looking to add some extra warmth, consider using a thicker yarn such as aran weight or bulky.
What Are Some Alternative Designs?
If you’re looking to switch things up, there are many ways to add a unique twist to your headband. Consider adding stripes in different colors or patterns, increasing the size of the headband for more coverage, or incorporating lace stitches or fringe along the edge. Have fun and get creative with this project!
How Do I Secure the Edge?
To secure the edge of your headband, you’ll need to cast off. To do this, knit two stitches together and then slip the stitch that you just knitted onto the right needle without knitting it. Repeat this process until there are no more stitches left on the left needle and then cut your yarn leaving a few inches of yarn tail. Finally, thread the yarn tail through the remaining stitches and pull tight to secure.
What Else Can I Do With This Headband?
Once you’ve completed your headband, there are many ways to customize it further. Try adding a flower or bow embellishment, embroidering a design, or crocheting an edge along the band. You can also use the same pattern to make a neck warmer or scarf. The possibilities are endless!

Some Extra Tips to Knit a Headband With a Twist
1 . Do Not Pull Too Tight
It is important not to pull too tight when knitting the headband or it will be uncomfortable to wear. Double-check as you go that the stitches are neither too loose nor too tight. Also, remember to switch the order of needles when creating the twist and pull gently as you cast off.
2 . Use Multiple Colors
Want to add some more flair to your headband? Try using multiple colors when knitting! This will create an eye-catching pattern that looks great in any style. Just make sure to pay attention while switching yarn colors so that you can keep track of the order.
3 . Add a Bow
For an extra touch of style, try adding a bow to your headband! Simply buy or make a small bow and attach it to one side of the headband. You’ll have a unique and stylish accessory that can be worn with almost any outfit.
There you have it! With just a few simple steps, you can easily learn how to knit a headband with a twist. So grab some supplies and get started on your next knitting project today.

Conclusion
With a few simple knots and stitches, knitting a headband with a twist is now within reach! Beginner knitters should not be discouraged either; with the right resources and guidance, even a beginning knitter can make an elegant twist headband.
Whether it’s for yourself or someone special, giving the gift of handmade craftsmanship is one of the most meaningful gestures you can give.
Now you know how to knit a headband with a twist! Crafting beautiful gifts such as this decorative headband is sure to bring happiness to anyone’s day. Have confidence in your skills and embrace that creativity! Enjoy your new-found knitting craft today and let those colorful skeins become something unique and special.