
Embarking on a knitting journey can be both exciting and rewarding, especially when it involves crafting adorable and tangible creations like knitted ducks. If you’re a knitting enthusiast eager to delve into the world of three-dimensional projects, learning how to knit a duck for beginners can be the perfect introduction.
Even if you’re a complete beginner, fear not – this venture into knitting isn’t as complex as it might seem. Creating a knitted duck involves understanding basic stitches, exploring color variations, and gradually constructing a charming little character that can be a delightful addition to your collection or a heartwarming gift.

Beyond just mastering stitches, this project allows you to grasp the fundamentals of shaping and assembly, helping you develop essential skills that will serve as building blocks for more intricate projects in the future. In this guide, we’ll unravel the steps, provide tips, and offer guidance, ensuring that your journey into knitting a duck is as enjoyable as the final adorable result.
The Simplicity of the Project, Perfect for Newcomers to Knitting
Knitting a duck is one of the most simple and straightforward projects for newcomers to knitting. With just basic skills, you’ll be able to produce an adorable and unique result that will make your friends and family proud.
All you need are some supplies such as yarn, needles, safety eyes, stuffing and a sewing needle with thread. Plus, this project is suitable for all ages! Once you’ve got your supplies, it’s time to get creative and start knitting.
To begin, use the yarn of your choice for your duck project and cast on the number of stitches specified in the pattern. Depending on how tight or loose a knitter you are, this could be anywhere from 14-24 stitches.
If you’re feeling overwhelmed in the beginning, take a moment to remind yourself that this is an easy project and you can do it. As you progress, remember to pay attention to your stitches and tension so that your duck looks even and neat.
Once you’ve finished knitting your duck, move on to the finishing touches. Attach safety eyes for your duck’s face, stuff it with the stuffing of your choice and use a sewing needle to sew up the duck. Now, you’ll have an adorable and unique duck that can be enjoyed by everyone!
List of Essential Knitting Supplies
Here are the essential knitting supplies you’ll need for this project:
- Knitting Needles: Size 6 (4mm) should be perfect for beginners.
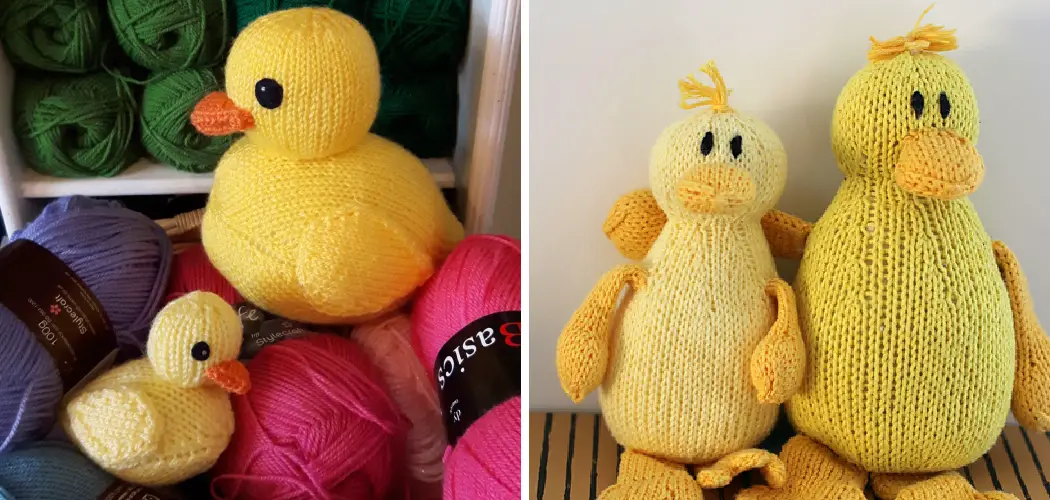
- Yarn: Choose a medium weight yarn. The color is up to you, but yellow is a traditional choice for a duck.
- Scissors: A sharp pair for cutting yarn.
- Tapestry Needle: For weaving in ends and assembling your duck.
- Stuffing: To give your duck shape and volume.
- Stitch Markers: To help keep track of your place in the pattern.
- Safety Eyes: Optional, but they can give your duck a nice touch!

Choosing Suitable Yarn Colors for the Duck’s Body
Once you have the basic duck shape created, it’s time to choose which colors of yarn you’d like to use for the body of your duck. Since there are so many different shades and hues available in yarn, it can be difficult to decide what you want your duck to look like. The key is finding a color palette that works with the design of your duck.
For example, if you’re making a blue duck, you could choose to use several shades of blue yarn for the body. You can also mix and match colors like yellow and orange or pink and purple to make your duck look even more unique.
Just remember to select colors that work together when choosing yarn for your duck project! Once you have chosen the yarn colors, you can start knitting the body of your duck.
To knit the body of the duck, make a chain using 11 stitches and work in single crochet to create a circle. Join each round with a slip stitch and then increase by one stitch in each round until you have 19 stitches. When you reach 19 stitches, continue working without increasing until your piece measures 6 inches from the center. Now it’s time to add details to your duck like eyes, a beak, and wings!
For the eyes and beak, use contrasting colors of yarn that look good against the body of your duck. For example, if you’ve chosen yellow and orange for the body of your duck, try using black or white for the eyes and beak. To make the wings, use two-stranded knitting in a rib stitch for extra texture.
10 Methods on How to Knit a Duck for Beginners
1. Gather Your Supplies
Before you start knitting your duck, you’ll need to gather all the supplies you need. This includes yarn, knitting needles, scissors, and a tapestry needle. You’ll also need some stuffing for the body of the duck. Once you have all of these items, you can begin knitting your duck!
2. Cast On Your Stitches
Once you have gathered all of your supplies, it’s time to cast on your stitches. To do this, use a pair of knitting needles and wrap the yarn around them until there are enough stitches to make up the size of the duck that you want to create. Once you have cast on your stitches, it’s time to start knitting!

3. Create the Feet
The next step is to create the feet for your duck. To do this, knit two rows in stockinette stitch and then decrease one stitch at each end of every row until there are four stitches remaining. Then bind off those four stitches and set them aside for later use.
4. Knit The Body
Now that you have created the feet for your duck, it’s time to move on to knitting the body. To do this, continue working in stockinette stitch until the desired length has been reached (or until it reaches just below where the neck will be). Then bind off these stitches and set them aside for later use as well.
5. Make The Neck
Once you have finished knitting the body of your duck, it’s time to make the neck portion by picking up four stitches from one side of the body and four from the other side. Then knit two rows in stockinette stitch before decreasing one stitch at each end of every row until there are only four stitches remaining. Bind off these last four stitches and set them aside for later use as well.
6. Knit The Wings
The next step is to knit two wings for your duck using a pair of double-pointed needles (DPNs). To do this, cast six stitches onto one DPN and then knit three rows in stockinette stitch before decreasing one stitch at each end of every row until there are only two stitches remaining on each wing tip (four total). Bind off these last few stitches and set them aside for later use.
7 . Sew The Pieces Together
Now that all of your pieces are finished (the feet, body, neck, and wings), it’s time to sew them together using a tapestry needle and some yarn scraps left over from earlier steps in this project. Start by sewing together both sides of the feet with a whipstitch before moving on to sewing together both sides of each wing with another whipstitch as well.

Finally, sew together all three pieces – feet/body/neck – with a mattress stitch before weaving in any loose ends left behind from earlier steps in this project.
8 . Stuff & Close Up The Duck
Now that all pieces have been sewn together, its time to stuff & close up our duck! Start by stuffing firmly into both sides of its body & neck area before closing up with a slip stitch. Be sure not to overstuff, or else our duck’s shape may look distorted!
9. Attach Eyes & Beak
After stuffing & closing up our ducks, its now time to attach eyes & beaks! Use black embroidery thread or felt cutouts if you don’t want or don’t know how to embroider eyes onto fabric! Alternatively, you can also glue on googly eyes if available! For the beak, simply cut out an orange triangle shape from felt material. Sew or glue it on right below the eye area!
10. Finishing Touches
Lastly, add finishing touches such as adding feathers or decorative bows around our duck’s neck area! If desired, you can even paint on details such as freckles or blush cheeks using fabric paint! When done, stand back & admire your very own handmade knitted duck masterpiece!

Conclusion
Now that you’ve learned the basics of knitting a duck, it’s time to take a stab at it yourself. Don’t be afraid to experiment with different colors and materials – each creation will be unique! If you find yourself stuck while tackling more complex techniques for stitching your duck, don’t forget all you learned in this article: take one step at a time and have fun doing it.
With creativity, focus, and determination, you can totally succeed in creating the perfect knit duck! Why not give it a try? Who knows –it might just become your favorite go-to hobby!
Whether you simply make one or have an entire collection of knit ducks in the making, don’t forget to enjoy the process along the way. So grab some knitting needles and join us in making How to Knit a Duck for Beginners!