
It’s the most wonderful time of the year – to get out your needles and wool, pull up a comfy chair and begin knitting! While it can be hard to part with hours of your precious time, we promise you that the end result will make it all worth it. Whether this is your first foray into knitting or you’re a sewing-savvy veteran, our guide will give you tips to upgrade any style.

Don’t worry if perfection isn’t in sight – ultimately, the goal is to craft each piece into something that feels unique. After distressing your garments, you’ll have pieces that are totally one-of-a-kind. Plus, by following along with this step-by-step tutorial on how to distress a knit sweater, you’ll never look at clothes the same way again.
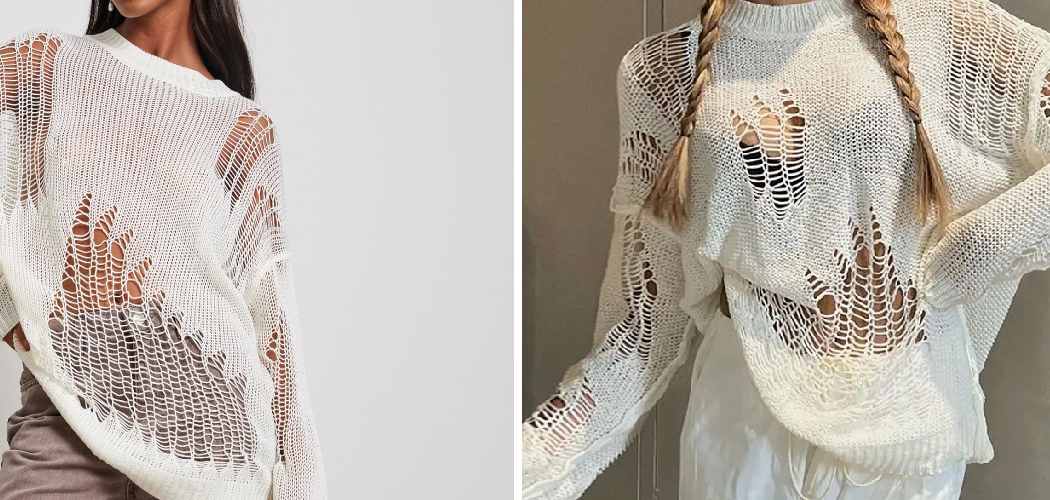
11 Step-by-step Guidelines on How to Distress a Knit Sweater
Step 1: Gather Supplies and Choose a Sweater
To begin, select a knit sweater made out of wool or cotton for the best results. Gather your supplies such as bleach and rubber gloves, scissors, tweezers, safety pins, sandpaper or pumice stone and any other items which you would like to distress the fabric with.
It’s best to select a sweater that is not too thin or worn out since the fabric might be too delicate for distressing. It’s also important to make sure the sweater is machine-washable before beginning.
Step 2: Cut into Your Sweater
Using scissors, begin cutting small holes in your knitted fabric. You can make designs such as stars or circles by using tweezers to pull out the stitches. You can also distress a portion of your sweater, like the sleeves, or create uneven shapes for added effect.
It’s important to remember that the holes will be more obvious once you’ve finished distressing, so cut accordingly. But don’t be afraid to experiment – you can always undo what you’ve done, and try something else!
Step 3: Use Bleach

Soak your knit sweater in a solution made from one part bleach and nine parts water. This will help to fade the original color of the garment and create a more distressed look. Make sure to wear rubber gloves when handling bleach as it can irritate your skin. Leave your sweater in the mixture for up to 20 minutes or until you are happy with the fading effect.
Step 4: Sandpaper
Take sandpaper or a pumice stone to lightly rub along the seams of your sweater. This will help to create a worn-out look and make it appear as if the garment has been through many wash cycles. Note that you don’t need to rub too hard as this could damage the fabric and lead to further tearing.
Step 5: Safety Pins
Take safety pins and add them randomly to the fabric. This will create an edgy, punk rock look that you can customize to your own style. Make sure you are being careful when using safety pins so as not to hurt yourself with their edges. It is best to attach them to the seams of the garment as this will help to prevent further tearing and keep the fabric intact.
Step 6: Put on the Heat
Heat is a great way to distress your knit sweater and give it an aged look. Try placing your garment on a flat surface and using a steamer or an iron to heat up specific areas. You can also place your sweater in the dryer with hot air for 20 minutes if you don’t have access to a steamer or iron. This will help to create even more fading and wrinkling of the fabric.
Step 7: Tie-Dye
If you’re looking for a more vibrant look, try tie-dyeing your sweater. You can use a variety of dyes such as fabric paint, food coloring or even Kool-Aid mix to create unique patterns and colors. Make sure to wear gloves throughout the entire process to avoid staining your skin with the dye.

Step 8: Old School Washing
If you would like to create an authentic vintage look, try washing your sweater in a bucket with water and laundry detergent. Put your garment in the bucket and allow it to soak for about 20 minutes before gently rubbing each area with an old toothbrush. This will emulate the same effect as if the item has been through many years of wear and tear.
Step 9: Wear & Tear
To create a more natural look, simply put on your knit sweater and start wearing it. Over time it will naturally become distressed from all the movement of your body. For an even quicker effect, you can tie dye or bleach after wearing the garment for a few weeks. However, make sure to keep an eye on the fabric so that it doesn’t become too damaged.
Step 10: Use Your Imagination
Be creative and use your imagination to come up with other ways of distressing your knit sweater. You can add patches, studs or fringes to the fabric for an extra stylish touch that will make your garment stand out from the crowd. Although some methods may require more time, the end result will be well worth it!
Step 11: Enjoy Your Sweater
Finally, it’s time to enjoy your new and improved knit sweater. From the fraying edges to the unique color combinations, you have now created a one-of-a-kind piece that cannot be replicated. Wear it proudly and show off your hard work! Always remember: the key to distressing any garment is to have patience and experiment with different techniques until you find something that works for you.
By following these steps on how to distress a knit sweater, you can make any item look like it has been through many years of wear and tear. Distressing your garments is a great way to upcycle and add more personality to your wardrobe. Have fun with it!
Whether you’re knitting for yourself or someone special, don’t be afraid to experiment and explore different techniques. You might be surprised at the amazing results you can get from simply distressing a knit sweater. Enjoy your new look and have fun crafting!

Do You Need to Hire a Professional?
If you’re looking for a more detailed, intricate result or if you don’t have the time to distress your own knit sweater, it may be beneficial to hire a professional. A seamstress or tailor can help you customize and distress any garment to perfection. They will also be able to give you tips on how best to care for your distressed items once they are completed.
Overall, distressing your own knit sweater can be a fun and rewarding experience. With the right supplies and some creativity, you can create one-of-a-kind pieces that reflect your unique style. So go ahead and give it a try! You never know what amazing results you might get.
Frequently Asked Questions
Q: What Makes a Knit Sweater Ideal for Distressing?
A: Wool and cotton are the best fabrics to use for distressing a knit sweater. They are durable enough to withstand the washing and bleaching processes so they don’t easily tear or become too thin. Additionally, wool and cotton usually retain their shape better than other fabrics, giving them a more natural distressed look.
Q: How Do I Make Sure My Sweater Doesn’t Get Too Distressed?
A: The best way to make sure your sweater doesn’t get too distressed is to take it slow and build up the distressing gradually. Start with small cuts and fades, and then increase the intensity of the distressing techniques depending on how much of a worn-out look you want.
Additionally, you can try using less harsh methods such as sandpaper or safety pins. By taking it step-by-step, you can make sure your garment doesn’t get overly distressed.
Q: What Other Techniques Can I Use to Distress a Knit Sweater?
A: There are many other techniques you can use to distress a knit sweater. Using paint, bleach and dye are great ways to add color and texture. You can also try distressing with scissors, razor blades or an old toothbrush.
Additionally, you can use hot water, sandpaper and safety pins for a more natural-looking result. The possibilities are endless – it just comes down to experimenting and finding what works best for you!

Q: How Do I Take Care of Distressed Sweaters?
A: To keep your distressed sweater looking its best, it is important to take proper care of it. Make sure to hand wash the garment with cold water and mild detergent.
Also, avoid using fabric softeners as they can cause fading and more wear and tear on the item. After washing, lay the item flat to dry in order to prevent any further distressing. With a bit of care and attention, you’ll be able to keep your distressed knit sweater looking great for many years to come!
Conclusion
The experience of distressing a knit sweater can be very enjoyable and rewarding. Not only do you end up with something unique and one-of-a-kind, but it’s also an economical alternative to buying new clothing.
The best part is that you can style the sweater however you like—whether that means creating personalized rips, washing out colors or cutting asymmetric hemlines, have fun with it!
It might take some practice getting right, but soon enough you’ll find yourself playing around with all sorts of combinations and get creative with the possibilities this way of customizing your knit sweaters gives access to.
Finally, remember that a distressed look requires purposeful action, so don’t be too hard on yourself if your first try ends not as expected – just keep trying and give a chance to all the ideas swirling in your head! Thanks for reading this article on how to distress a knit sweater.