
As the holiday season draws near, the allure of crafting heartwarming decorations and meaningful gifts grows stronger. Amidst the array of festive projects, knitting a Christmas tree stands out as a delightful and creative endeavor. Whether you’re a seasoned knitter or a curious beginner, this endeavor allows you to infuse the spirit of the season into your crafting.
Knitting a Christmas tree involves more than just creating a decorative piece; it’s an opportunity to explore color combinations, experiment with textures, and embrace the joy of shaping. From intricate lacework to simple garter stitches, the possibilities are as diverse as the ornaments adorning a real tree.

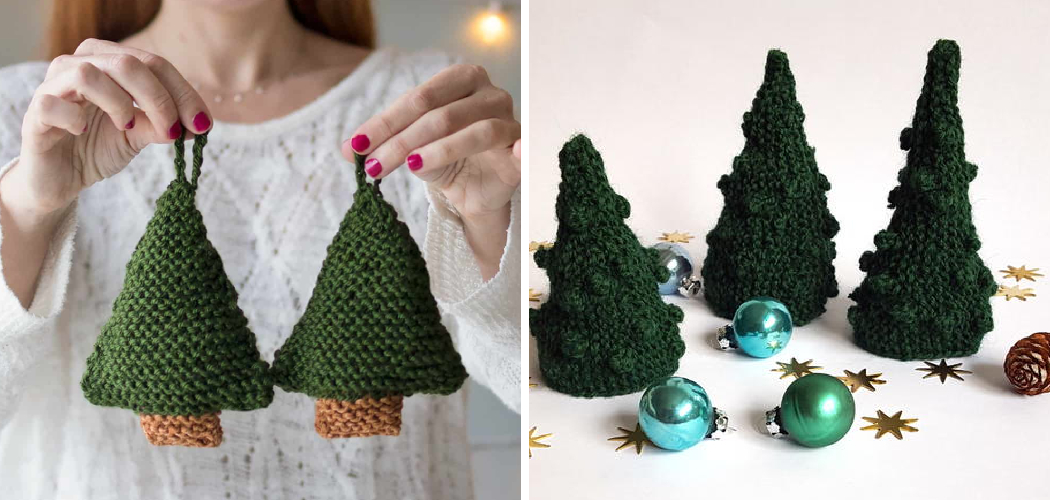
Whether destined to become a centerpiece on your holiday table or a cherished keepsake, a knitted Christmas tree embodies the essence of the season and offers a chance to spread warmth and merriment through your handmade creations. In this guide, we’ll unwrap the steps, techniques, and tips on how to knit a Christmas tree that captures the magic of this special time of year.
The Joy of Creating a Handmade Decoration for the Holiday Season
Christmas trees are one of the most iconic decorations to bring joy and warmth during the holiday season. Every year, people scour stores looking for the perfect tree that will give their home a special touch. But what if this year you could make your own Christmas tree?
Knitting is one of the oldest forms of needlework, and it can be used to make a wide variety of items. If you know the basics of knitting, then you can create your very own Christmas tree! All it takes is some imagination and a bit of patience, and you’ll have a beautiful handmade decoration to show off for years to come.
Before you get started on your project, it’s important to select the right yarn for your tree. Choose a worsted weight yarn for a sturdy tree that won’t sag under the weight of ornaments, but if you prefer something lighter and airier, a DK or sport-weight yarn will do the trick. You can also choose to use multiple colors of yarn to create an ombre effect or even stripes!
Once you’ve selected your yarn, you’ll need to decide on the size of your tree. A smaller tree is perfect for a desk or tabletop display, while a larger one will suit better in a living room or entryway. Keep in mind that the larger trees may take more yarn and require longer knitting needles.

List of Essential Knitting Supplies
- Knitting Needles: Available in various materials like bamboo, metal, or plastic and essential for any knitting project.
- Yarn: Comes in a variety of textures, weights, and colors. Choose according to your project requirements.
- Stitch Markers: Useful for marking specific spots in your knitting pattern.
- Measuring Tape: To keep track of the size of your in-progress knitting work.
- Scissors: A good pair of sharp scissors is crucial for cutting yarn.
- Tapestry Needle: This is used for weaving in loose ends once your project is completed.
- Stitch Holders: These are like safety pins for your stitches, keeping them secure when not in use.
- Knitting Gauge: This tool helps determine your stitch size and is especially important for projects that require a precise fit.
10 Methods on How to Knit a Christmas Tree
Gather Supplies
Before you begin knitting your Christmas tree, you will need to gather the necessary supplies. You will need a pair of knitting needles, yarn in the color of your choice, and a tapestry needle for weaving in the ends.
Additionally, it is helpful to have a pattern or chart to follow as you knit your tree. It is important to choose the right size needles and yarn for your project. If you are using a pattern, it will usually tell you what sizes of needles and yarn to use.
When choosing yarn, select one that is soft and lightweight so that your Christmas tree will be nicely drapable. You may also want to consider adding some sparkle or texture to your yarn with glitter or metallic thread. This can give your tree a unique look and make it stand out!

Cast On
Once you have gathered all of your supplies, you can begin by casting the desired number of stitches onto one of your needles. When casting on stitches for a project like this one, it is best to use the long-tail cast-on method, as it produces a neat edge that won’t curl up when finished.
Once your stitches have been cast, work on the tree in rounds from the bottom up. Increase your stitch count as you move up through the tree for a more even shape. For this project, it may be easier to use two needles instead of one circular needle for comfort while increasing.
Work Tree Pattern
Now that you have cast on your stitches, you can begin working on the pattern for your Christmas tree. Depending on what type of pattern or chart you are using, this step may involve knitting and purling different combinations of stitches to create the desired design.
Be sure to read through each row carefully before beginning so that you don’t make any mistakes! Once you have finished your pattern, you can move on to the next step: creating the tree shape.
To give your Christmas tree its traditional shape, you will need to add increases and decreases at specific points in the pattern. Increasing involves knitting two stitches into one stitch on a single row while decreasing involves slipping two stitches over one another. When done correctly, these techniques can create a rounded, triangular shape that will look like the tree you are envisioning!
Decrease Stitches
As you work through the pattern for your Christmas tree, eventually, you will reach a point where you need to decrease some of the stitches in order to shape your tree correctly.
To do this, simply knit two stitches together at regular intervals until there are only enough stitches left on your needle to form the top part of your tree. This will give your tree the classic triangular shape. Once you have decreased down to the amount of stitches necessary, simply bind off and weave in the remaining yarn ends.

If you’re feeling adventurous, you could make a more detailed pattern for your Christmas tree by adding some colour work or lace patterns. Adding festive decorations like baubles and stars is also an excellent way to make your tree look realistic and give it a unique, creative flair. You could even add some pom-poms or tassels to the base of your tree for added texture and colour!
Change Colors
If desired, now is also a good time to change colors in order to add some visual interest and texture to your Christmas tree design.
To do this, simply knit with two strands of yarn held together – one strand being from the original color and one strand being from the new color – until all of the old color has been used up and replaced with new color yarn throughout the entire piece. Make sure to not knot the yarn when you join two colors together.
Again, it is important to take time and be patient while switching colors as this is a small project that requires attention to detail. Keep in mind that if the project becomes too complicated with multiple color changes, then it may be best to scrap the idea and keep it simple with one solid-colored tree.
Bind Off
When all necessary decreases have been made, and any desired colors have been changed, it is time to bind off all remaining stitches in order to finish off your Christmas tree project properly.
To do this, simply knit two stitches together until only one stitch remains on your needle and then cut off any excess yarn from both sides before pulling tight and securing it with a knot at each end for extra security if needed.
Once you have finished the bind off, take a few moments to admire your work and secure any loose ends before proudly displaying it in a place of honor. Now, with your new Christmas tree knitted, you can enjoy the warmth and comfort of this treasured handmade item for many years to come!

Weave In Ends
Once all remaining ends have been secured with knots at each end (if needed), use a tapestry needle to weave them into their corresponding rows so that they are hidden from view when finished with this step – making sure not to pull too tightly or else it may cause puckering or other unwanted effects within the fabric itself!
Use the same technique of weaving in ends to add any decorations you wish to place on your Christmas Tree as well – such as pinecones, holly leaves, stars and more! Once all of these items are added and securely attached using needle and thread (or yarn), your Christmas Tree is ready for display!
To give your tree that extra special touch this holiday season, you may opt to add some felt decorations such as snowflakes or holly leaves. Simply cut out these shapes using a pair of sharp scissors and attach them to the tree with yarn, being careful not to pull too tightly so that they lay flat against the fabric. If desired, you can also add sequins or small beads for extra sparkle!

Block Your Tree
Blocking is an important step when finishing any knitted item as it helps even out any uneven edges or shapes that may be present due to tension issues while knitting or purling during earlier stages in its construction process – especially when dealing with projects such as these which require more precise shaping than others!
To block yours properly, just wet it down lightly with water & allow it to dry completely before moving onto the next steps…
Add Embellishments
Now comes perhaps one of my favorite parts about creating knitted Christmas trees: adding embellishments! This could include anything from sequins & beads sewn into place using small pieces of thread (making sure not to pull too tightly here either!), tiny pom-poms glued onto branches, etc.; just get creative & enjoy yourself here!
Additionally, you could also use the same yarn or embroidery thread from your Christmas tree to hang up a few handmade decorations.
Adding fringe onto your tree is another beautiful way to add texture and color. Simply pick out some colors that go with your tree, cut some strands of yarn (about 6 inches in length), lay them down on top of one another, fold them in half & then push the folded end through a stitch on your tree.
Pull the ends of yarn all the way through and tighten up the knot with two fingers. Trim off any excess threads if needed and repeat across your tree!
Hang Your Tree Up!
Last but not least hang up & admire those hard-earned efforts! Whether it be hung up inside near a window sill/doorway/etc., outside near a porch railing/fence post/etc., wherever chosen spot maybe I’m sure there’s no doubt about how proud everyone around will be seeing something so unique yet beautiful hanging up with spirit of Christmas!

So grab the ribbon or string & tie it to secure ends of tree (loops should work) then place wherever desire & enjoy that one-of-a-kind masterpiece or a heartfelt gift for your loved ones!
Conclusion
Crafting handmade decorations has become a beloved pastime for many during the holiday season. With a few simple materials, everyone can create a beautiful knitted Christmas tree to bring festive cheer into their homes. Not only is the process of knitting this craft enjoyable and rewarding but completing it brings with it a sense of accomplishment.
This unique and creative project can be started right away so you can get ahead of the rush or even take some time off to fill your home with the joys of winter crafting. So grab your knitting needles and wool yarn and make your own DIY decoration this Christmas! Thanks for reading, and we hope this has given you some inspiration on how to knit a christmas tree!