Are you intimidated by the prospect of installing a snap button? If you’re not an experienced seamstress, it can be challenging to know where to start. But don’t worry – installing a snap button isn’t nearly as difficult as it looks!
Snap button is a popular type of closure used in clothing, bags, and other fabric items. They offer a quick and easy way to secure two pieces of fabric together without buttons or zippers.
With this blog post, you’ll get all the information and instructions necessary to outfit your garment with stylish snaps in no time. Keep reading for our comprehensive guide on how to install a snap button flawlessly – from selecting the right materials and tools down to the finishing touches. Let’s get started!
What Will You Need?
First things first, let’s talk about materials. To install a snap button, you’ll need the following:
- Snap buttons (both the top and bottom parts)
- A marking tool (tailor’s chalk or fabric marker)
- Scissors
- Needle and thread
- Hammer or snap setting tool (depending on the type of snaps you chose)
Make sure to choose the right type of snap button for your project – there are different types and sizes available, such as sew-on, prong, or post. It’s essential to consider the fabric you’ll be using and how thick it is when selecting your snaps.
10 Easy Steps on How to Install a Snap Button
Step 1. Mark the Position:
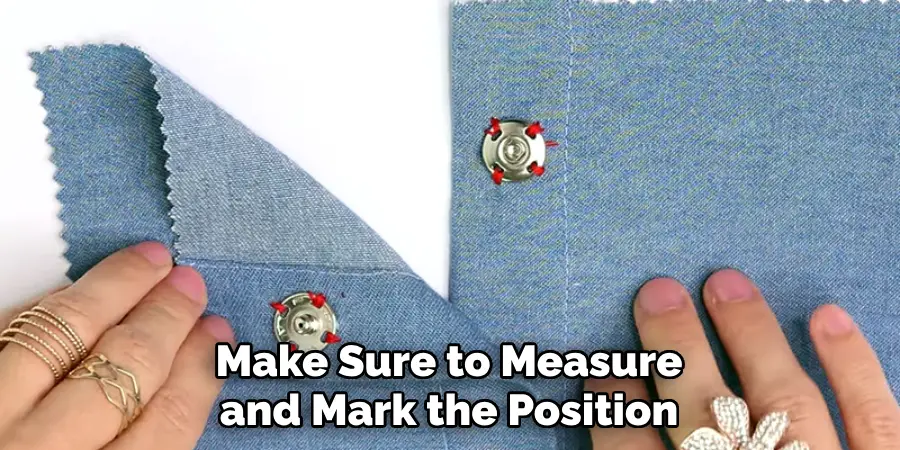
Start by determining where you want the snap button on your garment. Use your marking tool to mark the exact position where the snap will go. Make sure to do this for both pieces of fabric where the snap will be attached.
Step 2. Prepare the Snap:
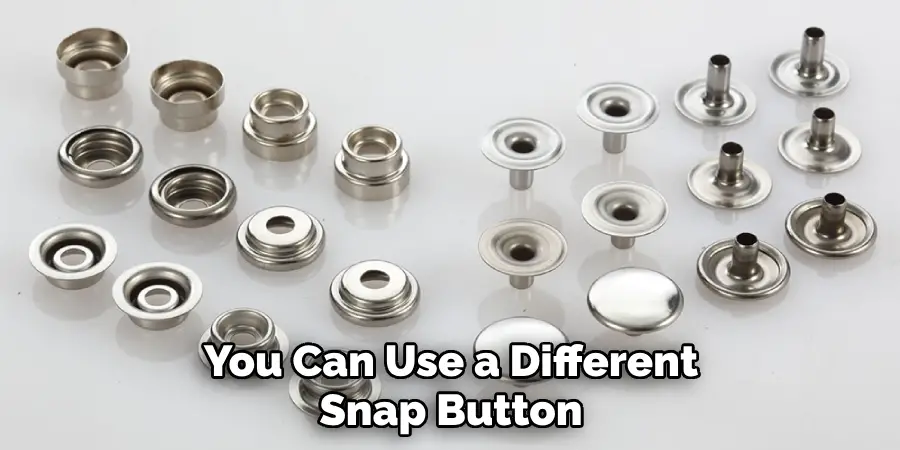
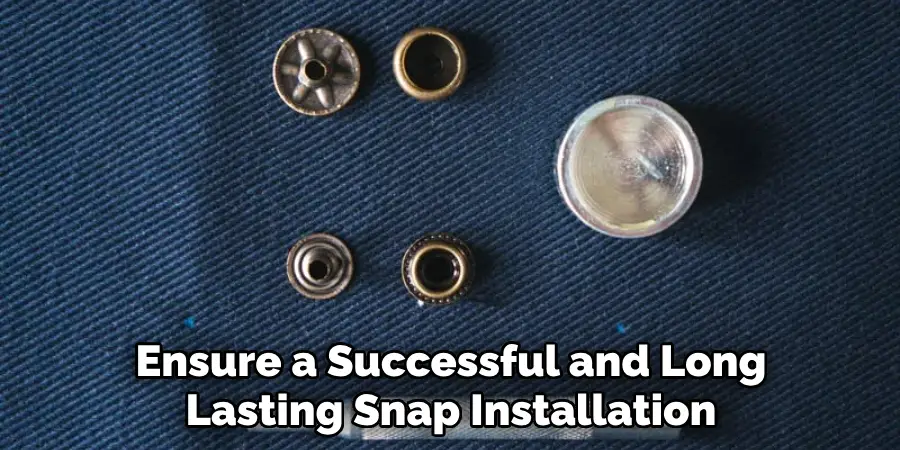
The next step is assembling the snap button. A snap comes in four parts: the cap (or button), socket, stud (or nipple), and open prong (or ring). The cap and socket comprise the ‘female’ part of a snap, and the stud and open prong make up the ‘male’ part. Start by taking the cap and place it on a stable surface, cap side down.
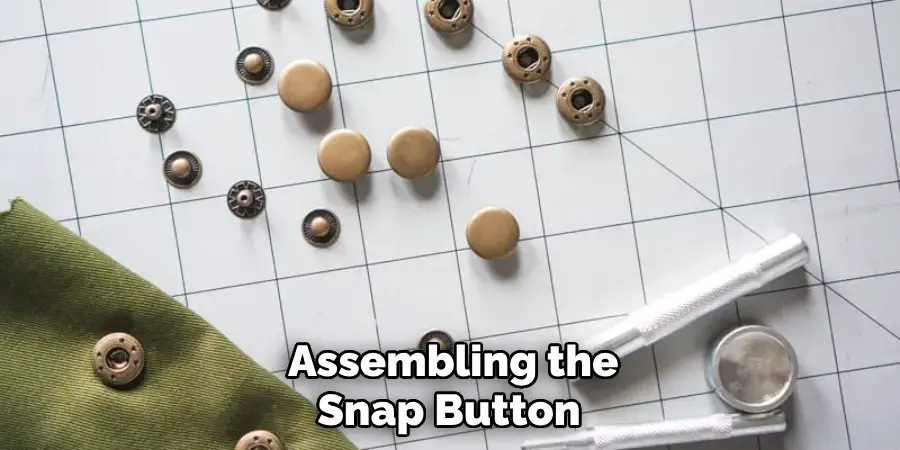
Then, position the socket on top of the cap, the open side facing up. Similarly, for the male part, position the open prong, prong side up, and then place the stud into the open prong, with the stud facing up.
Step 3. Attach the Snap:
Now that your snap is prepared, it’s time to attach it to your fabric. Place the fabric over the cap and socket, ensuring the cap is on the right side of your fabric, and the position aligns with the mark you made earlier. For the male part, the open prong should be on the wrong side of your fabric, with the stud facing outwards. Be sure to align it with the corresponding mark as well.
Then, gently but firmly tap on the snap using a hammer or snap setting tool until it is securely set into the fabric. Repeat this process for the other side of your snap.
Step 4. Test the Snap:
The final step in the installation process is testing the snap to ensure it’s been correctly and securely attached. Try snapping and unsnapping the button a few times to make sure it’s functioning as it should. If the snap comes apart or feels loose, you may need to give it a few more taps to secure it further. Your task is complete once you’re confident the snap button is securely installed and operates smoothly!
Step 5. Check for Loose Threads:
Before you proceed further, it’s essential to inspect the area around the snap button for any loose threads. Loose threads can interfere with the snap’s operation and look unsightly. Carefully scan the area; if you find any, use your scissors to trim them as close to the fabric as possible.
Step 6. Reinforce the Snap:
To ensure the longevity and performance of your snap, it’s advisable to reinforce it. Reinforcing the snap means to add extra security to prevent it from detaching with regular use. This step usually involves sewing around the snap button’s edges, either by hand or using a sewing machine.
This step may require some sewing skills, but remember, a little effort now can save you from repairing or replacing the snap later. Take your needle and thread, make a knot at the end, and carefully sew around the edge of the snap. Once you’ve sewn all around, make a final knot and cut off any excess thread
Step 7. Repeat for Other Snaps:
If your project requires more than one snap button, repeat the steps above for the remaining snaps. Make sure to measure and mark the position for each snap carefully to ensure even spacing and alignment. Use the first snap as a reference point and double-check your markings before installing each snap. Once all the snaps are installed, test and reinforce them as previously described.
Step 8. Clean Up:
After installing all the snap buttons, it’s time to clean up. Remove any marks made by the marking tool from the fabric. You can do this with a slightly damp cloth or by following the manufacturer’s instructions on your marking tool. Check both sides of your fabric for any streaks or marks. Cleaning up after your work ensures your project’s neat and professional-looking finish.
Step 9. Final Check:
Once you’ve cleaned up, give your project a final look-over. Ensure all snaps are functioning well and are securely attached to the fabric. Pay close attention to the alignment and spacing of the snaps – they should be evenly distributed and perfectly aligned for a professional finish.
Moreover, check for any loose threads or fabric around the snaps and trim them if required. Taking the time to perform this final check will help ensure the quality and longevity of your work. This is also the perfect time to admire your newly installed snap buttons and the skills you’ve learned.
Step 10. Explore Different Techniques:
While the above steps outline the basic process of installing a snap button, there are several other techniques you can explore to customize your results. For example, you can use a different snap button or experiment with different fabrics and attachment methods.
You can add decorative elements to your snaps, such as beads or fabric covers. Don’t be afraid to try new ideas and techniques – the more you practice, the better you install snap buttons!
By following these 10 easy steps, you can easily install snap buttons onto your garments and other projects. Remember to take your time and precisely mark and attach the snaps for the best results.
5 Additional Tips and Tricks
- Practice First: Before starting your project, practice installing a snap on scrap fabric. This will give you a feel for the process and help you avoid making mistakes on your project.
- Invest in Quality Tools: A quality snap setting tool will make the installation process much easier and more efficient. Choose a tool that is sturdy, comfortable to hold, and suitable for the size and type of snaps you’re using.
- Choose the Right Snap Size: Snaps come in various sizes, so choosing the right one for your project is essential. Generally, heavier fabrics require more extensive snaps, and lighter fabrics need more petite snaps.
- Handle with Care: Be careful when hammering the snap into place. Too much force can damage the snap or the fabric, while too little force may not secure the snap properly.
- Maintenance is Key: Over time, snaps may loosen or tarnish. To extend their life, check them regularly and clean them using a cloth and mild cleaning solution.
With these additional tips and tricks, you’ll be a pro at installing snap buttons in no time!
5 Things You Should Avoid
- Avoid Rushing: Take your time during the installation of the snaps. Each step requires precision, from marking the position to hammering the snap. Any mistakes made during the process could damage the fabric or the snap.
- Don’t Ignore the Snap Sizes: All snap buttons are not created equal. Different project requires different snap sizes. Using the wrong size could lead to a loose snap or damage to the fabric.
- Avoid Using Poor-Quality Tools: Cheap, low-quality tools can make the installation process more complex and can even damage your snaps or fabric. Always invest in good quality tools.
- Don’t Skip Reinforcement: Even though it might seem tedious, don’t skip sewing around the snap for reinforcement. This step ensures the longevity of your snap and prevents it from detaching with regular use.
- Avoid Ignoring Maintenance: Snaps require regular maintenance. If you notice a snap is becoming loose or tarnished, take immediate action. Ignoring these signs could lead to the snap failing prematurely.
By avoiding these mistakes, you can ensure a successful and long-lasting snap installation. Now that you have all the knowledge and techniques go ahead and confidently install snap buttons on your next sewing project!
Conclusion
Now, you’ve learned the basics of how to install a snap button in your project! But be encouraged if the installation goes as planned – it likely requires additional troubleshooting. If you’re still having trouble, plenty of resources are available for extra help and guidance, such as video tutorials and online forums.
Hopefully, this guide has given you the confidence and knowledge to add snap buttons to your sewing arsenal. Whether using them for functional purposes or as decorative accents, snap buttons are a versatile and essential addition to any sewing project.
All that’s left is for you to try it, see what works best for your project, and ensure the result looks exactly like you wanted it to. Feel free to experiment with unique designs or materials; who knows how incredible the outcome will be? Get out there and get crafting – good luck!

