
Do you have a passion for crafting, or looking to try a new one? Look no further – the Lazy Daisy Stitch is here to provide you with an entertaining and satisfying way to create beautiful artwork and designs! This classic embroidery technique has been used throughout the ages, providing easy-to-follow instructions that make creating intricate designs pleasingly simple.

Not only will this stitch offer a fun and fruitful creative experience, but it can also be completed relatively quickly. Whether you’re an experienced crafter or just learning the basics of hand-stitching; we’re sure that with these steps on how to do lazy daisy stitch in mind – you’ll be able to construct stunning needlework in no time!
Needed Materials
- Embroidery Hoop
- Fabric (Preferably Cotton or Linen)
- Needle
- Embroidery Floss in Desired Colors
- Scissors
11 Step-by-step Guidelines on How to Do Lazy Daisy Stitch
Step 1: Prepping Your Fabric
First things first, it’s important to prepare your fabric. Cut the fabric according to the size you desire for your design and secure it onto your embroidery hoop. The fabric should be taut and wrinkle-free. But be careful not to pull it too tight as this may distort the final design. It’s usually a good idea to start on a fresh, clean fabric. You can always wash and iron it beforehand, but this is completely up to your personal preference.
Step 2: Threading the Needle
Next, take your desired color of embroidery floss and cut it to the desired length. Most embroidery floss comes in 8-meter packs, so you may want to divide this into two or three strands depending on how thick you want your stitches and design to be. Once you have your desired number of strands, thread them through the eye of the needle and double knot at the end.

Step 3: Create Your First Stitch
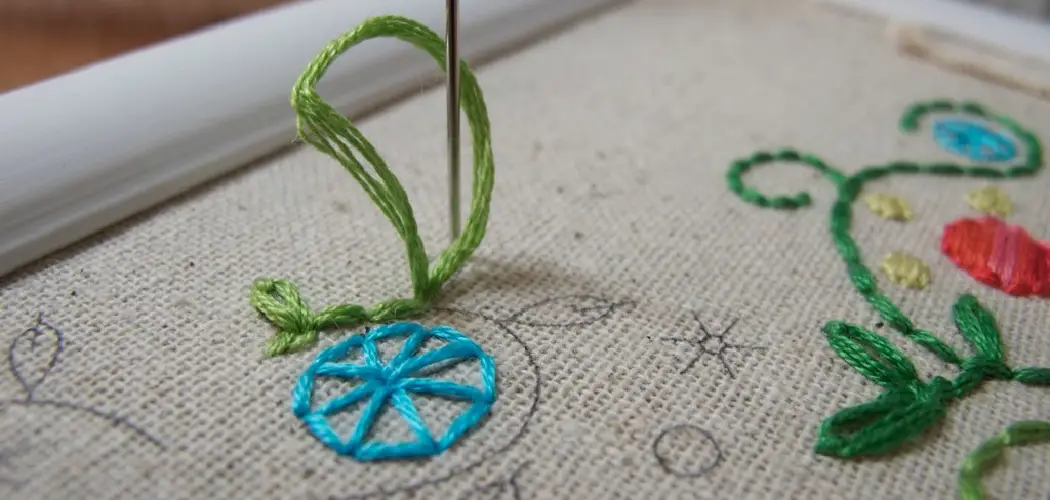
Start by bringing your needle through the back of the fabric to the front and pull it all the way through. This will be your starting point for creating your first lazy daisy stitch. It’s always a good idea to start your stitching near the edge of the hoop, this way you’ll have easier access for connecting and finishing off your stitches. But again, this is completely up to your personal preference.
Step 4: Creating a Small Loop
Bring your needle back through the fabric on the same spot and create a small loop with the thread. Be sure not to pull it too tight as you’ll be creating more stitches within this same loop. You can make the loop as big or small as you want depending on your design. It’s usually a good idea to make the loop about the size of your fingertip. You can use your finger to hold the loop in place as you continue with the next step.
Step 5: Securing the Loop
Before moving on, secure the loop by inserting your needle through it and pulling it gently until it’s taut. This will prevent the loop from unraveling and keep it in place while you complete your stitches. It’s important to secure each loop one at a time to avoid any confusion with the placement of your stitches. You’re now ready to move on to the next step.
Step 6: Creating the Petals
Here comes the fun part! To start making petals, bring your needle up through the fabric at a point near the edge of the loop. Make sure to leave enough space between the first stitch and the loop as this will be used for creating additional petals. Otherwise, your stitches will be too crowded and difficult to work with. It’s always a good idea to leave about 1/8 inch between stitches, but this can vary depending on your design.
Step 7: Finishing the Petal
Next, bring your needle down through the fabric at a point slightly inside of the loop. You should notice that as you pull the thread taut, a small petal is formed within the loop. Then, bring the needle back up through the fabric at a point outside of the loop and repeat this process to create another petal. Be sure to make each stitch slightly larger than the other to create symmetry.

Step 8: Securing Each Petal
As you complete each petal, secure it by bringing your needle down through the previous stitch and then back up through the fabric at a point slightly inside of the petal. This will ensure that your stitches stay in place and prevent them from unraveling or becoming loose. You’re now ready to move on to the next petal. It’s recommended to create 5-6 petals for a full bloom, but again this can vary depending on your design.
Step 9: Continue Creating Petals
Keep repeating the process of creating petals until you reach the desired number for your design. Make sure to keep the stitches evenly spaced and symmetrical to create a well-balanced design. It’s always a good idea to step back and take a look at your work from a distance to see if any adjustments need to be made. It’s better to catch any mistakes early on than having to redo your work later.
Step 10: Finishing Off the Stitch
To finish off your final petal, bring your needle down through the fabric at a point outside of the loop. Then, take the needle through the back of the fabric and tie a knot with the remaining thread. You can then secure this knot with a small dab of fabric glue or by weaving the thread back into the design. Your lazy daisy stitch is now complete!
Step 11: Experiment and Have Fun!
Now that you have mastered the basic technique of lazy daisy stitch, it’s time to get creative and experiment with different colors, sizes, and placements. You can also combine this stitch with other embroidery techniques to create unique and beautiful designs. The possibilities are endless, so have fun and let your creativity run wild!
Following these 11 simple steps, you too can learn how to do lazy daisy stitch and add a beautiful addition to your embroidery repertoire. Remember, practice makes perfect, so don’t be afraid to keep practicing and refining your technique until you achieve the desired result. Happy stitching!

Tips and Tricks
- Always Start With a Taut and Wrinkle-Free Fabric to Avoid Any Distortions in Your Design.
- Experiment With Different Thread Colors and Thicknesses to Create Unique Effects.
- Use a Fabric Hoop to Keep Your Fabric Taut and in Place While You Work.
- Secure Each Loop Individually Before Moving on to the Next One to Avoid Confusion.
- Practice, Practice, Practice! The More You Do This Stitch, the Better You’ll Become at It.
- Step Back and Assess Your Work From a Distance to Catch Any Mistakes or Make Necessary Adjustments. Overall, Have Fun and Let Your Creativity Guide You as You Learn How to Do a Lazy Daisy Stitch!
Frequently Asked Questions
Q: Can Lazy Daisy Stitch Be Used on Any Type of Fabric?
A: Yes, you can use this stitch on most types of fabric, as long as it’s not too stretchy or loose. However, some fabrics may require a different needle size and thread thickness to achieve the desired result.
Q: Is Lazy Daisy Stitch Only Used for Floral Designs?
A: No, while this stitch is primarily used for creating floral designs and embellishments, it can also be used to create various other shapes and designs. Feel free to experiment and see what you can come up with!
Q: Can I Combine Lazy Daisy Stitch with Other Embroidery Techniques?
A: Absolutely! Lazy daisy stitch can be combined with other techniques such as backstitch, French knot, and satin stitch to create unique and intricate designs. Don’t be afraid to get creative and try new things! So go ahead and give this versatile and beautiful stitch a try – you won’t be disappointed!

Q: I’m Having Trouble Creating Symmetrical Petals, What Can I Do?
A: Try using a template or stencil to guide your stitches and ensure they are evenly spaced and sized. You can also use a pen or fabric marker to lightly sketch out the petal shapes before stitching for added precision. Remember to take breaks and step back to assess your work from a distance to catch any mistakes and make necessary adjustments.
Conclusion
From just one week of practice, you are now able to do a lazy daisy stitch and one day you might be making complete quilts and other art pieces. With this new set of skills and focuses, let your imagination run wild and make something unique that will show everyone just how capable you are.
A great way to continue improving is by watching tutorials online or getting together with other quilters in your community. It’s so much easier to learn when we have each other to rely on and encourage us to do our best. Go out there and start creating something beautiful. Now that you know the fundamentals of the lazy daisy stitch, the possibilities for what you can create are only limited by your imagination! Thanks for reading this article on how to do lazy daisy stitch