
Are you surrounded by your kids’ masterpieces that never seem to end? Does it feel like your home is just one giant art gallery filled with creative genius? You’re not alone! Every parent loves to watch their child’s art grow and develop – the challenge becomes showing off all those colorful creations without overwhelming yourself or sacrificing too much space.

Kid’s art displays are an excellent way to showcase your child’s creativity while also keeping a neat home. Fortunately, many incredibly creative ways to display kids’ artwork still allow them (and everyone else) to admire and appreciate every creation!
In this guide, we’ll show you some creative and practical ways how to display kids art so that you can celebrate their artistic talents without cluttering up your living space.
What Will You Need?
Before we get started, there are a few things you’ll need to have on hand to create your perfect kids’ art display. The essentials include:
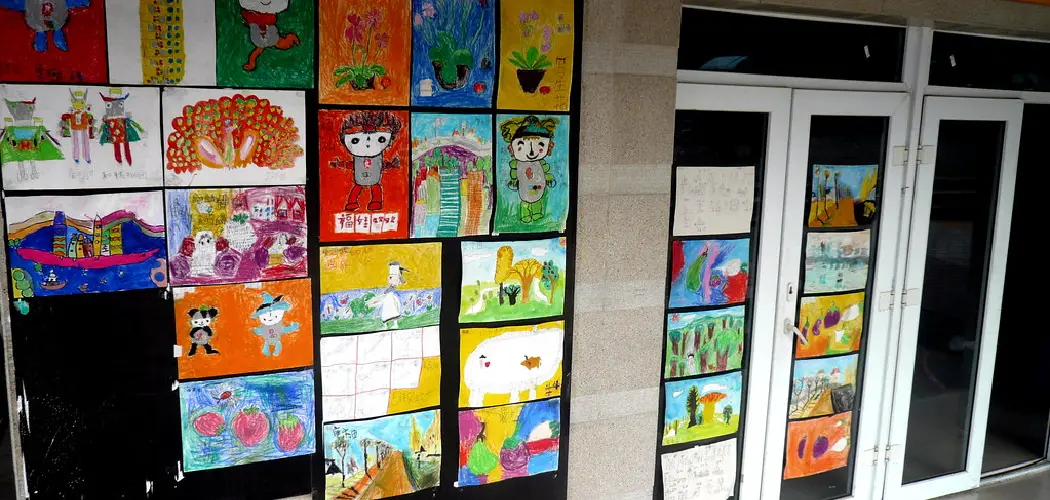
- Artwork: This one seems obvious, but it’s an essential first step! Gather all of the artwork that you want to display. Consider picking out pieces of different sizes, shapes, and colors to add visual interest to your display.
- Frames: Whether you choose traditional frames or opt for something more unique, having a way to mount the artwork is crucial. Using frames gives the art a polished look and helps protect it from everyday wear and tear.
- Hanging Supplies: Ensure you have everything you need to hang your artwork, including nails, hooks, adhesive strips, and a hammer. If you plan to hang heavier pieces, invest in appropriate hardware.
- Art Supplies: Go beyond the traditional frames and explore other creative ways to display your child’s art. Use clothespins, strings, clips, or even magnetic tape to make unique displays.
Now that you have all the necessary supplies, let’s explore some creative ways to display kids’ art.
9 Easy Steps on How to Display Kids Art
Step 1: Choose the Right Spot
Identify a space where you’d like to showcase the art in your home. This could be a hallway, a segment of a wall in the living room, or even part of your child’s bedroom.

The selected spot should have enough wall space to accommodate the artwork and be where the art can be easily seen and appreciated. Be mindful of lighting conditions, and avoid areas that receive too much direct sunlight, which could potentially fade the colors over time.
Step 2: Organize the Artwork
After selecting the ideal spot, it’s time to organize the artwork. You may categorize it by date, theme, color, or even the child who created it if you have more than one artist in the house. This step is all about deciding how you want to present the art.
You might create a chronological timeline of your child’s art progress, place similar themed pieces together, or make a visually appealing color-coded display. Take the time to play around with the arrangement until you find one that is both aesthetically pleasing and meaningful.
Step 3: Frame and Prepare the Artwork
As the third step, it’s time to frame and prepare the art pieces for display. While some might fit perfectly into standard frames, others may need a different approach. Consider using clips or clothespins for those difficult-to-frame pieces or for a more casual and dynamic display.
Remember to clean the glass and carefully place your child’s artwork to avoid any wrinkling or unintended damage if you’re using frames. This step not only helps to preserve the artwork but also adds a touch of professionalism to your home gallery.
Step 4: Hang the Artwork
Now comes the exciting part – hanging the artwork. Use your hanging supplies – nails, hooks, adhesive strips, or whatever you have chosen – to mount the art pieces securely. Remember that the layout is essential. Maintain a uniform distance between each piece to give it a neat look. Adjust the height at eye level or lower so the kids can appreciate their artwork.

If you’re using a string and clothespin approach, secure the string tightly between two points and clip the art pieces onto it, ensuring they hang smoothly. Be sure to handle each piece of artwork carefully during this stage to avoid accidental damage.
Step 5: Rotate the Artwork Periodically
To keep the display fresh and exciting, consider rotating the artwork periodically. This rotation could be done weekly, monthly, or seasonal, depending on the volume of new art your child creates. This approach not only allows for each piece to have its time in the spotlight, but it also keeps the display dynamic and engaging.
In addition, it gives you a chance to showcase your child’s artistic progression over time. Remember to involve your child in the rotation process, as it can instill a sense of pride and excitement about their evolving artistic journey.
Step 6: Involve Your Child in the Display Process
Involving your child in the display process can be a great way to boost their confidence and encourage their artistic endeavors. Let them have a say in the arrangement of the artwork, picking the frames, and deciding which pieces to display. They can also help in hanging their artwork.
This participation can foster a sense of ownership and pride in their creations while also making the art display a fun and engaging family activity.
Step 7: Add Some Lighting
Adding lighting to your kids’ art display can elevate the presentation. It can highlight the colors and details of the artwork, making it more visually appealing and noticeable. You can opt for picture, spotlights, or even fairy lights for a soft, whimsical effect.
Ensure any lighting you choose is safe and appropriate for the space, especially if it is within reach of children. Also, consider opting for energy-efficient LED lights, which don’t produce heat, making them the safest option for your children’s masterpieces.
Step 8: Create a Digital Gallery
In the digital age, why not take your child’s art display further by creating an online gallery? This can serve as a backup if physical pieces get damaged and allow you to share your child’s art with friends and family who live far away. You can scan the art or take high-quality photos and upload them to a dedicated website or social media page.

This way, your child’s art can reach a wider audience, and they can receive feedback and encouragement from a broader community.
Step 9: Preserve Older Art Pieces
As your child’s art collection grows, it becomes essential to consider the long-term preservation of older pieces. Invest in archival storage boxes or portfolio cases that protect the art from dust, sunlight, and wear over time.
Organize the stored pieces by date, theme, or artist (if you have multiple children), and record pertinent details such as the creation date or the inspiration behind the work. This method protects older pieces from potential damage and creates an ongoing archive of your child’s artistic progression.
By following these steps, you can create a beautiful and meaningful display of your child’s artwork that will bring joy and pride to your family for years to come.
5 Things You Should Avoid
- Avoid Overcrowding: While displaying all your children’s artwork at once may be tempting, this can lead to a cluttered and overwhelming display. Choose a few key pieces to showcase at a time and rotate them regularly.
- Avoid Damaging the Artwork: Certain types of adhesive can damage artwork over time. Use non-damaging methods, like picture hooks or clips, to hang the artwork.
- Avoid Neglecting Your Child’s Opinion: Remember, this is your child’s artwork. Always involve them in the decision-making process about what to display and where. Their pride in seeing their work appreciated will be priceless.
- Avoid Inconsistent Display: Try to maintain a consistent style when creating an art wall or using frames. Too many different frame styles or colors can make the display look disorganized.
- Avoid Forgetting to Document: If you’re rotating the artwork, ensure you’ve either photographed or scanned each piece before it’s stored away. This way, you’ll always have a record of your child’s artistic progress.

By avoiding these common pitfalls, you can enhance the beauty and impact of your child’s art display.
Conclusion
With the right strategy, displaying your child’s artwork can be exciting for the whole family. Taking some time to consider how you envision your gallery wall coming together and how you will use it in your home to create a focal point of warmth and personality from your family to yours.
Investing in art display materials will allow you look back on all the moments that are dear to both of you. As many parents know, one of the best ways to show our children love and devotion is by finding creative ways to honor their hard work and achievements.
Hopefully, these tips and tricks on how to display kids art have inspired you to start displaying your child’s artwork in a fun and meaningful way.
So why not pull out those photos and artwork that are tucked away in drawers and boxes, hang them up, and enjoy!