
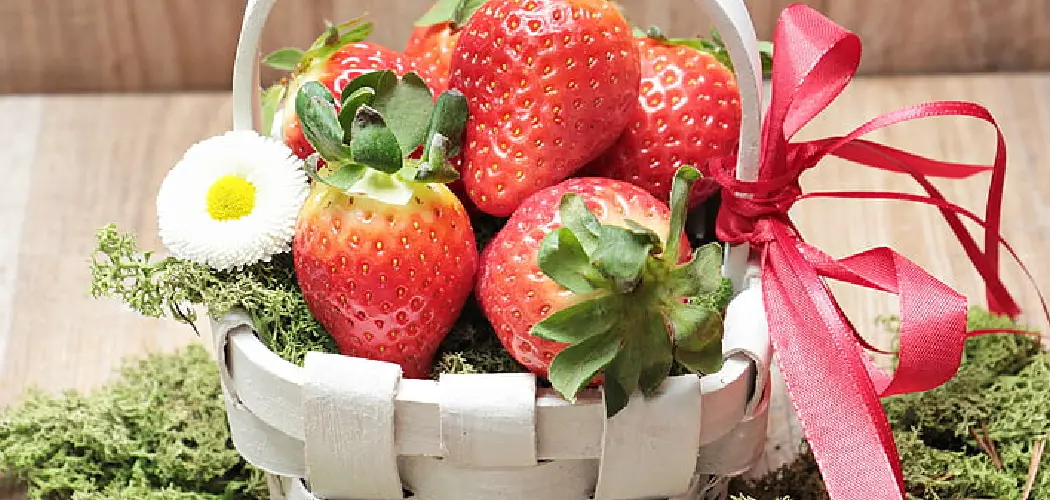
Are you looking for an easy, creative way to add some flair and style to a basket that you recently acquired? Decorating it with ribbon is the perfect solution! Not only is this decorative touch simple enough for those who are craft-impaired, but it can also produce stunning results. Pick out a few colors of beautiful ribbon from your local crafting store and use our step-by-step guide to learn how to decorate a basket with ribbon like a pro. You’ll be amazed by the transformation that takes place when you tie pretty ribbons around your basket!

Why Do You Need to Decorate a Basket With Ribbon?
Baskets are versatile and functional, but sometimes they can look plain and boring. By decorating them with ribbon, you can instantly add some personality and charm to your basket. It’s also a great way to repurpose an old or unattractive basket that you have lying around the house. It’s a cost-effective and creative solution to beautify your basket and make it stand out in any room.
Materials You Will Need
- A Basket
- Ribbon of Your Choice (Preferably Two or More Colors)
- Scissors
- Glue Gun (Optional)
11 Step-by-step Guidelines on How to Decorate a Basket With Ribbon
Step 1: Measure and Cut the Ribbon
The first step is to measure the length of your basket’s handle or rim. Use this measurement to determine how much ribbon you will need. Cut the ribbon according to your desired length. It’s always better to have more ribbon than you think you will need, so don’t be afraid to cut a little extra. But make sure you have enough ribbon to cover the entire basket handle or rim.

Step 2: Prepare Your Basket
If your basket has a handle, make sure it is sturdy and securely attached. If needed, use glue to reinforce any loose parts. If your basket doesn’t have a handle, skip this step. But make sure the rim is smooth and free from any rough edges. Otherwise, it can damage the ribbon. You can also clean your basket beforehand to remove any dirt or debris. If you’re using a new basket, this step may not be necessary.
Step 3: Begin Wrapping the Ribbon
Start by wrapping one end of the ribbon around your basket handle or rim. Make sure to leave enough slack so that you can tie a bow at the end. If you are using two colors of ribbon, alternate between them as you wrap around the handle or rim. It’s better to use different textures and widths of ribbons for a more interesting look.
Step 4: Tie the Ribbon Knot
Once you have wrapped the ribbon around the handle or rim, tie a knot with both ends. If using two colors, make sure one color is on top and the other at the bottom. This will create a nice contrast between the ribbons. You can also use a dab of glue to secure the knot. You can also use this step to add in any additional decorations like beads or charms.
Step 5: Create a Bow
Take the two ends of the ribbon and tie them into a bow. Adjust the loops and tails until you are satisfied with the shape and size of your bow. If needed, trim the ends of the ribbon to make them even. However, make sure not to cut them too short. You can also fluff up the bow and adjust the loops as desired. Otherwise, you can skip this step and tie a simple knot instead of a bow.

Step 6: Repeat the Process
Continue wrapping and tying ribbons until you reach the end of your basket’s handle or rim. If you are using multiple colors, make sure to alternate between them. If your basket has a long handle, you may need to cut and tie more ribbons. You can also mix and match different colors or patterns to create a unique and eye-catching design. It’s all about personal preference and creativity!
Step 7: Glue the Ribbons
If you want to make sure your ribbons stay in place, use a glue gun to secure them. Apply a small amount of glue to the back of the ribbon as you wrap it around the handle or rim. This will keep it from slipping or unraveling. Be careful not to get glue on your fingers, as the hot glue can cause burns. If you don’t have a glue gun, you can also use fabric or craft glue. It may take longer to dry, but it will still do the job.
Step 8: Add Additional Decorations (Optional)
If you want to add more embellishments to your basket, now is the time to do so. You can use ribbons of different widths or patterns and wrap them around your handle or rim. You can also add in some beads, flowers, or charms for a more unique and personalized touch. Just make sure not to overcrowd your basket with too many decorations. You want the ribbons to be the focal point.
Step 9: Check for Gaps
As you decorate your basket, make sure there are no gaps or spaces between the ribbons. If you notice any, simply add another ribbon and tie it in place. You can also use smaller pieces of ribbon to fill in any small gaps. This will ensure that your basket looks neat and polished. If you are using a larger basket, check for gaps periodically as you decorate to make sure everything is even.
Step 10: Hang Your Basket
Once all the ribbons are in place and secure, hang your basket for display. You can use it as a decorative piece in any room of your house or give it away as a gift. The possibilities are endless! Always make sure to hang the basket with care, especially if you have used a glue gun. You don’t want the ribbons to come loose or unravel.
Step 11: Enjoy Your Beautifully Decorated Basket!
Congratulations! You have successfully learned how to decorate a basket with ribbon. Admire your work and enjoy how it transforms an ordinary basket into a decorative piece that will surely catch everyone’s eye. Don’t be afraid to experiment with different ribbon colors and patterns. The more you practice, the better your baskets will look!

Following these simple step-by-step guidelines, you can easily decorate any basket with ribbon and add a personal touch to your home decor or gift-giving. This creative and budget-friendly solution is perfect for those who love DIY projects and want to elevate their baskets beyond their traditional use. So go ahead and have fun decorating your basket with ribbon! Happy crafting!
Frequently Asked Questions
Q1. Can I Use Any Type of Ribbon to Decorate My Basket?
A1. Yes, you can use any type of ribbon for this project. However, it’s better to choose ribbons that are durable and hold their shape well. Satin or grosgrain ribbons are good choices. Avoid using delicate or sheer ribbons as they can easily tear or get tangled.
Q2. Do I Have to Use a Glue Gun?
A2. No, you don’t have to use a glue gun if you’re not comfortable with it. You can use fabric or craft glue instead. Just make sure to give the glue enough time to dry before hanging your basket.
Q3. Can I Add Other Embellishments Besides Ribbons?
A3. Absolutely! You can add any type of embellishment you like, such as beads, flowers, charms, or even feathers. Just make sure not to overcrowd your basket with too many decorations and keep the ribbons as the focal point. Have fun and get creative with it!
Q4. How Do I Clean My Decorated Basket?
A4. If your basket gets dirty, you can spot-clean it with a damp cloth and mild soap. Avoid submerging the basket in water or using harsh cleaning products as they can damage the ribbons and decorations. Always handle your decorated basket with care to maintain its beauty and durability.

Conclusion
Crafting a beautiful basket with ribbon is an easy and fun project to try. If you’ve never done it before, now is the time! With just a few simple steps on how to decorate a basket with ribbon and some craft supplies, you can spruce up any basket and add a touch of texture and sparkle. Depending on your style, you can choose from many materials and patterns to get the perfect look. You can also personalize your basket by either creating a patterned design or weaving different colored ribbons together.
As always, be creative and have fun experimenting with different designs and color combinations to create something truly unique that expresses your personality! Don’t forget to use hot glue or a glue gun for extra security as it will make sure the ribbons stay in place. Now that you’ve seen how easy it is to decorate a basket with ribbon, don’t be afraid to give it a try today!