
Are you looking for a way to finish off the edges of your latest project? If so, then polystyrene trim is just what you need! Polystyrene trim is great for giving any surface a neat and professional-looking finish – but how exactly do you go about cutting it correctly?

We’ll be taking an in-depth look into this today. In this blog post, we’ll cover everything you need to know about how to cut polystyrene trim safely and accurately with minimal mess.
From choosing the right tools and supplies at the outset through to cleaning up afterward, we’ve got all of your questions covered! So if you’re ready to get started on creating that perfect edge or corner detail, then let’s get started now!
Why Do You Need to Cut Polystyrene Trim?
1. Home Improvement
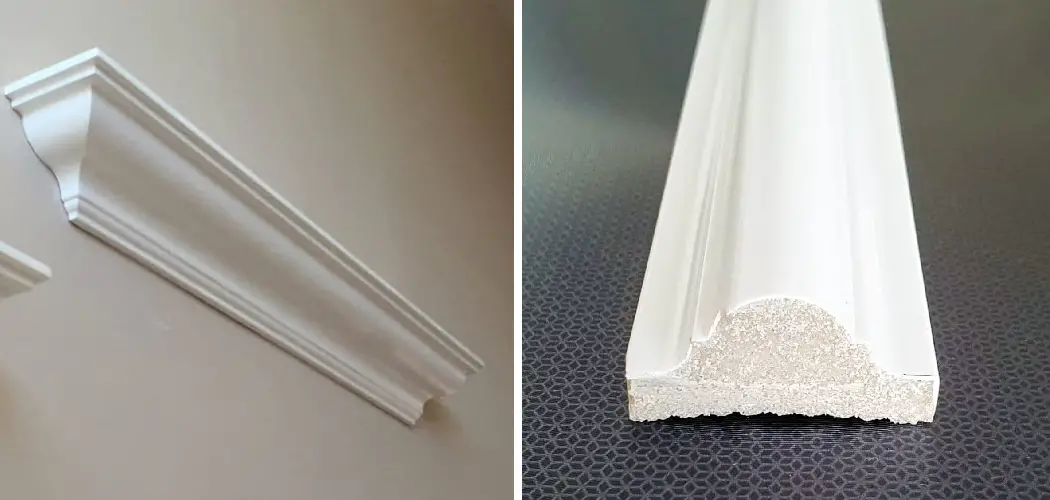
Polystyrene trim is an ideal material for a variety of home improvement and construction projects. It offers a neat, professional-looking finish to any surface or corner detail that you’re working on – whether it’s in the bathroom, kitchen, living room, etc. It’s also great for adding a stylish edge to a variety of different fixtures and fittings, such as cupboards, shelves, counters, and more.
2. Art and Crafts Projects
Polystyrene trim is not just great for home improvement projects; it can also be used in a variety of arts and crafts projects too! It’s perfect for adding a decorative edge to any project and can also be used to create unique 3-dimensional shapes and models. So if you’re looking for a way of giving your latest masterpiece that professional, finished look, then polystyrene trim is the perfect choice!
Required Items
Before you can start cutting your polystyrene trim, there are a few items that you’ll need to have on hand. These are:
- Polystyrene trim
- A sharp utility knife
- A straight edge (such as a ruler or metal square)
- Safety glasses
- A dust mask
- A damp cloth (for cleaning up any mess afterward)
10 Steps on How to Cut Polystyrene Trim
Step 1: Gather Supplies
Make sure that you have all of the required items listed above. Gathering all the necessary items before you start will ensure that you have everything you need for the job.

Step 2: Measure and Mark the Cut Line
Using your straight edge, measure and mark out the area where you want to make the cut. Make sure that all of your measurements are accurate so that you end up with a precise and professional-looking finish.
Step 3: Put On Your Safety Gear
Safety should always be your top priority when working with power tools and materials like polystyrene trim. Put on your safety glasses, dust mask, and any other protective clothing that you feel is necessary before starting any cutting work.
Step 4: Score the Cut Line
Using your utility knife, carefully score the cut line along your marked area. Make sure that you keep your knife steady and move it in one continuous motion for a precise finish.
Step 5: Turn the Polystyrene Trim Over
Once you’ve scored the cut line, turn the polystyrene trim over so that the scored side is facing down. This will help to reduce any tearing or fraying of the edges, resulting in a more professional-looking finish.
Step 6: Start Cutting
Using your utility knife, start cutting along the scored line. Keep your knife steady and move it slowly for an accurate cut. Take care not to apply too much pressure as this can cause the blade to slip.

Step 7: Cut All the Way Through
Continue cutting until you have cut all the way through your polystyrene trim. Make sure that the blade is still moving in one continuous motion and not slipping or wobbling, as this can cause inaccuracies in your finished piece.
Step 8: Remove Excess Trim
Once you’ve cut all the way through, take your straight edge and run it along the side of the polystyrene trim to clean up any excess or jagged edges. This will give you a more professional-looking finish.
Step 9: Clean Up
Using your damp cloth, wipe away any debris or dust that may have accumulated during the cutting process. This will help to keep your work area clean and tidy.
Step 10: Admire Your Handiwork
Once you’ve completed all of the steps above, sit back and admire your handiwork! You now have a neat and professional-looking piece of polystyrene trim that you can use for whatever project you have in mind.
Following these 10 simple steps is the best way to ensure that you get a precise, neat and professional-looking finish when cutting polystyrene trim. Remember, safety should always be your top priority – so make sure that you wear the appropriate safety gear at all times!
8 Safety Measures to Follow when Cutting Polystyrene Trim
Whether you’re working on a renovation project or building something from scratch, cutting polystyrene trim is often necessary. However, it can be dangerous to do so without the right safety precautions in place. To ensure your safety and success with this task, here are eight essential safety measures to follow when cutting polystyrene trim:

- Read and understand all instructions before you begin the cutting process. This is important because different types of trim may have different safety procedures that you should follow.
- Wear protective gear at all times, including safety glasses, gloves, and a face mask to protect against dust particles. Also, look for long-sleeved clothing that will not get caught on the trim.
- Make sure to take all necessary safety precautions with your cutting tool. For example, make sure blades are sharp and properly maintained, and use appropriate power cords or batteries for cordless tools.
- Clear the area of all materials and objects that could get in the way or be damaged by your cutting tool. This includes furniture, clothing, rugs, and other items that may be in close proximity.
- Cut polystyrene trim on a flat surface to ensure stability while you’re making cuts. Consider using saw horses to help elevate the trim and make it easier to cut.
- If you plan on using a power saw, ensure that it is properly connected to a dust collection system. This will help minimize the amount of dust created during the cutting process.
- Apply steady pressure while making cuts with your saw or other tool. Avoid pushing too hard, as this could lead to inaccurate cuts and other issues.
- Wear hearing protection when using power tools, as the noise associated with their use can lead to long-term hearing damage.
Following these safety measures will help ensure that you are able to safely and accurately cut polystyrene trim for your project. Just remember to read all instructions thoroughly and take proper precautions when working with any type of cutting tool.
Frequently Asked Questions
How Long Will It Take?
It depends on the size and complexity of your project. Generally speaking, cutting polystyrene trim with a power saw should take no more than an hour or two, depending on how experienced you are with this type of task.
What Type of Power Saw Should I Use?
The type of power saw you use will depend on the size and shape of the trim you are cutting. For small projects, a jigsaw or reciprocating saw should suffice. If you’re working on a larger project, then a circular saw may be more appropriate.

Is It Difficult to Cut Polystyrene Trim?
Not necessarily. While it can take some time to get used to cutting polystyrene trim, it’s not an overly difficult task. Just remember to take your time and follow the proper safety procedures. With some practice, you should be able to master this skill quickly.
What Are Some Common Mistakes People Make When Cutting Polystyrene Trim?
The most common mistakes people make when cutting polystyrene trim include pushing too hard, not using proper safety equipment, and not reading the instructions before beginning. Avoid these mistakes by taking your time and following the proper safety measures. With some practice, you should be able to safely and accurately cut polystyrene trim for any project.
Conclusion
Cutting polystyrene trim can be a challenging but rewarding experience. Whether you decide to use a saw, hot wire, or some other form of cutting tool, following the proper safety protocol and taking the necessary precautions is key for successful results.
Consulting with an experienced contractor before tackling the job on your own is recommended, as professional insight and advice will be invaluable throughout the process.
Once you have the right tools and equipment in hand, it’s time to enjoy watching your project come to life. Carefully measure out your polystyrene trim pieces and take your time while cutting each piece exactly to size.
Your hard work and dedication will be worth it when you have expertly crafted pieces that display a perfect fit around any area of your building or home’s exterior trim. Following the tips and advice on how to cut polystyrene trim in this guide can help you to safely and accurately cut polystyrene trim for any project.