
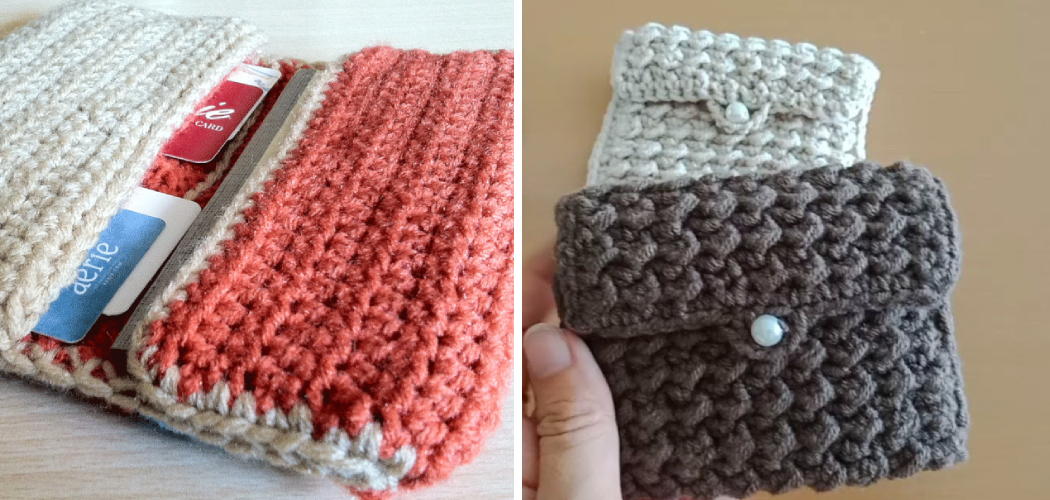
Are you looking for a unique and creative way to store cash, coins or cards? Are you interested in creating something that will last through the years? If so, learning how to crochet a wallet may be just what you’re looking for! This blog post will discuss the supplies needed, give step-by-step instructions on how to create your own functional piece of art and provide helpful tips for crocheting wallets.
With just a few simple materials and some patience on how to crochet wallet, anyone can learn how to make their own stylish and durable handmade wallet. So grab those hooks and let’s get started on this fantastic adventure into crafting this one-of-a-kind accessory.

Why Do You Need to Crochet a Wallet?
There are many benefits to crocheting a wallet. Not only will you have a stylish and unique way to store your cards and cash, but it will also make an excellent gift for someone special in your life. Crocheting wallets is also an excellent way to exercise creativity and craftsmanship.
It’s fun to work with various colors and patterns while creating something that you can be proud to show off. It’s a great way to practice patience and perfect your crochet techniques as well.
Needed Materials
Given below are the materials you will need to make your wallet:
- Crochet Hooks (Size G/6, 4.25mm)
- Yarn of Your Choice
- A Stitch Marker or Safety Pin
- Tapestry Needle for Weaving in Ends
- Buttons (Optional)
- Interfacing Fabric (Optional)

8 Step-by-step Guidelines on How to Crochet Wallet
Step 1: Create a Chain Stitch
Create a chain stitch of the length you desire for your wallet. Make sure to leave some extra space, as this will eventually become the flap of your wallet. Otherwise, you can make it as long or short as you wish. But, remember that your wallet will be only as wide as the chain stitch.
If you are aiming for a wider wallet, make the chain stitch longer. It’s best to use a yarn that is strong and durable, such as cotton or acrylic.
Step 2: Work the Stitches Into The Chain
Begin single crochet stitches into your chain and continue until you reach the end of your chain. If you want to create a pattern or texture, then this is where you can do it! Otherwise, just keep on going until all the stitches are complete. This will be the body of your wallet.
If you are using multiple colors, change the yarn as desired. But, make sure to securely fasten off your ends. This will prevent the unraveling of your wallet.
Step 3: Work Backwards
Now that you have crocheted one side of your wallet, it’s time to work on the other. You will need to turn your work around and start working back in the opposite direction. Before starting, however, make sure you count and remember how many rows you worked on the first side.
This will help ensure that your sides are equal in size when finished. But, don’t be afraid to try something different! It’s your wallet, after all. This is your chance to get creative.
Step 4: Put It All Together
Once you have completed both sides of the wallet, it’s time to put everything together. First, take a stitch marker or safety pin and insert it through the two edges of your work (make sure they match up evenly). Then, begin single crochet stitches through both layers to connect them together.

This will help keep your wallet together and provide additional strength. This is also a great opportunity to add some extra stitch patterns or textures if desired.
Step 5: Adding a Lining (Optional)
If you wish to add an extra layer of protection to your wallet, you can do so by adding a lining. This is done by measuring out the size of your wallet and cutting a piece of interfacing fabric to match it. Then, sew the lining and wallet together using a tapestry needle and yarn.
It’s best to use a yarn that matches the color of your wallet. This will help keep dirt and moisture out and add an extra layer of protection and durability. You can even use the lining to add pockets or credit card slots.
Step 6: Add Finishing Touches
Now that your wallet is complete, you can add some extra touches such as buttons or decorations of your choice. You can also use this time to weave in any loose ends if needed. This is also a great time to try out some different stitch patterns or textures.
Have fun and be creative! It’s your wallet – make it unique and one-of-a-kind! But, make sure to leave enough space for the flap of your wallet. It’s best to leave a couple of inches for this part. It will be added in the next step.
Step 7: Finishing Up
The final step is to block your work and give it a professional-looking finish. Blocking can be done by dampening the wallet with water, pinning it in place on an ironing board or other flat surface, and leaving it to dry overnight. This will help give your wallet a nice and even appearance.
Once it is dry, you can add any buttons or decorations of your choice. It’s now ready to use and show off! It’s a great conversation starter, too! But, the best part of all is that it’s completely handmade and one-of-a-kind.
Step 8: Congratulations! You Did It!
Congratulations on completing the project and learning how to crochet a wallet. Now, enjoy your new handmade creation and show it off with pride! Always remember that you are capable of accomplishing anything. The sky is the limit when it comes to your creativity and talent. So keep on crafting and never stop learning! This is the key to success in any craft.

Following these steps on how to crochet wallet, you should now have a completed wallet that can be used and admired for years to come. With some patience and hard work, learning how to crochet a wallet is an enjoyable and rewarding experience. So what are you waiting for? Grab your materials and get started on this fantastic adventure into crafting!
Do You Need to Use Professionals?
If you are still struggling with how to crochet a wallet, you can always take a class or reach out to professional crafters for help. These experts will be able to provide guidance and advice on your project and ensure that everything is done properly. There may even be classes available in your local area that teach the basics of crochet. So if you don’t feel confident in your skills yet, don’t be afraid to seek out help.
And once you’ve finished making your crochet wallet, why not challenge yourself even further by trying different stitch patterns or learning how to make other items? With a little creativity and dedication, the possibilities are endless! So what are you waiting for? Get started on your next crochet project today!
How Much Will It Cost?
Every project has its own cost depending on the materials you choose and how much time goes into it. Generally, basic materials like yarn and a crochet hook can be purchased for relatively cheap prices in most craft stores. Other supplies such as buttons or fabric may need to be bought separately, but this should add very little additional cost.
The main cost of your wallet project is likely to be your time. But, don’t forget the satisfaction of creating something with your own hands! There’s something special about knowing that you made it all by yourself and there’s no price tag on that. So go ahead and enjoy the process – it’ll be worth it in the end!
Helpful Tips for Crocheting Wallets
- Make Sure to Choose a Yarn That is Strong and Durable Enough to Withstand Everyday Use.
- If You Are Adding a Lining, Be Sure to Choose One That is Lightweight and Won’t Add Too Much Bulk.
- If Using Buttons, Make Sure They Are Securely Attached Before Putting the Wallet Into Use.
- Block Your Work Once Complete to Give It a Professional and Finished Look.
- Have Fun With the Design of Your Wallet! There Are Endless Possibilities When It Comes to Colors, Textures and Patterns.

With just a few simple materials and the guidance provided by this blog post, anyone can learn how to crochet a wallet. Whether you are looking for something functional or decorative, crocheting wallets is an easy way to create something unique that will last through the years. So don’t wait any longer and get crafting!
Frequently Asked Questions
Q: What Type of Yarn Should I Use for Crocheting a Wallet?
A: It’s best to use a strong and durable yarn that will withstand everyday wear and tear. This could mean choosing an acrylic blend, wool or even cotton if you are looking for something less durable.
Q: Can I Add Pockets or Credit Card Slots to My Crocheted Wallet?
A: Yes, you can add pockets or credit card slots by using a lining. This is done by measuring out the size of your wallet and cutting a piece of interfacing fabric to match it. Then, sew the lining and wallet together using a sewing machine or by hand.
Q: What Is the Best Way to Secure Buttons on My Wallet?
A: When attaching buttons, it’s best to use a needle and thread for added security. This will help ensure that they stay attached even after frequent use. You can also use hot glue as an alternative but be sure to let it cool completely before putting the wallet into use.
Q: How Do I Block My Crocheted Wallet?
A: Blocking your work is done by dampening the wallet with water, pinning it in place on an ironing board or other flat surface and then leaving it to dry overnight. This will help give your wallet a nice and even appearance. Once it is dry, you can add any buttons or decorations of your choice before putting them into use.

Conclusion
Creating a crochet wallet takes patience and dedication to detail. By following the simple steps listed in this post and utilizing the necessary materials, you’ll wind up with a handmade accessory that will bring you enjoyment. It’s time to get creative with the colors and stitches to make something unique!
Don’t be afraid to try something new – give it a whirl! As soon as your piece is completed you will feel a sense of accomplishment with your craftsmanship. In conclusion, if you are interested in learning how to crochet your own wallet, don’t hesitate any longer.
Investigate various patterns and follow the suggested instructions in this blog post on how to crochet wallet, and let yourself be inspired by what you can create. Show off your skills and enjoy all the compliments when others learn that it was made by you! So, come on – grab those yarns and let’s get started!