
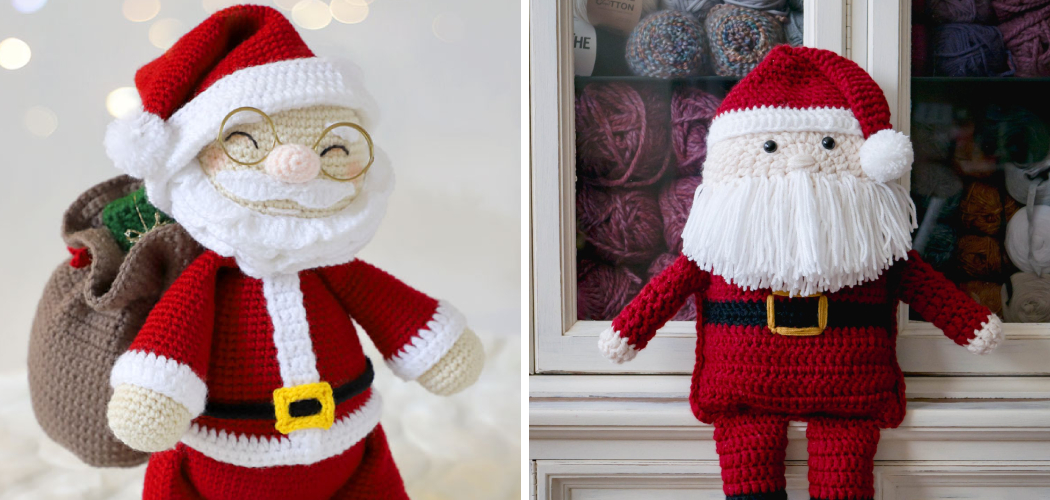
Do you have a passion for creating handmade holiday decorations? If so, now is the perfect time to learn to crochet Santa Claus!

Whether you’re a beginner or an experienced crafter, this project will bring hours of enjoyment as you create unique and delightful decorations for gifts and family gatherings. This step-by-step guide will walk you through the basics of crocheting a jolly ol’ Saint Nick that will look perfect atop any mantlepiece, tree, or package.
Crocheting Santa Claus is not only fun but also provides an ideal decorative item for the festive season. Whether it’s used on its own as a standalone figure or to decorate something else, such as an ornament or even a doily, this project can add that special touch of Christmas charm and festivity.
In this blog post, we will be showing you how to crochet santa claus!
What Will You Need?
- Yarn: Any type of worsted weight yarn in red, white, and skin tone will work great for this project. Christmas colors like green and gold can also be used if you want to add a little extra holiday cheer!
- Crochet Hook: A size G (4 mm) crochet hook is perfect for crocheting Santa Claus.
- Polyester Fiberfill: This will be used to provide stuffing and shape for Santa’s body.
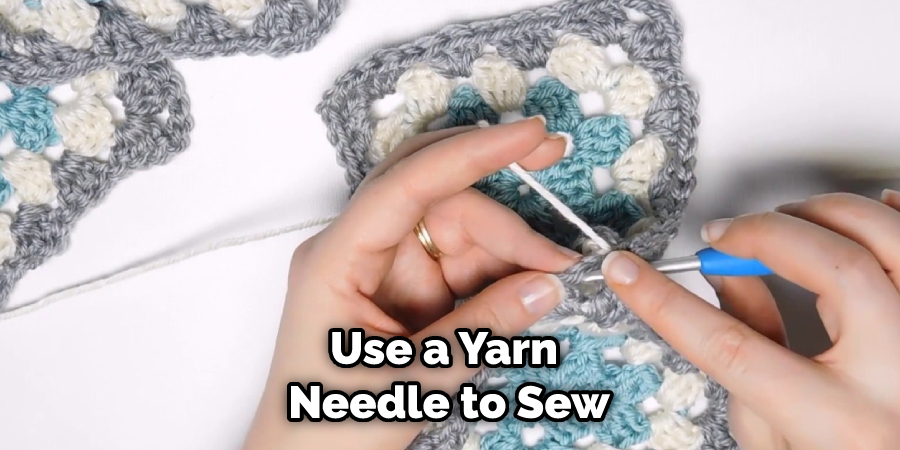
- Embroidery Needle: Use this to weave in the ends of your yarn when you’re all finished crocheting.
- Sewing Needle and Thread: This is optional, but it can be used to attach Santa’s beard or other decorations if desired.
- Safety Eyes: These are optional as well, but they can be a great way to give Santa an extra special look!
Now that you have all the necessary materials let’s get started on how to crochet santa claus!
10 Easy Steps on How to Crochet Santa Claus
Step 1. Crochet a Magic Ring:
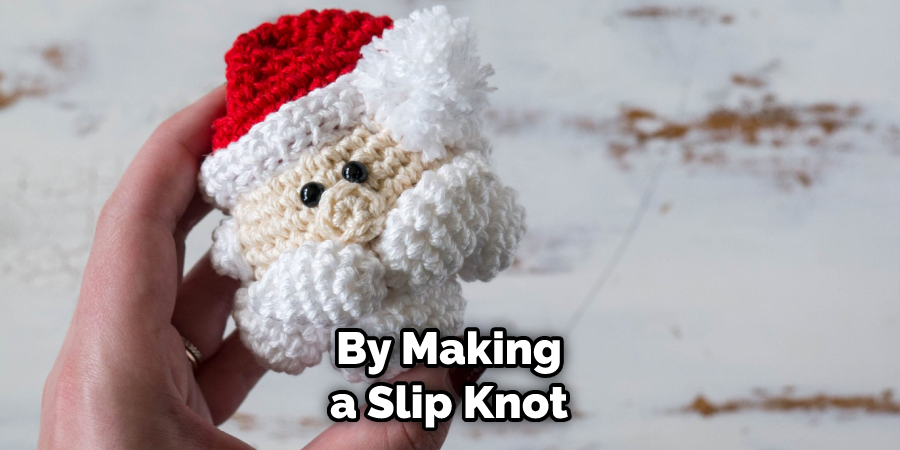
Begin this step by making a slip knot onto your crochet hook. Then, wrap the yarn around your fingers twice and make one single loop. Pull the end of the yarn through the loop to secure it, then use your crochet hook to pull the working end of the yarn back into it. You have now created a magic ring!
Step 2: Make 6 Single Crochet Stitches:
Make six single crochet stitches into your magic ring. Pull on the tail end of your yarn to close up any gaps in between each stitch. If you’re having trouble remembering how to do this, refer back to the beginning of this blog post for a refresher.
Step 3: Increase by Making Two Single Crochet Stitches:
Make two single crochet stitches into the same stitch. Then, move on to the next one and make two single crochet stitches there as well. This will increase your number of stitches from 6 to 8.
Step 4: Make One Single Crochet Stitch in Each Stitch Around:
Repeat this step until you have a total of 16 single crochet stitches. As you work around, be sure to pull on the tail end of your yarn slightly to close up any gaps between each stitch. Be careful not to pull it too tight, as this will cause the stitches to become uneven.
Step 5: Make One Half Double Crochet Stitch in Each Stitch Around:
This step will give Santa’s head a more rounded shape. To do this, make one half double crochet stitch in each stitch around for a total of 24 half double crochet stitches. Don’t forget to pull on the tail end of your yarn after each stitch!
Step 6. Add Santa’s Facial Features:
Use a yarn needle to sew on his eyes and nose, then attach an embroidery needle with white thread to make his mouth. You can add safety eyes or a mustache! You can use felt for these if desired.
Step 7. Try On Santa’s Hat:
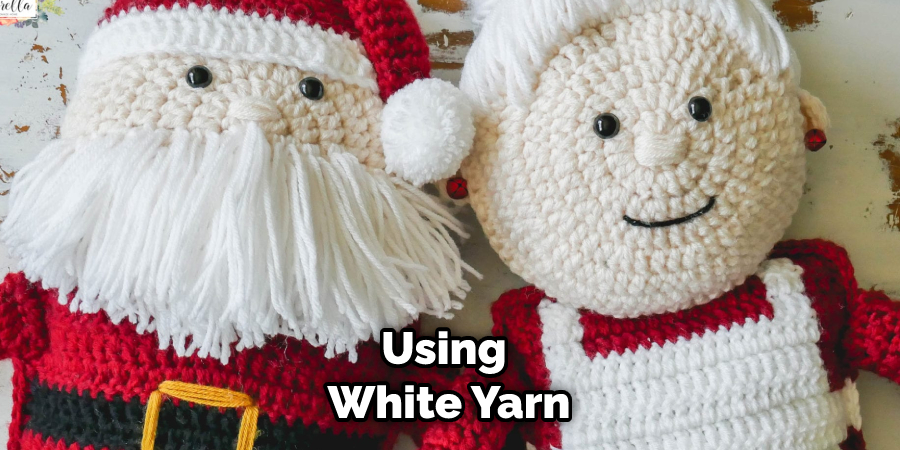
Thread your crochet hook with a length of white yarn and make single crochet stitches along the edge of the head. Work in continuous rounds until you’ve reached the desired circumference of Santa’s hat. Then, fasten off and weave in any loose ends.
Step 8: Make Santa’s Beard:
Using white yarn, make chain stitches around the edge of Santa’s face until it reaches his chest. Once done, slip stitch back to where you began and fasten off. If desired, you can use a sewing needle and thread to attach it to his face for a more secure hold.
Step 9: Stuff Santa Claus with Polyester Fiberfill:
Carefully stuff Santa’s body with the polyester fiberfill until it’s nice and firm. Don’t overstuff, as this will make it difficult to close up the remaining gaps. You should be able to feel how firm it is when squeezed.
Step 10: Close Up Remaining Gaps and Add Final Details:
Work in continuous rounds of single crochet stitches until all remaining gaps are closed. Fasten off and weave in any loose ends. You can add a few more details, like buttons or embroidery if desired!
And there you have it—a beautiful crocheted Santa Claus! With these easy steps, you now know how to crochet your santa claus just in time for Christmas! Enjoy creating your own special version of Santa this holiday season!
5 Additional Tips and Tricks
- For extra detailing, you can add a red pom-pom or bell to Santa’s hat. You can also use black beads for his eyes and white felt for his beard.
- To add a 3D effect to your Santa, feel free to use stuffing material like polyfill or cotton balls to make him look more lifelike.
- To help make sure you get the desired size of your Santa, use a ruler as a guide when crocheting the pieces of the body together.
- If using different colors for the pom-poms and other features, try wrapping some contrasting yarn around them for extra texture and detailing.
- When sewing on small details such as eyes and facial features, be careful not to pull too hard on the thread – this can cause damage to the crochet fabric.
By following the above tips and tricks, you can create a unique Santa Claus with your own personal style. So get creative and have fun crocheting this festive figure! Happy crafting!
5 Different Theme Ideas
- Classic Red and White Santa: To create a classic Santa-inspired look, choose some bright red yarn for the main body of your project. Add white accents to complete the traditional colors associated with St. Nick. Try crocheting Santa’s famous hat using both colors or make a festive striped scarf.
- Jolly Green and Red Santa: Not feeling traditional? Opt for a greener version of Santa with either all green or green and red yarn combinations! Make this look even more unique by adding colorful pom-poms to Santa’s hat or bells to embellish his coat.
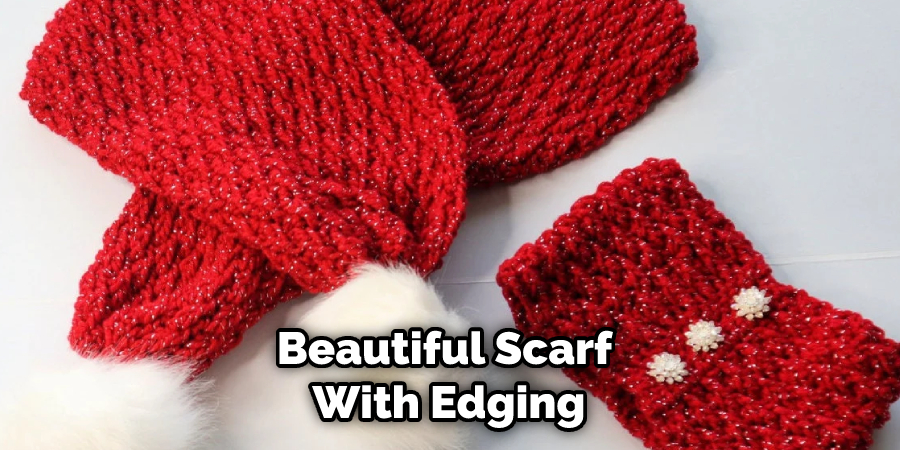
- Snowy White and Silver Santa: For those looking for something different, how about trying silver and white? This color combination is perfect for a wintery scene! Make a beautiful scarf with edging details in silver and white snowflakes. Finish the look off with some white fur around the edges of your project.
- Rainbow Santa: A fun way to create a unique Santa is to use lots of colors that blend together nicely in one piece. Try combining bright colors such as yellow, pink, purple, and blue to make a vibrant Santa. This look is perfect for adding extra cheer to any holiday celebration!
- Grinchy Santa: For those looking for something unconventional, how about making a grumpy-looking Santa? Choose green yarn as the main color and add in some dark red or black accents to complete the look. Make sure to give him a big frowning face with scrunchy eyebrows and grumpy eyes!
Creating your own crochet Santa Claus project can be fun and rewarding no matter what color scheme you choose. Don’t forget to have fun with it by adding details that make it your own, like different colored pom-poms or stripes! With these tips, you’ll be on your way to making your own special Santa Claus.
Conclusion
Creating your own Santa Claus doll with crochet can be fun and meaningful. This process not only allows you to create a beautiful toy that young children will thoroughly enjoy, but it also gives you a chance to explore the holiday.
This can be a fulfilling venture for everyone, from the person creating the handmade figure to those who receive it as a gift on Winter Solstice. Not only that but this craft is known to be fairly easy for beginners, so anyone eager and willing can use this tutorial as their starting point for crocheting projects.
Taking the time to craft something unique is a special way of showing love and affection to both family and friends as well as yourself. So try crocheting your own special version of Mr. Claus today!
Hopefully, the article on how to crochet santa claus has helped you gain insight into how to make your own festive figure. From choosing the right yarn and needles to adding unique detailing and accessories, now you have all the information you need to start this fun-filled project! Have fun making your own special Santa Claus today! Happy crafting!