
Crocheting is a great way to create beautiful one-of-a-kind items, from cozy blankets and scarves to detailed amigurumi figures. No matter what you’re making, an essential stitch used in many projects is ribbing. Today, we’ll discuss how to crochet ribbing in the round, which is perfect for creating thick cuffs on sleeves and sweaters or simply adding texture to your work. We’ll go through each step of this technique in detail so that anyone with any skill level can tackle this unique method!

If you want to add a little pizzazz and extra texture to your projects or garments, one great way to do this is by crocheting ribbing in the round. Creating ribbing used to seem intimidating with its combination of stitches and peculiar repetitive patterns, but once you understand how it’s done, it’s actually quite simple! As an added bonus, learning how to crochet ribbing can open up a wealth of project possibilities. In this blog post, we’ll take an in-depth look at everything that goes into crocheting ribbing in the round so that you can confidently tackle all sorts of design ideas!
Why May You Want to Crochet Ribbing in the Round?
There are many reasons why you may want to crochet ribbing in the round. Such as:
1. To Add Texture and Interest to Projects
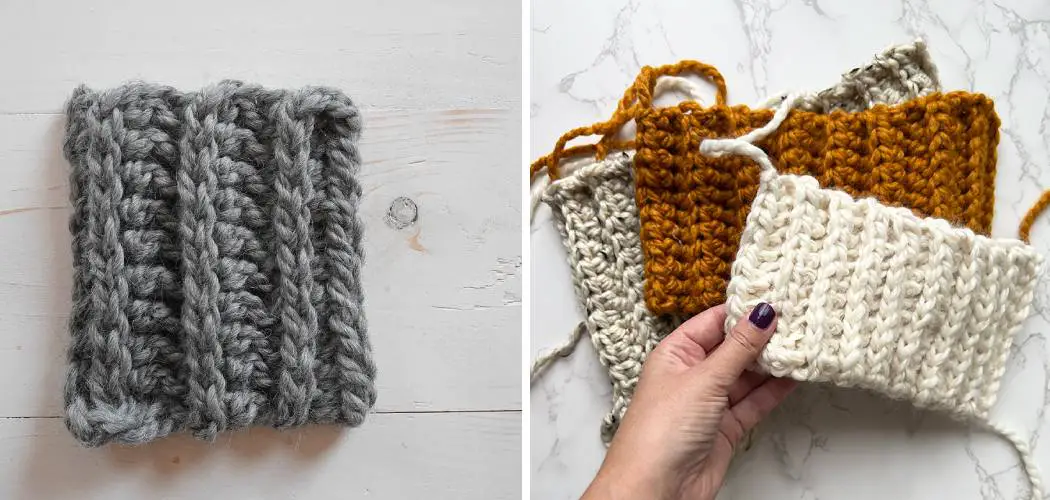
One of the most common reasons why people crochet ribbing in the round is to add texture and interest to projects. The pattern creates a textured look that adds dimension to any project, whether it’s a hat, scarf, sweater, or another item.
2. To Create Fitted Garments
Ribbing can also be used to create fitted garments as it stretches and holds its shape better than other patterns. As such, ribbing can be used to create fitted sweaters, sleeves, hats, and more. Also, when crocheting ribbing in the round, you can customize the size to fit any garment.
3. For Comfort and Durability
Lastly, ribbing is also used for its comfort and durability. The pattern creates a warm, snug feeling that makes it an ideal choice for winter wear such as hats and scarves. In addition, the pattern is highly durable and can last through multiple wears.
By understanding why you may want to crochet ribbing in the round, you can better decide if this stitch pattern is right for your project. From adding texture to creating fitted garments, ribbing has a variety of uses that can take your crocheting skills to the next level. As long as you follow the instructions, you’ll be able to create ribbed garments with ease.
How to Crochet Ribbing in the Round in 10 Easy Steps
Step 1: Start by Making a Slip Knot and Chain
The very first step is to make a slip knot at the end of your yarn and chain as many stitches as you need for your project. Also, be sure to make your chains slightly tighter than usual because you’ll need that tension when crocheting the ribbing in the round. It’s important to keep in mind the desired width of your ribbing when chaining. But don’t worry if your chains are not perfect; ribbing can easily stretch and fit. It’s always better to have slightly more chains than not enough. You can also use stitch markers to keep track of your chains.

Step 2: Join Into a Round
After making your chain, join two ends of the chain together by slip stitching into the first stitch. This will create a loop and complete a round. Also, you have to make sure that your tail is tucked inside the ring so that it won’t be visible from the outside. Although it may seem tricky at first, with practice, joining in the round will become second nature. You can also use a stitch marker to indicate the beginning of each round. But if you don’t have one, a simple piece of yarn or a paperclip can also do the trick.
Step 3: Crochet the First Round in Single Crochet Stitches
In this step, you will crochet a single round of all single crochet (sc) stitches. When crocheting, insert your hook into the next chain stitch, and crochet one single crochet stitch into each chain until you reach the end. You should have the same number of single crochet stitches as your initial chain. This first round will serve as a foundation for the ribbing. If you prefer, you can also start with a magic circle instead of a chain for a seamless look. The choice is yours!
Step 4: Crochet the Second Round in Half Double Crochet Stitches
For this step, you will need to do a half-double crochet (hdc) around the whole round. To do this, insert your hook into the next stitch, and crochet one half double crochet stitch into each single crochet until you reach the end of the round. This round will be the basis for creating the ribbed pattern. The half-double crochet stitch will create a slightly larger and looser stitch than the single crochet, which is necessary for the ribbing to form properly. You should also have the same number of half-double crochet stitches as your original chain.
Step 5: Crochet the Third Round in Double Crochet Stitches
To complete your ribbing, you will need to do a double crochet (dc) around the whole round again. To do this, insert your hook into the next stitch and crochet one double crochet stitch into each half-double until you reach the end of the round. The double crochet stitch will create a slightly larger and looser stitch than the half-double crochet, which is necessary for the ribbing to form properly.
You should have the same number of double crochet stitches as your original chain. You can also repeat this round to make your ribbing taller or add another stitch pattern for a more complex design.
Step 6: Tie Off
Once you have completed your third round of ribbing stitches, it’s time to tie off. To do this, cut your yarn and pull through the last loop on the hook. You have to be careful not to pull too tight or your ribbing won’t look right. Instead, leave a little bit of slack and gently pull to secure the yarn. You should now have a complete round of ribbing stitches.
But don’t worry if your ribbing looks a bit wavy at this point; it will flatten out once you move on to the next round. It’s important to remember that the first round of ribbing is always a bit looser and will tighten up as you continue adding rounds.
Step 7: Weave in the Ends
The last step is to weave in your ends. To do this, use a yarn needle and thread it through the middle of each stitch until you reach the end. This will help secure your ribbing and make sure that it won’t unravel. After weaving in your ends, you can cut off any excess yarn. It’s important to weave in your ends as you go, rather than waiting until the end, to avoid a tangled mess of loose yarn. You can also use this technique for any other project that requires starting with a round of single crochet stitches before moving on to another stitch pattern.

Step 8: Make Adjustments If Needed
If you want to make adjustments to the size of your ribbing, simply add or subtract rounds of single crochet stitches. For larger projects such as sweaters, you may need a few extra rounds of ribbing to get the desired length and width. Experiment and make adjustments as needed to get the perfect fit. Remember, crocheting is all about creativity and personalization. It’s important to find what works best for you and your project.
Step 9: Practice Makes Perfect
Like any new technique, crocheting ribbing in the round may take a few tries to get it just right. Don’t be discouraged if your first attempt doesn’t turn out exactly as you wanted. Keep practicing and soon enough, you’ll have mastered this unique stitch pattern. You can also try different yarns and hook sizes to see how they affect the look of your ribbing. The possibilities are endless and with practice, you’ll be able to create beautiful ribbed pieces for any project.
Step 10: Get Creative with Your Projects
Now that you’ve learned how to crochet ribbing in the round, it’s time to get creative with your projects! You can try using different yarn colors, playing around with stitch combinations, or even adding buttons or other embellishments to your ribbed pieces. The possibilities are endless and with this skill in your repertoire, you can take your crocheting to new heights.
With these 10 easy steps, you now have the knowledge and skills to confidently crochet ribbing in the round. Whether you’re looking to add texture to your designs, create fitted garments, or simply learn a new technique, crocheting ribbing in the round is a valuable skill for any crocheter. So grab your yarn and hook, and get ready to tackle all sorts of design ideas with this versatile stitch pattern! Happy crocheting!
Do You Need to Use Professionals?
The answer to this question depends on your specific project and your level of skill and experience in crocheting. If you are new to crocheting or have never tried ribbing in the round before, it may be beneficial to seek guidance from a professional or experienced crocheter. They can provide helpful tips and techniques to make the process easier and help you avoid common mistakes. However, if you are confident in your abilities and have experience with crocheting in the round, then you may not need to use a professional for this particular technique.
Ultimately, the decision is up to you and what will work best for your project. Remember, practice makes perfect, so don’t be afraid to try it out on your own first before seeking outside help. So go ahead and give it a try, and you may just surprise yourself with the amazing ribbed creations you can create!
How Much Yarn Do You Need for Ribbing?
The amount of yarn needed for ribbing will vary depending on the size of your project and the desired height and width of your ribbing. As a general rule, you can estimate that you will need approximately the same amount of yarn as you would for a single crochet round in the same stitch count.
To be safe, it’s always a good idea to have extra yarn on hand, as it’s better to have too much than not enough. If you’re unsure of how much yarn you will need for your specific project, consult the pattern or a professional for guidance. With some trial and error, you’ll soon get a feel for how much yarn is needed for different sizes and designs of ribbing.
Some Extra Tips for Crochet Ribbing in the Round
1. Use the Same Number of Stitches
This is very important when crocheting ribbing in the round. Make sure to use the same number of stitches throughout your project so that it looks even and neat. Also, make sure to count your stitches every few rounds to ensure accuracy.
2. Use a Tailored Hook
Using the right-sized crochet hook is essential when crocheting ribbing in the round. If you use a hook that is too large, the resulting ribbing will be loose and can stretch out over time. On the other hand, if you use a hook that is too small, the ribbing might be too tight and difficult to work with.

3. Work in Even Rounds
When crocheting ribbing in the round, it is important to work even rounds throughout your project. This means that each stitch should be of equal size. This will help to ensure that your ribbing looks neat and uniform.
4. Use a Stitch Marker
To keep track of rounds, it is helpful to use a stitch marker or other marker of your choice (e.g. safety pins). This helps you remember where each round begins and ends so that you can easily count your stitches and make sure they stay even.
5. Try Different Patterns
When crocheting ribbing in the round, you can try different patterns to add interest or texture to your project. Some common patterns include 1×1 rib stitch (K1, P1), 2×2 rib stitch (K2, P2), or any other pattern of your choice.
Frequently Asked Questions
What Precautions Should I Take When Crocheting Ribbing in the Round?
Crochet ribbing in the round is a relatively advanced technique, and it is important to be aware of certain precautions to ensure success. It is important to pay close attention to stitch counts, as an incorrect count can make the ribbing look uneven or distorted. Additionally, if using multiple colors, it is important to ensure that the color changes occur at regular intervals. Finally, when working with a pattern or set of instructions, follow them exactly to ensure success.
What Are Some Tips for Crocheting Ribbing in the Round?
Crocheting ribbing in the round can be a challenging technique if you are unfamiliar with it. To help ensure success, start by using a smaller hook size than normal. This will make the stitches tighter, making them easier to work into and keeping the ribbing more secure.
Additionally, keep track of your row numbers as you work, as this will help you maintain an even stitch count throughout the project. Finally, don’t be afraid to experiment! If you don’t like the way a particular ribbing looks, try using a different pattern or stitch type.
Can I Use Other Types of Yarn When Crocheting Ribbing in the Round?
Yes! The type of yarn chosen for crocheting ribbing in the round depends on the look and feel desired for the project. For example, using a thicker yarn will produce a more pronounced ribbing effect. Additionally, certain types of novelty yarn can be used to create unique effects. Experimenting with different types of yarn can lead to interesting and creative results!

Crocheting ribbing in the round can be a fun and rewarding experience. With patience, practice, and these tips and tricks, you’ll be crocheting beautiful ribbed projects in no time!
Conclusion
Now you know how to crochet ribbing in the round. It’s a simple and versatile technique that can be used to add interest to any project. With this guide, you should have all the information you need to get started crocheting ribbing in the round. Have fun!
Overall, the method of creating crochet ribbing in the round is simple and rewarding! From beginning to end, it’s a wonderful technique for adding a touch of texture and personality to your project. Whether you’re a beginner or an experienced crocheter, this type of ribbing adds uniqueness and dimension to any piece. Experiment with different sizes, types of yarn and even colors – the possibilities are endless.